Deploy to Android / iOS
This article outlines how to enroll a myViewBoard installation on devices running Android or iOS. If enrollment is successful, admins will be able to perform the following management tasks on the enrolled instances:
- Review activity data in the Software Instances page.
- Update settings remotely in the Software Instances page.
- Collect information for analytics in myViewBoard Insights.
- Add entity-based bookmarks in the Entity Management page.
Enroll via Manager
The myViewBoard app comes preinstalled when you buy most ViewSonic devices, especially IFPs. To enroll the pre-installed app to an entity, install the Manager app on your ViewSonic device.
About myViewBoard Manager
myViewBoard Manager is a tool for Entity Admins to remotely manage multiple installations of ViewSonic hardware. Installing the Manager APK on your device automatically enrolls the myViewBoard app installed on that device.
For instructions on how to install the Manager APK and add devices to Manager, refer to the articles below:
Enroll via Enrollment form
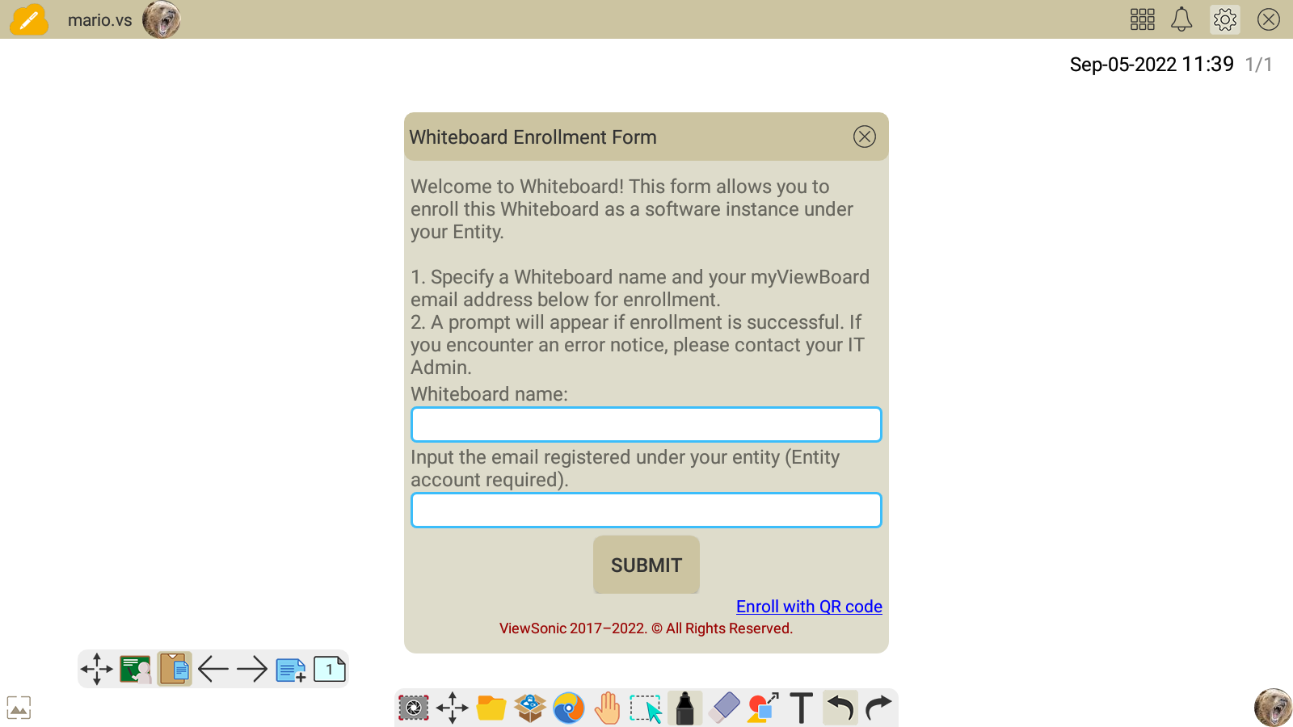
To use the enrollment form to enroll your myViewBoard installation on Android / iOS, follow the steps below.
- Launch myViewBoard app.
- Tap the icon to open the settings window.
- Tap the icon to access the software information tab.
- Tap the Enroll Software Instance link under Entity.
- On the next window, provide the following details:
- Entity organization email
- myViewBoard name
- Tap Submit.
- A prompt informs you of successful enrollment.
To verify if enrollment was successful, sign in into myviewboard.com and check that the Software Instance table now includes an instance that uses the myViewBoard name you provided during enrollment. For more details, see here:

Enroll via Companion app
For mobile devices running Android or iOS, you can also enroll your myViewBoard instance using the Companion app. For more information on downloading and installing the Companion app, see the article below:
Once installed, the Companion app has a QR code feature that allows you to associate an Android or iOS installation with your entity.
QR code
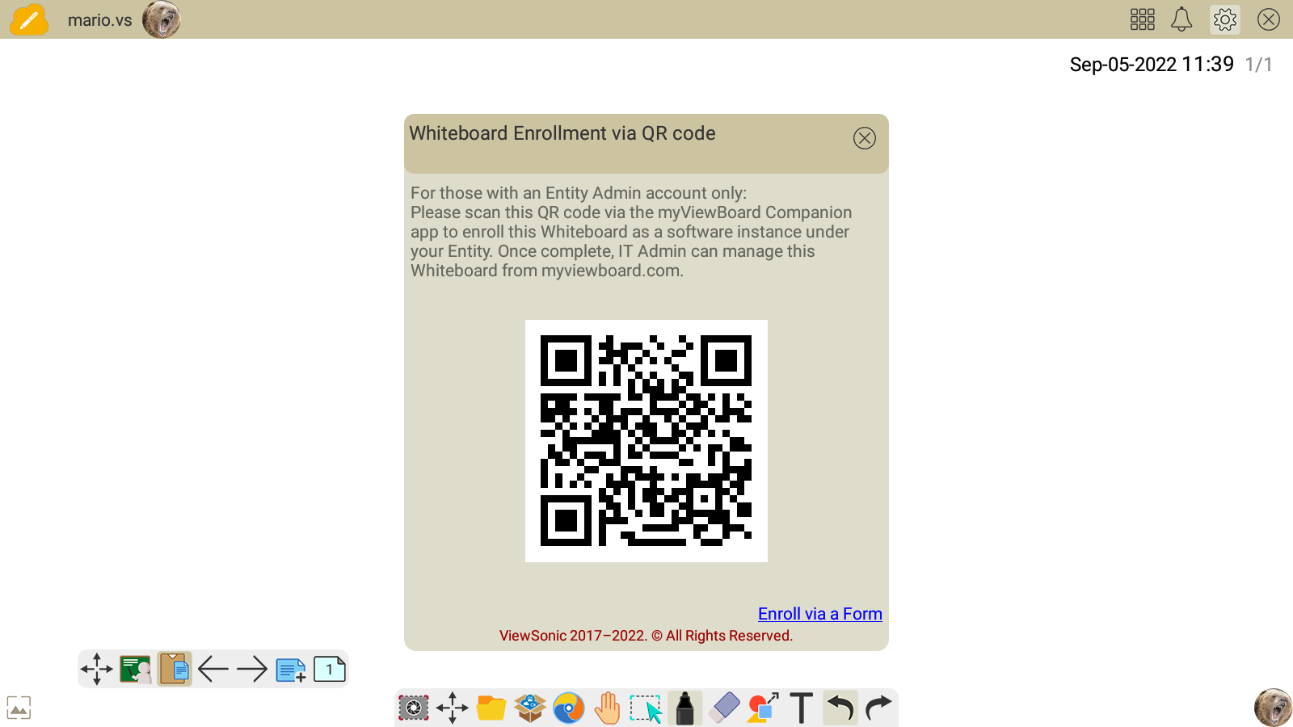
To use a QR code to trigger the enrollment process, follow the steps below. Use this method if the instance to enroll is not on the device that has the Companion app installed.
On the Android or iOS device with myViewBoard installed:
- Launch myViewBoard app.
- Tap the icon to open the settings window.
- Tap the icon to access the software information tab.
- Tap the Enroll Software Instance link under Entity.
- On the Enrollment Form, tap Enroll with QR Code.
myViewBoard displays the QR code for enrollment. - Now, head over to the device that has the Companion app installed.

On the mobile device with the Companion app:
- Sign in with your Entity admin account.
Ensure that you sign with the correct Entity account as the details of this account will be used in the enrollment process.
- Tap to scan the QR code.
- Provide the following details:
- Entity organization name
- myViewBoard name
- Click Submit.
- A prompt informs you of successful enrollment.
For a full visual walkthrough, see the video below:
To verify if enrollment was successful, sign in into myviewboard.com and check that the Software Instance table now includes an instance that uses the myViewBoard name you provided during enrollment. For more details, see here:
Activator APK
If the above methods are not applicable to your devices, you can request an entity-specific Activator APK from your local sales representative or from our support team that you can install onto your devices. The next time myViewBoard is launched on those devices, those instances will automatically be enrolled to your entity.
Verify successful enrollment
To verify if enrollment was successful:
- Sign in into myviewboard.com using your Entity admin account.
- Go to Entity Management.
- Go to Software Instances on the left menu.
- If successful, the instance that uses the myViewBoard name that you provided during enrollment should now be listed in the Software Instance table.
