IFP33 Pre-installed apps
Your ViewBoard comes pre-installed with several applications optimized to increase engagement in your classroom sessions. Note that while these apps can't be removed, you can use the settings menu to hide them.
 myViewBoard
myViewBoard is a fully featured digital whiteboarding app on your ViewBoard. myViewBoard offers whiteboarding tools like pens, erasers, shapes, math tools. Various interactive and multimedia tools are also available for all your lesson delivery needs.

 Manager
Manager is an automation tool that allows admins to manage one or more ViewSonic devices remotely from a web console. Pair your ViewBoard with a Manager instance to start sending commands to your ViewBoard. Assign a Manager Advanced license to access more commands, like broadcasting multimedia, scheduling automated jobs, and pre-configuring device profiles.
For more info about Manager, refer to the article below:

 Display
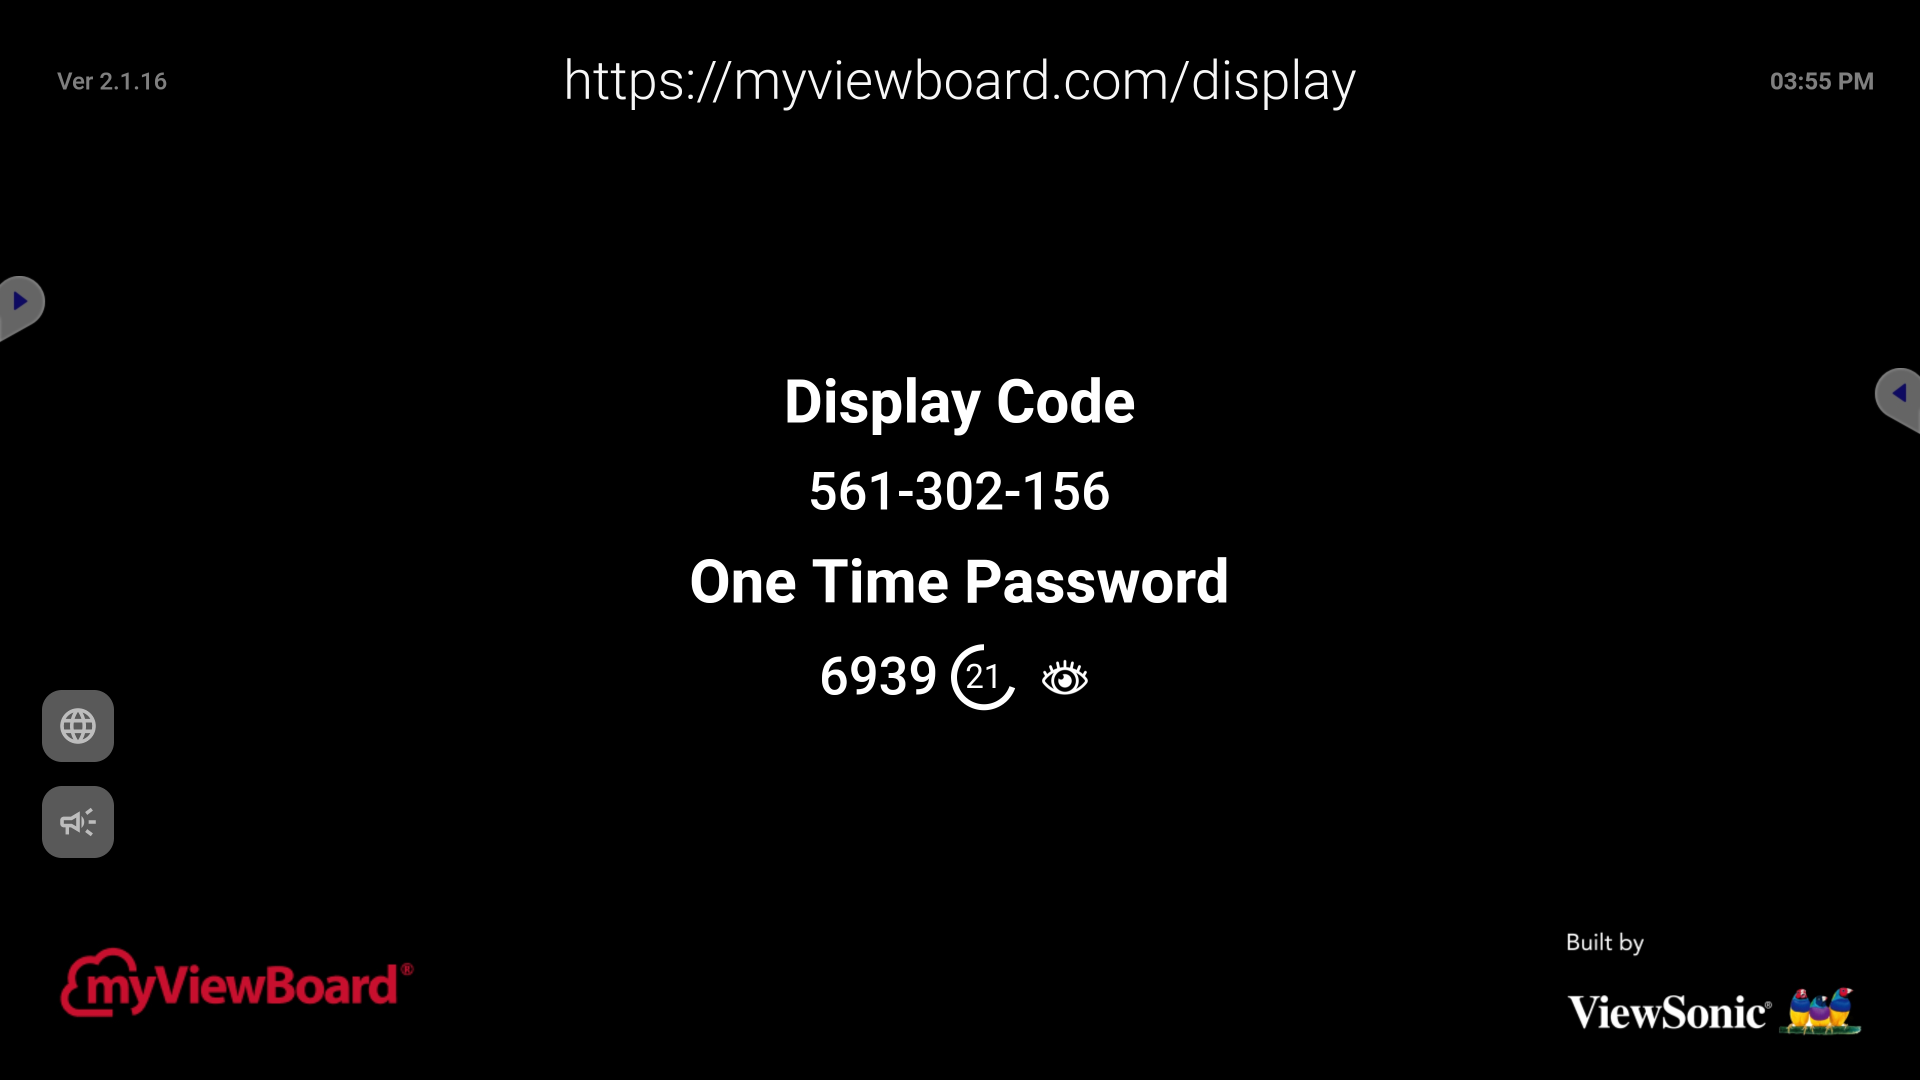
Cast the screen of a desktop device to your ViewBoard. myViewBoard Display only requires an internet connection and a browser on the casting device.
For more info about Display, refer to the article below:
 vCast
vCast
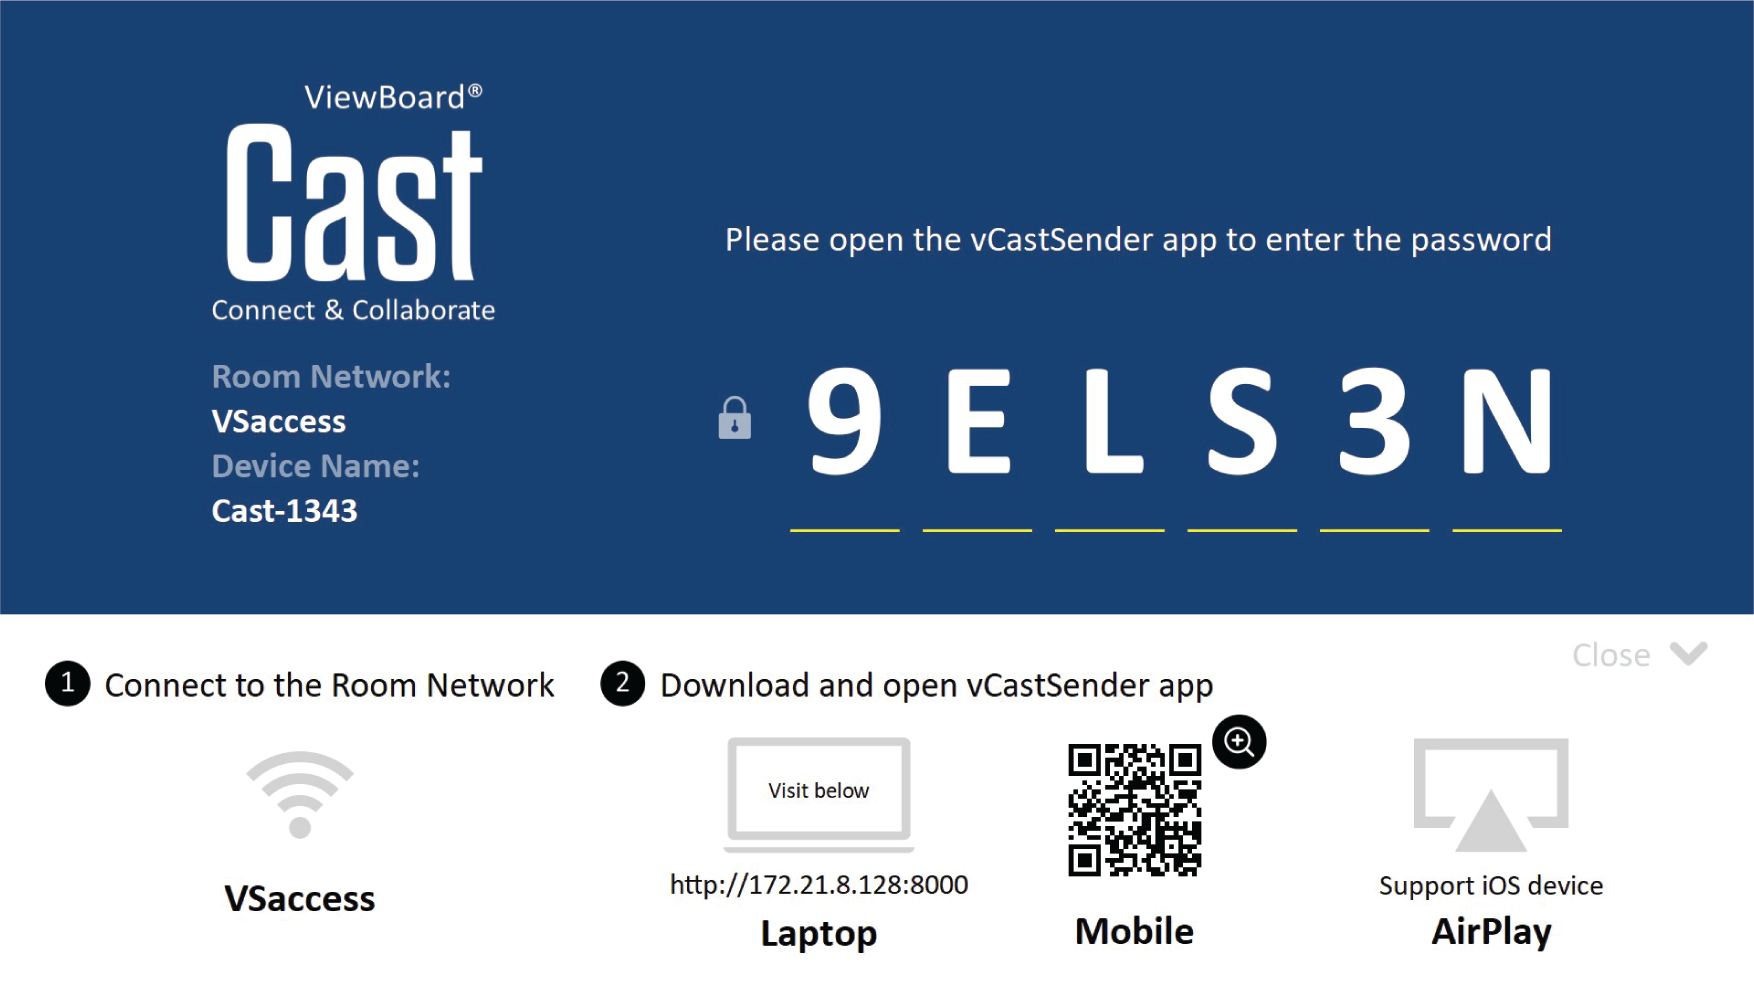
Another casting solution on your ViewBoard. Supports casting on both mobile and desktop devices, as long as all devices are on the same network. Simply follow the on-screen instructions in the app to start casting.
For more info about vCast, refer to the article below:
 myViewBoard Record
Start myViewBoard Record to record all on-screen activity. Afterwards, save the recording and share it with your class.
For more info about Record, refer to the article below:

 myViewBoard Live
Your ViewBoard also comes with myViewBoard Live for live streaming all on-screen activity to an audience.
For more info about Live, refer to the article below:

 vSweeper
Clears unnecessary data and unwanted files. Use the Advanced settings to customize options to suit your needs.

 ScreenLock
ScreenLock enforces a password requirement after the opening the app. Set a password in the app itself, or via the ViewBoard's settings page.
- Perform one of the following:
- Open the settings page: Settings > Protection > Password for screen lock
- Open the ScreenLock app in the apps list.
- Tap Set Password.
- Type a new four (4) digit password.
- Press OK.
- Afterwards, opening the ScreenLock app will now auto-lock the screen. Type your new password to unlock.


Chromium
myViewBoard comes with a standard web browser that allows you to navigate the web and visit your favorite educational websites. To save your most-visited websites as bookmarks, press the star button on the address bar.

OfficeSuite
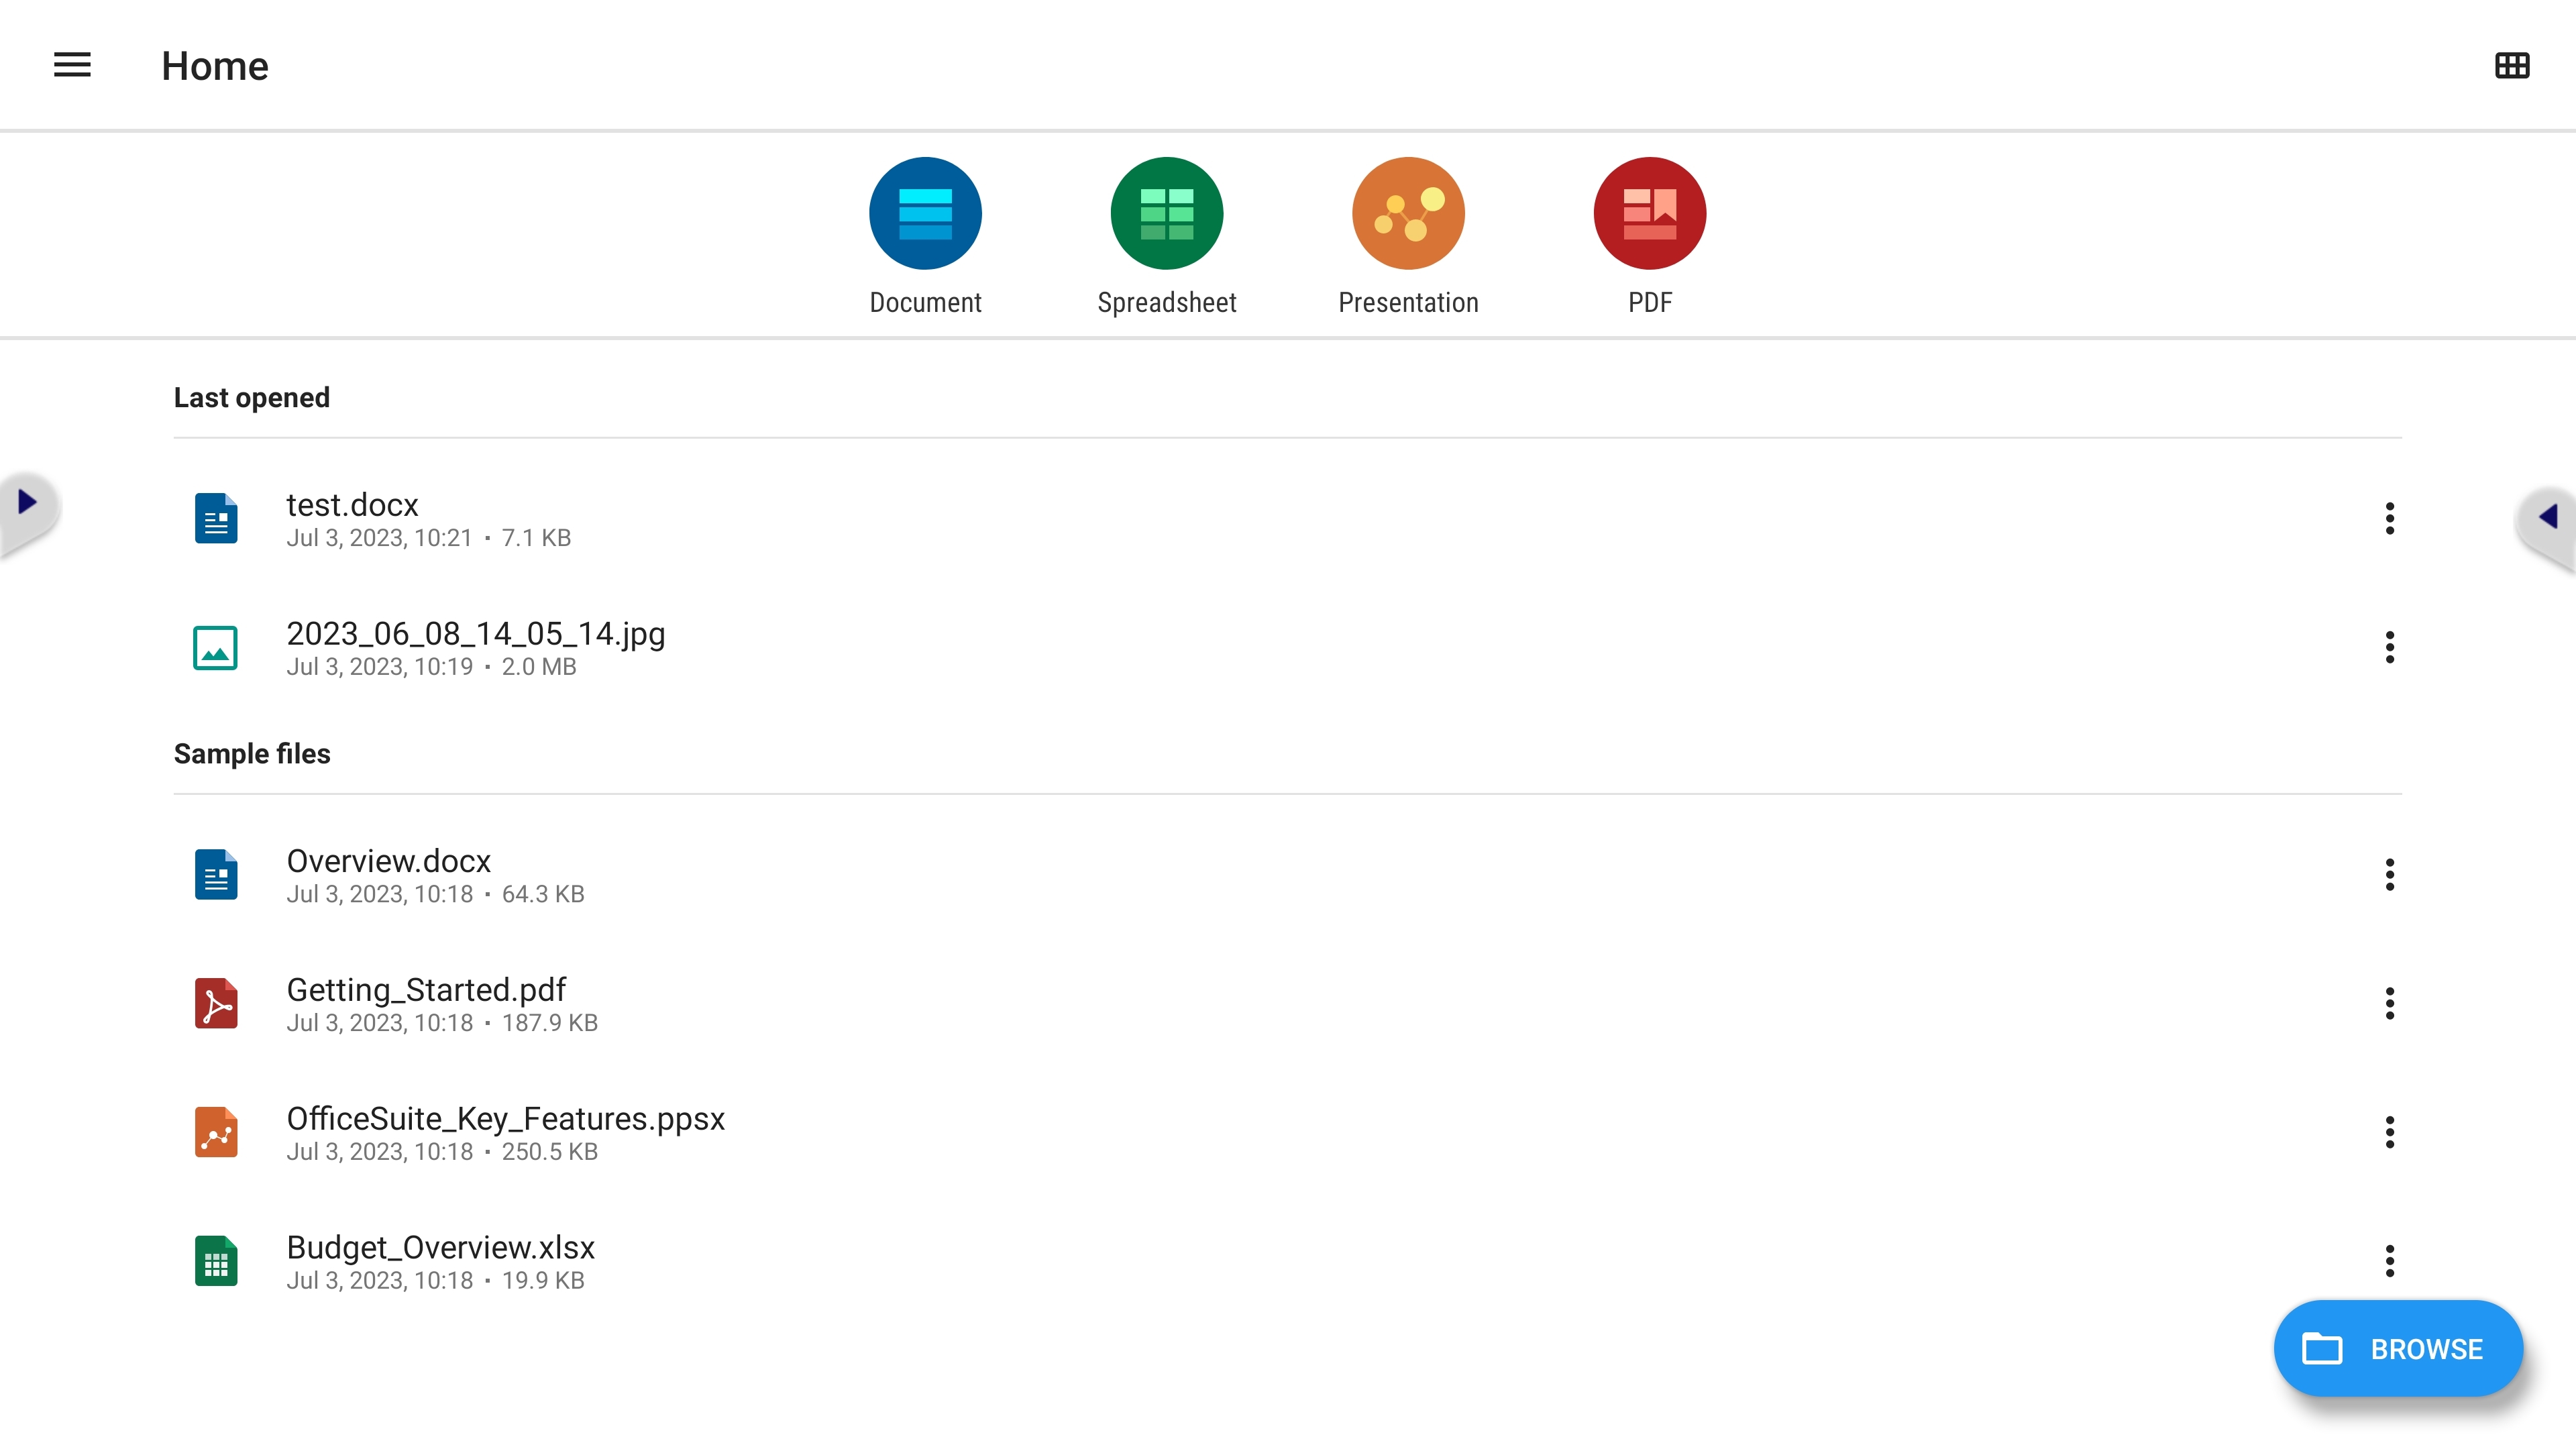
For teachers who need to view Microsoft Office and other file types, OfficeSuite provides a lightweight solution. OfficeSuite supports opening DOCX, XLSX, PPTX, PDF, and more file types. You can also use the app to create and save your own files, for later use.
 Folders
The Folders app provides a simple built-in method to easily navigate, locate, and organize files and folders with the ViewBoard device.
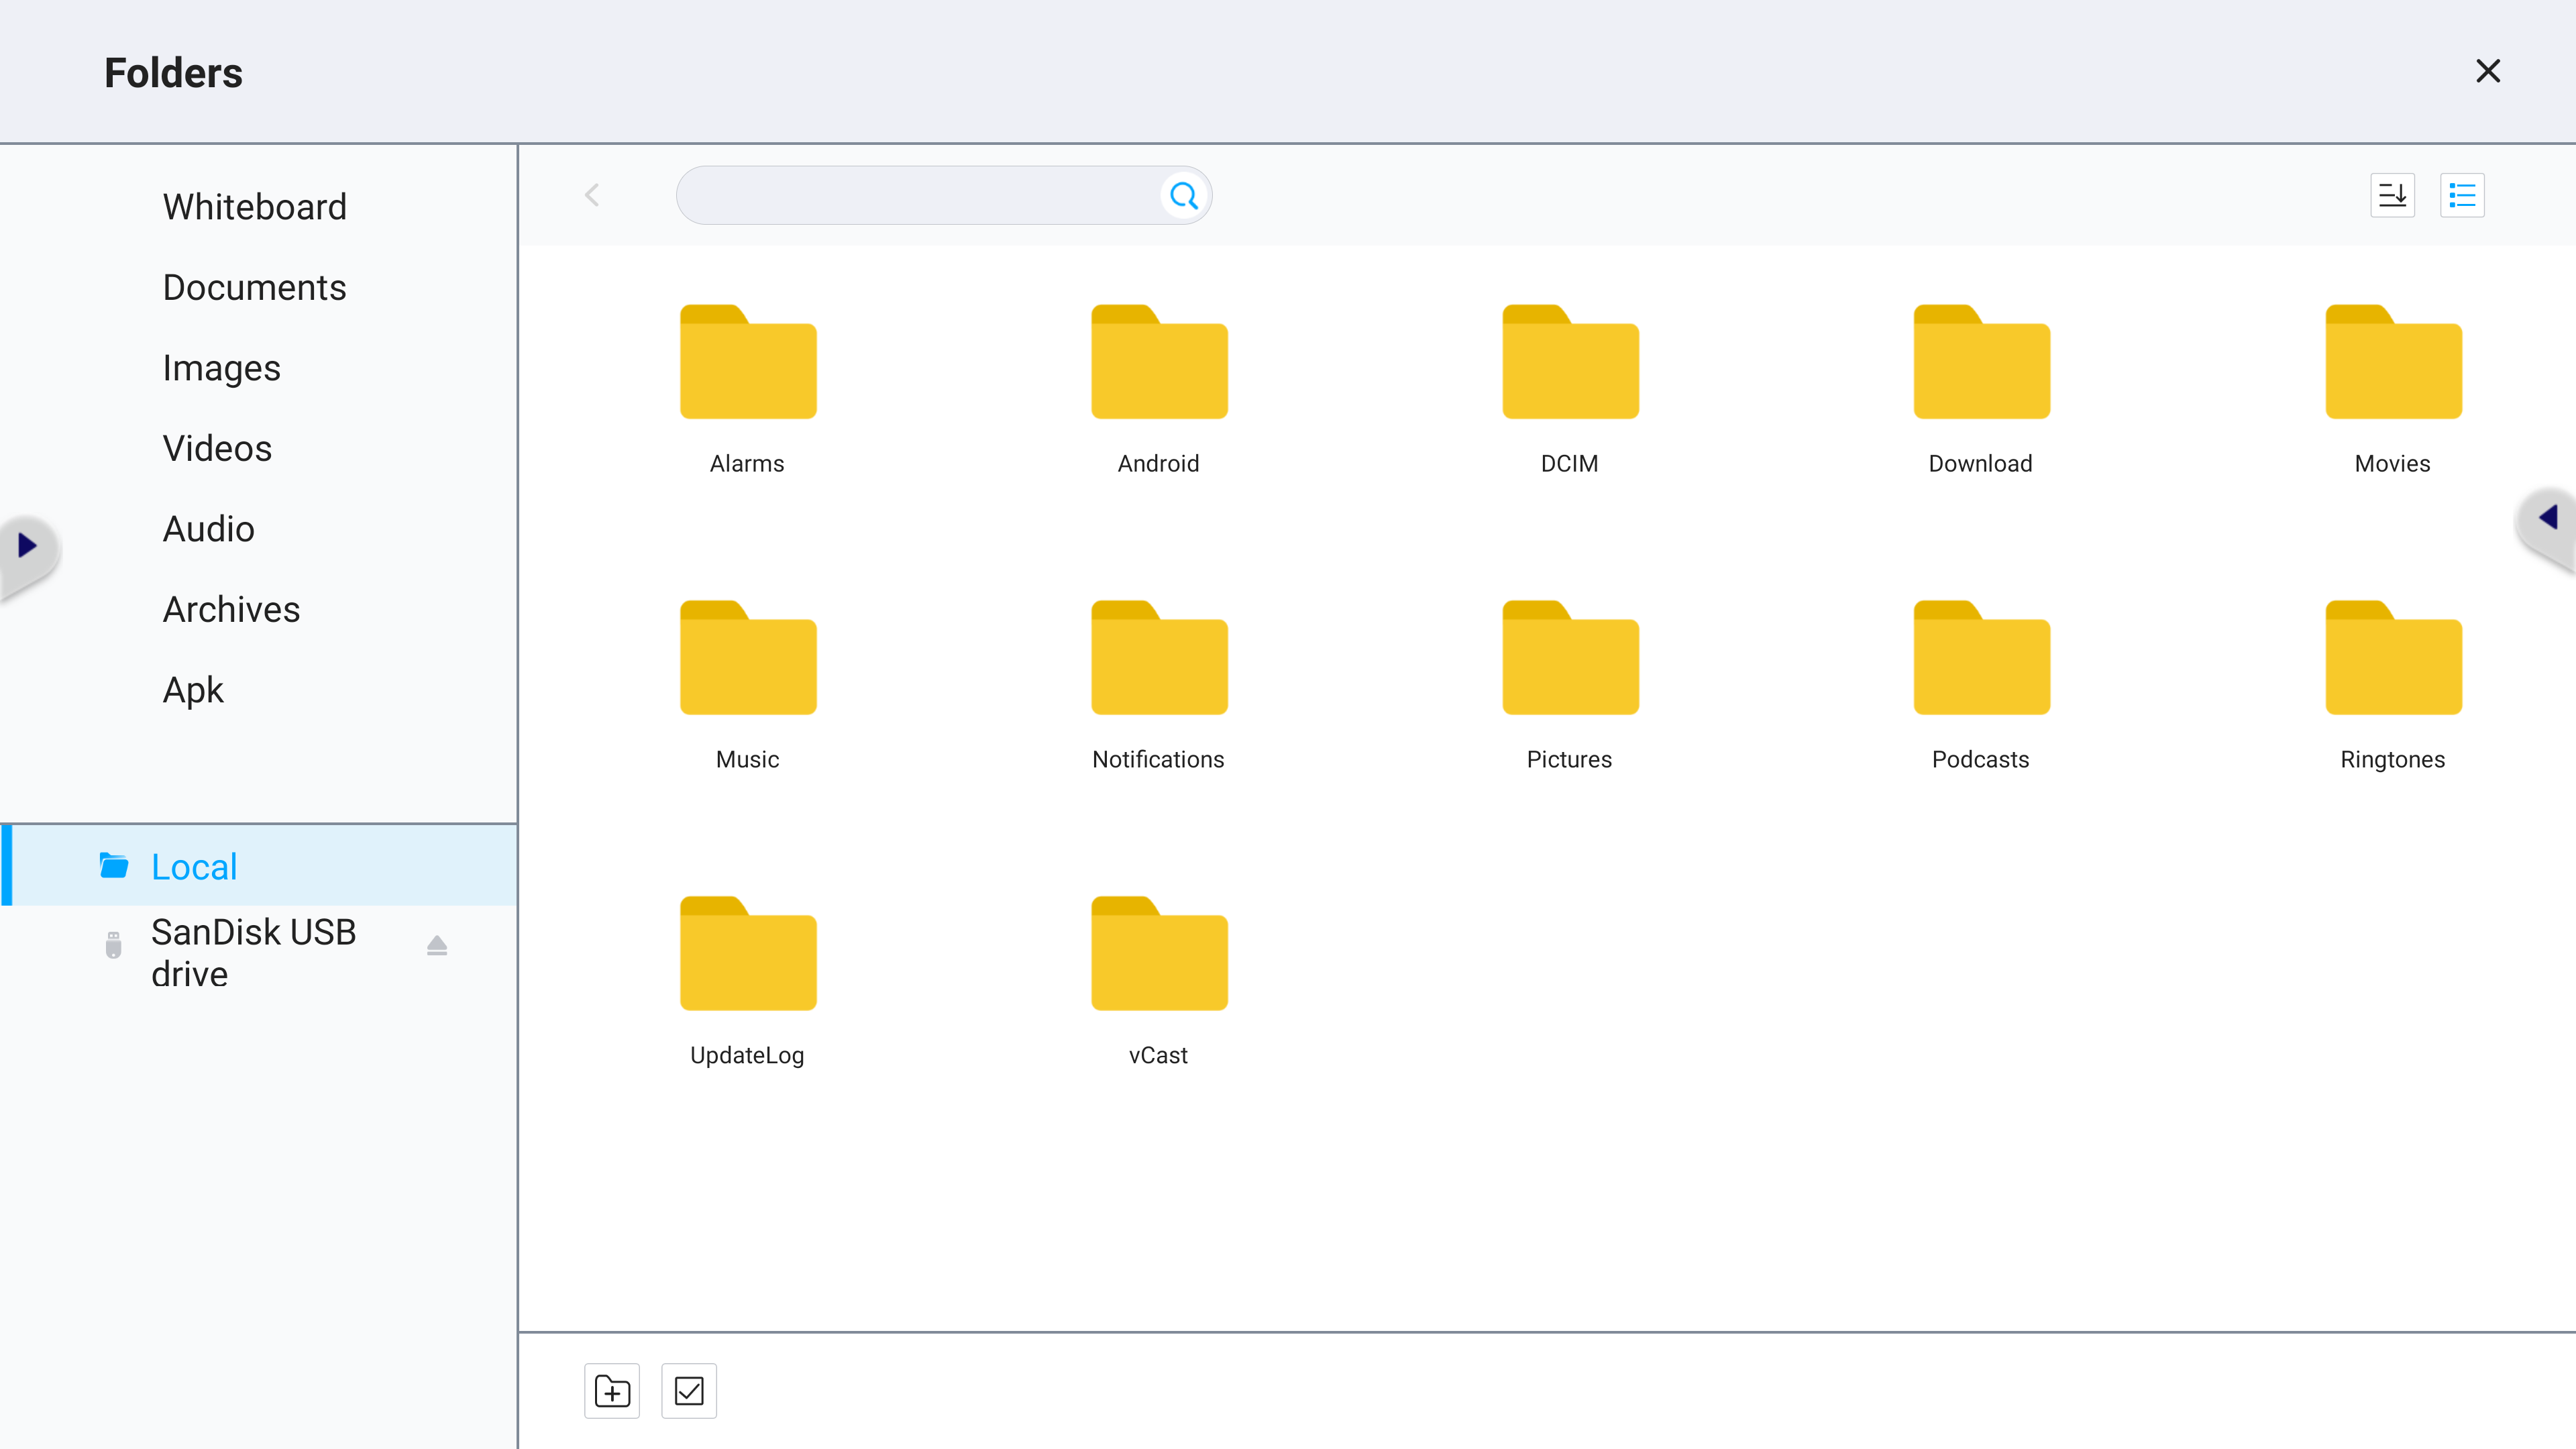
To learn more about key features of the Folders app, click one of the panels below:
» File type categories
To display all files of a specific type only, click a category on the left. The Folders app organizes files into the following categories:
Folder |
Description |
|---|---|
| Whiteboard | myViewBoard Whiteboard files. |
| Documents | Document, presentation, and spreadsheet files. |
| Images | Image files (such as screenshots). |
| Videos | Video files. |
| Audio | Audio files. |
| Archives | Compressed files. |
| APK | APK files (Android installer). |
» File navigation
To work with your files, press the Select button to access the following options:
![]()
 Split Screen
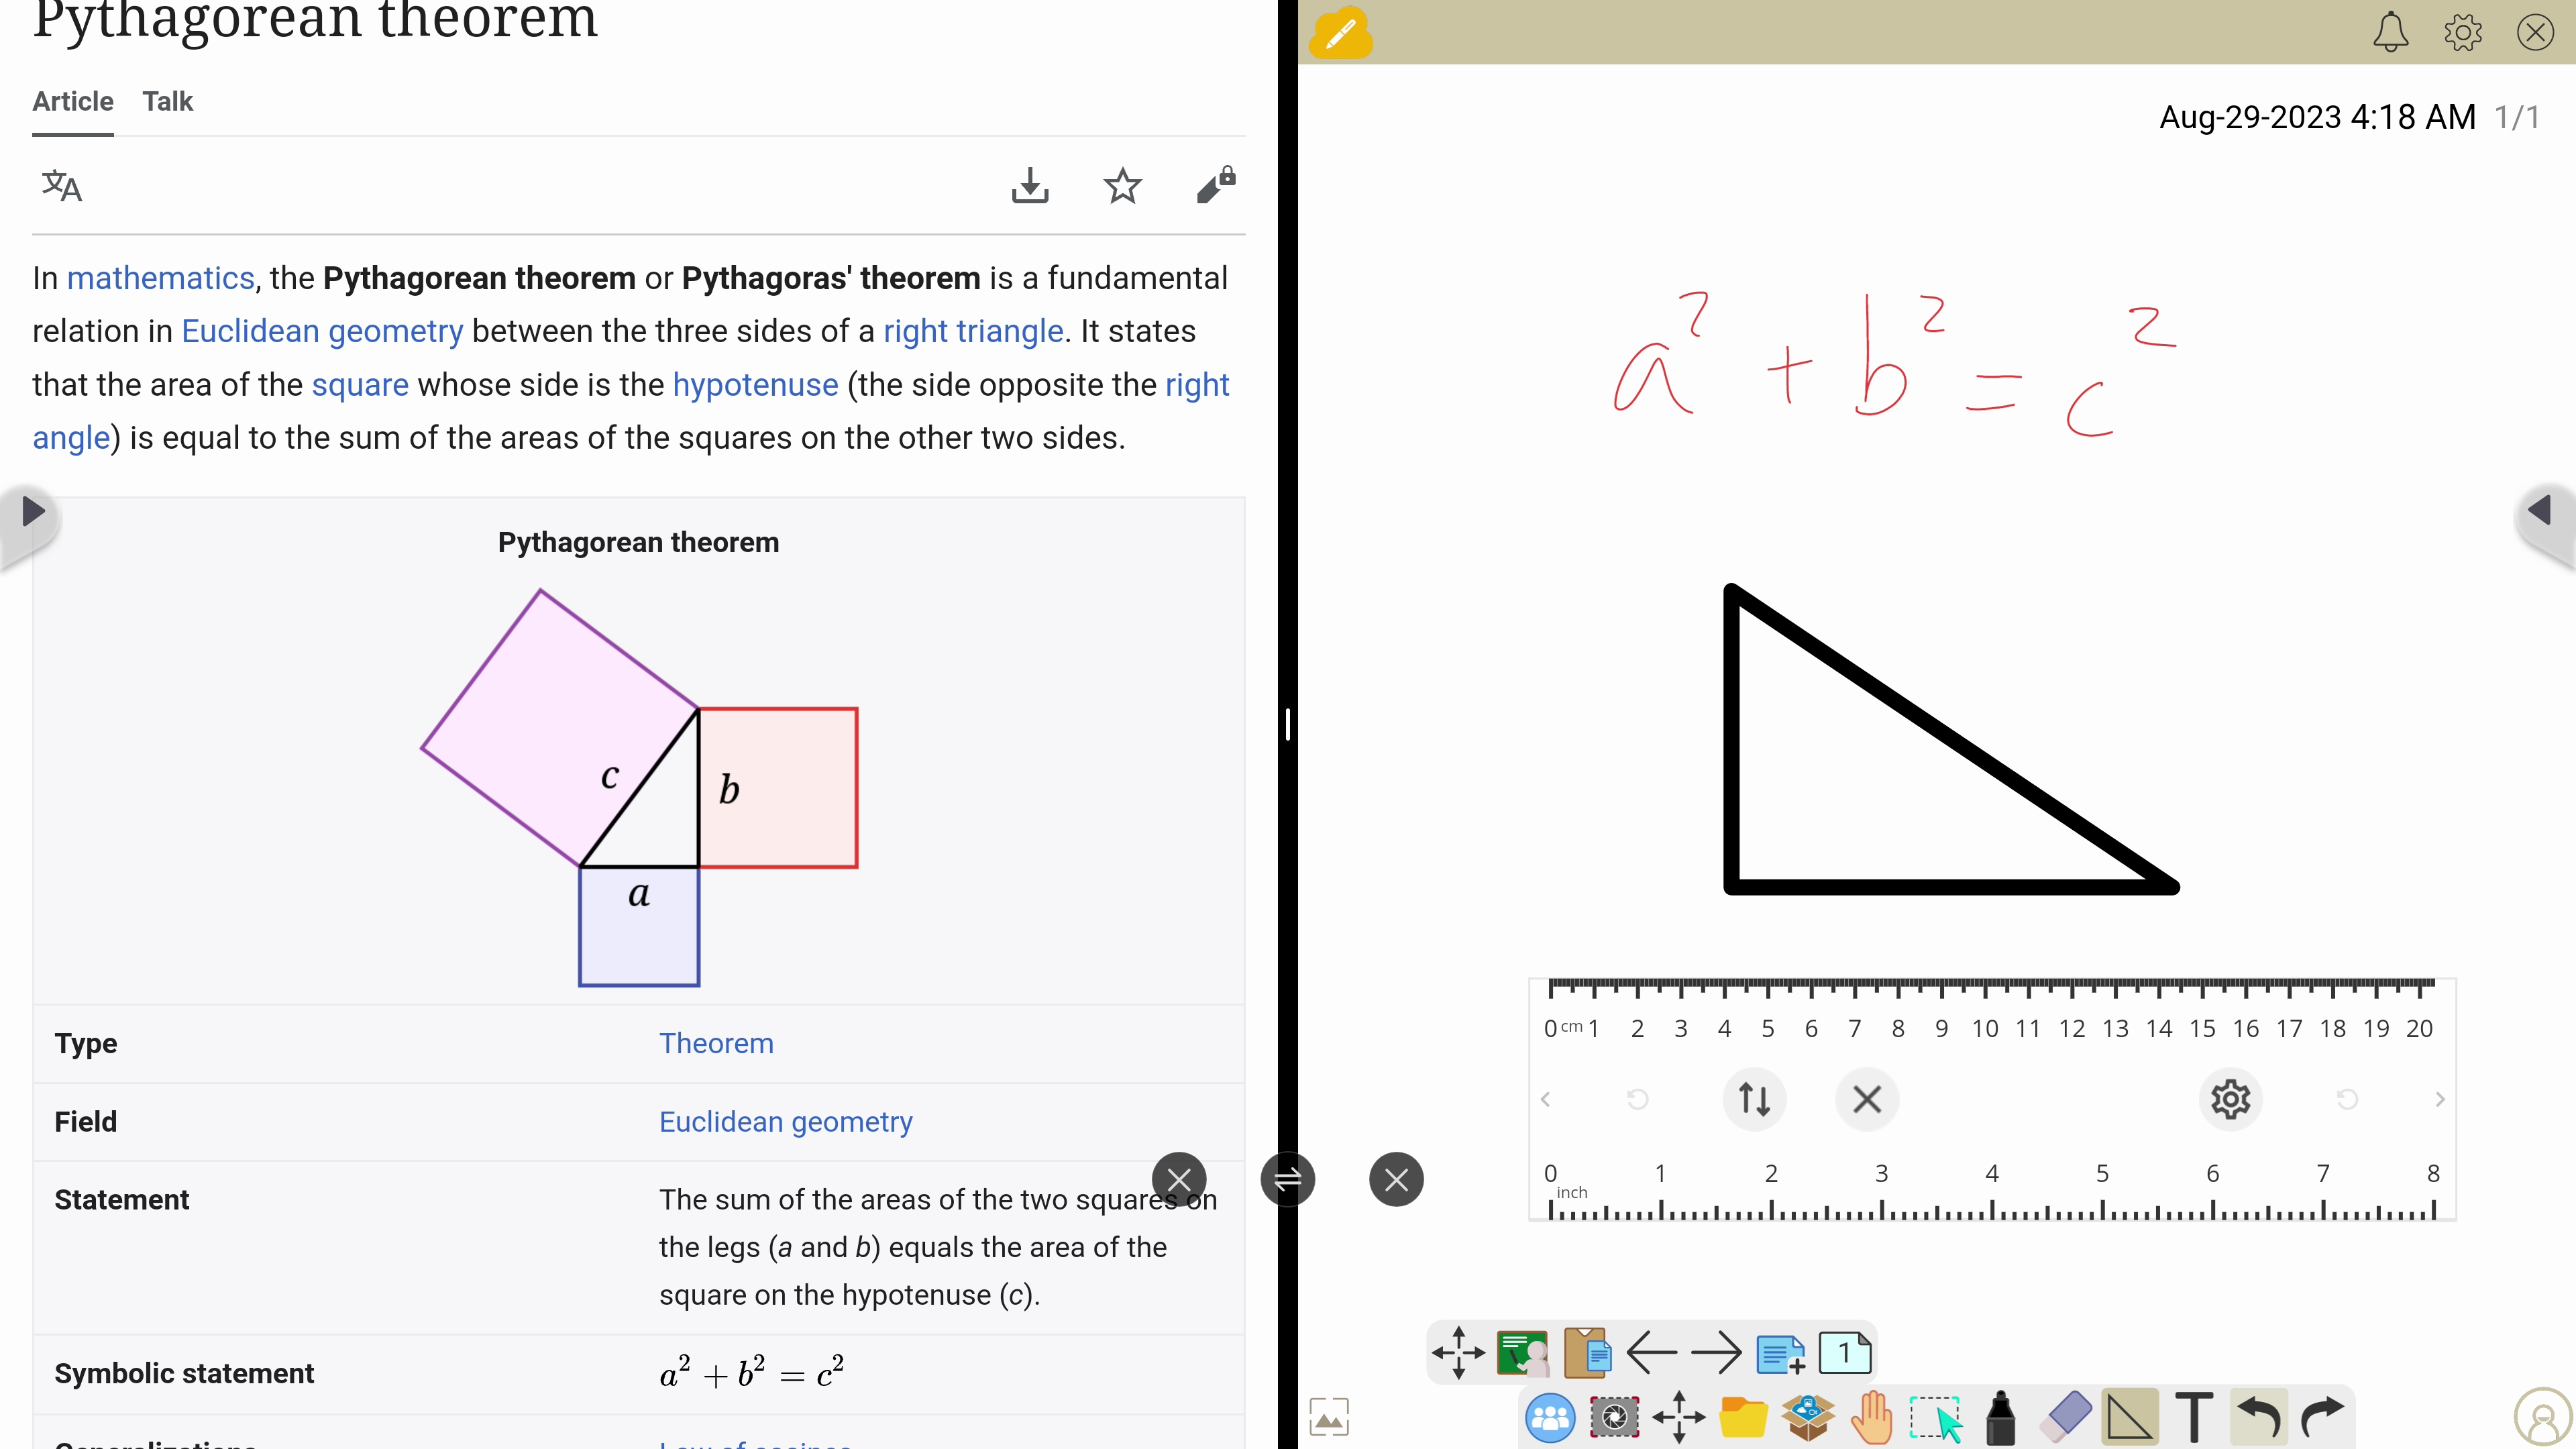
The Split Screen app allows viewing and interacting with two apps, side by side.
For example: you can open a myViewBoard canvas on one side, and open a document from Office Suite on the other side. This setup provides a convenient way to copy content from one app to the other.
To use Split Screen:
- Go to the home screen of your ViewBoard device. .
- In your app tray, tap the Split Screen app.
- You should see a list of supported apps.
Select a first and second app to open in split screen.
To modify split screen view:
- Drag the central bar left or right to modify each app's screen size.
Apps can be resized to take up one-third, half, or two-thirds of the full screen. - Tap
 to swap apps displayed on the left and right sides.
 - Tap
 to close an app and select another app to open on that side.
 Air Class
Use Air Class to create quizzes on the ViewBoard screen. Up to 30 users can use their mobile devices to submit answers remotely. Once submitted, answers for each participant are stored for class discussion and review.
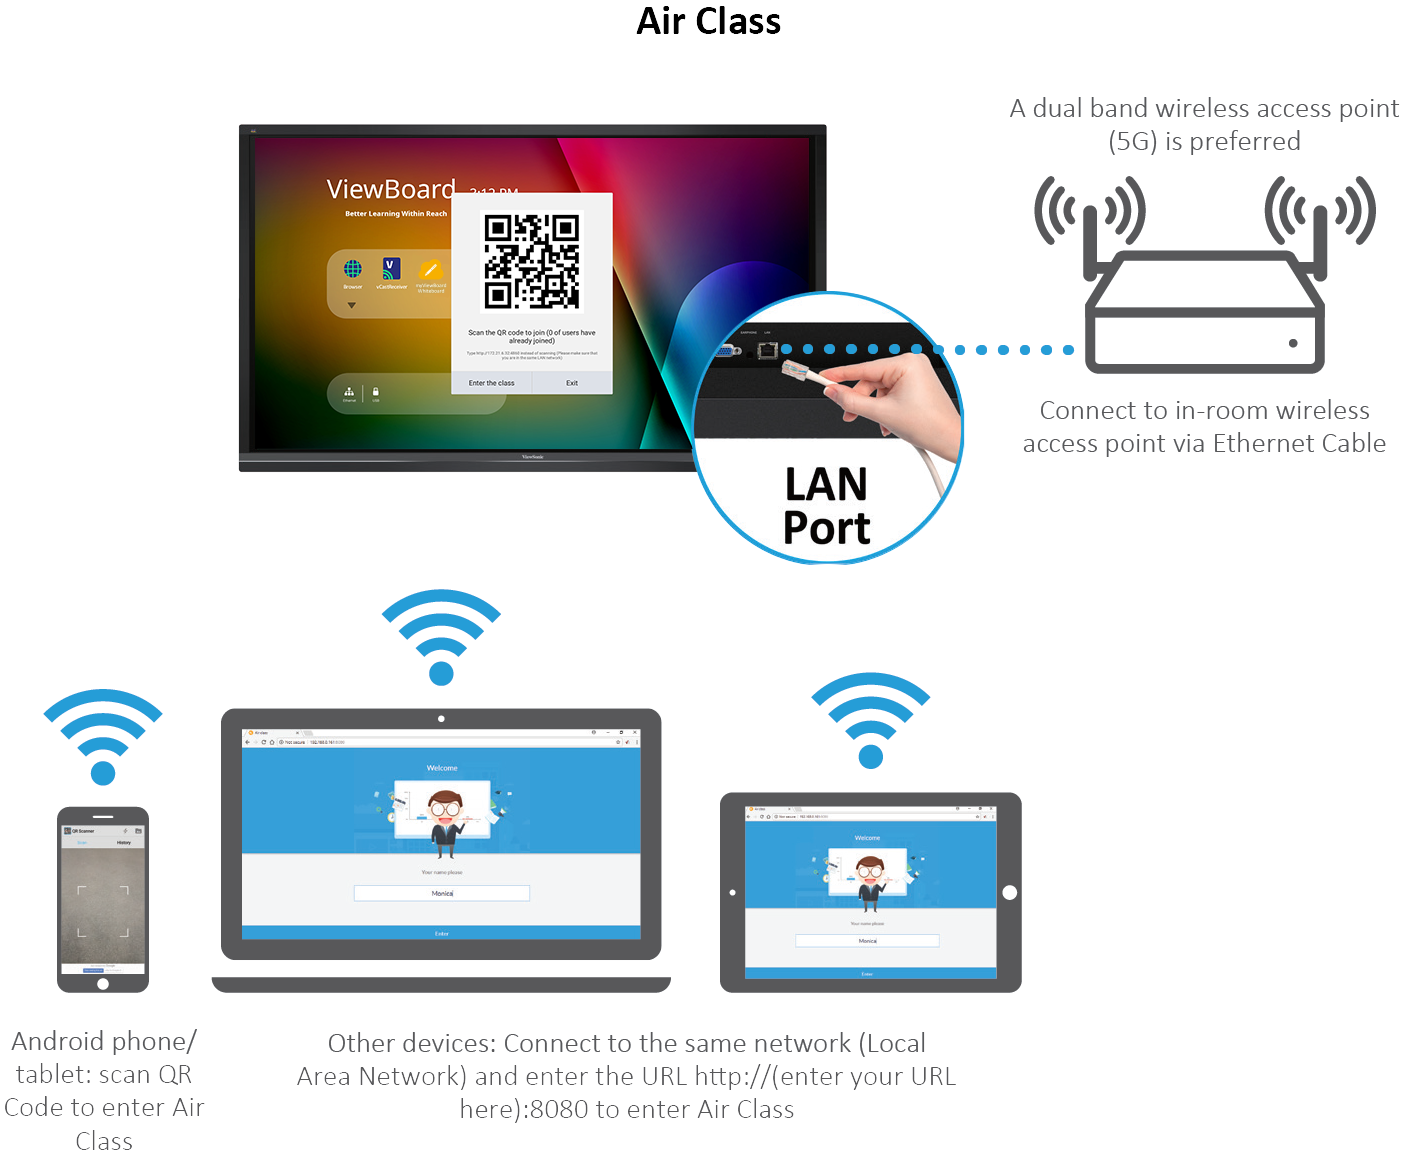
- PCs (Windows/Mac/Chromebook) or mobile devices (iOS/Android)
- The ViewBoard must be connected to the same LAN network subnet.
- Ports: TCP 8080
- Tap the side toolbar
 .
. - Tap the Air Class icon.
- Tap Enter the class.
- Review the Quiz types shown at the bottom of the screen.
Voter
Single and multiple choice questions
- Select the Single choice or Multiple choice icon.
- Set which option will be the preferred answer.
- Tap BEGIN VOTING to initiate the voting session.
- Participants who have answered will have their names displayed on the screen.
- Tap FINISH VOTING to end the voting session.
To review the responses:
- Answer Statistics will provide a breakdown of all answers submitted for the session.
- Select the correct answer to display the rate of correct answers.
- Tap the Explain icon to display the results as an overlay over the ViewBoard OS.
When this mode is on, you can navigate to other apps (such as myViewBoard) to discuss the question and compare results.
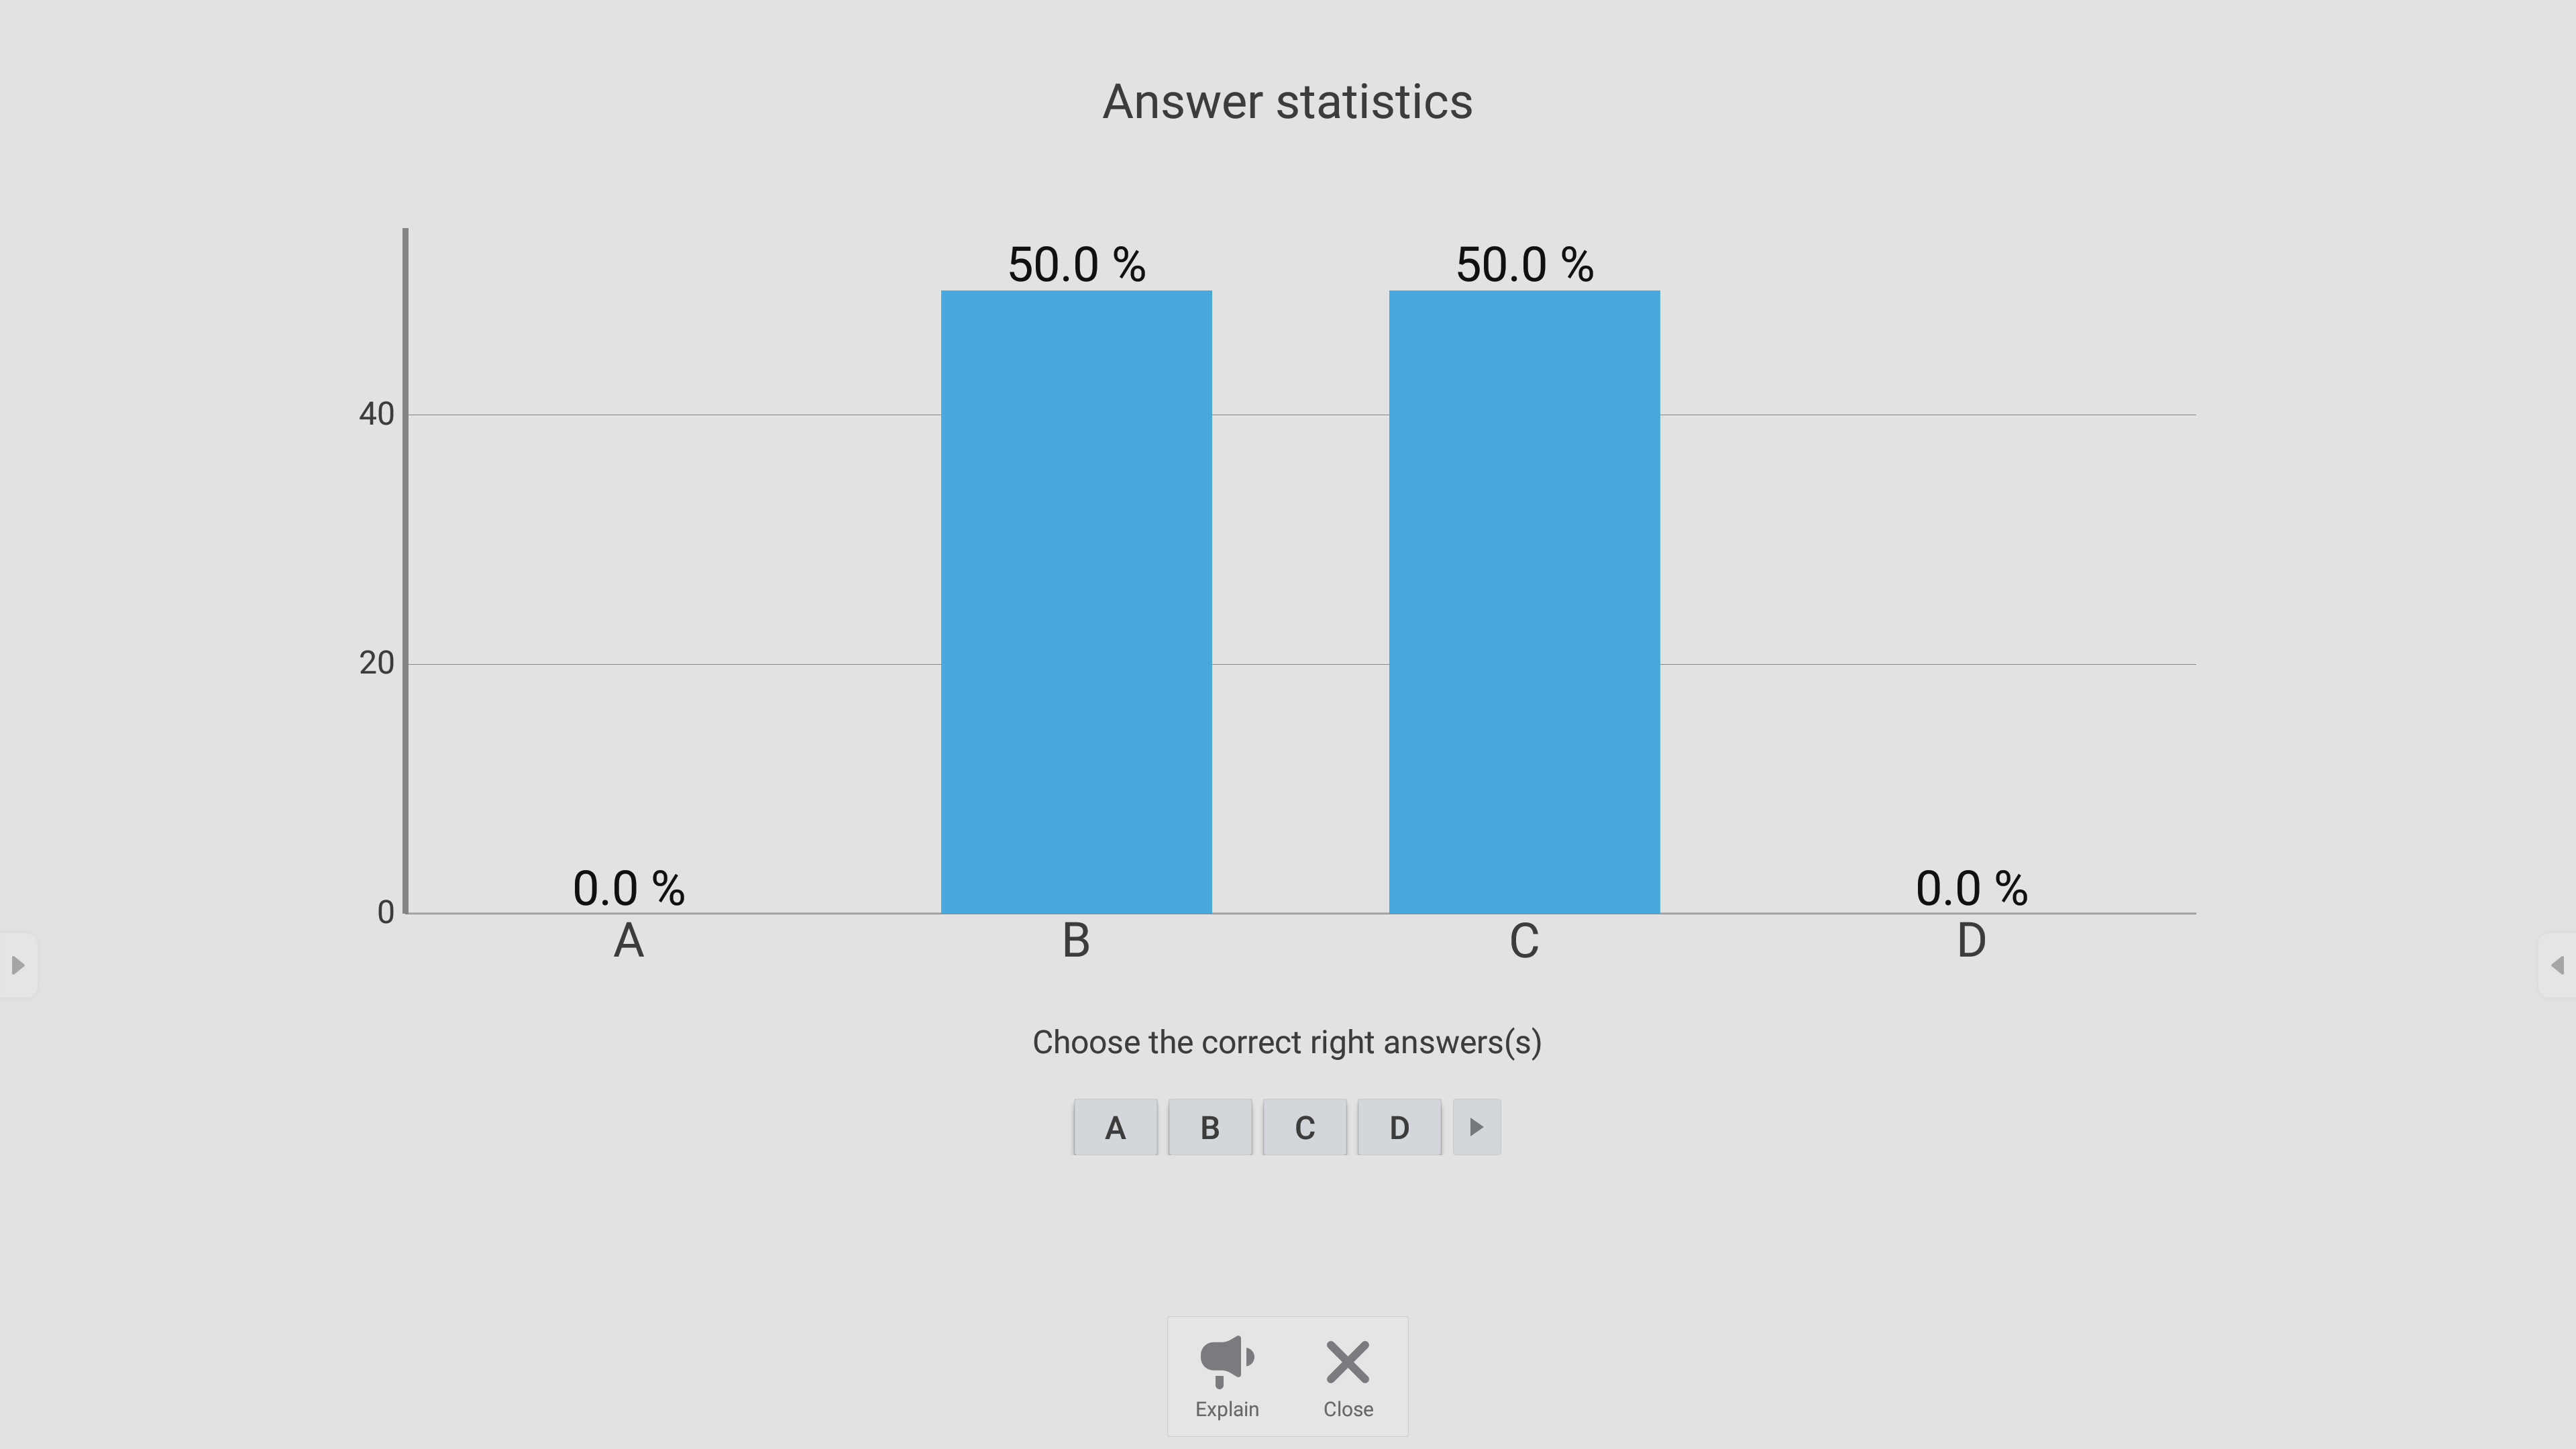
Participant answer breakdown without answer being revealed.
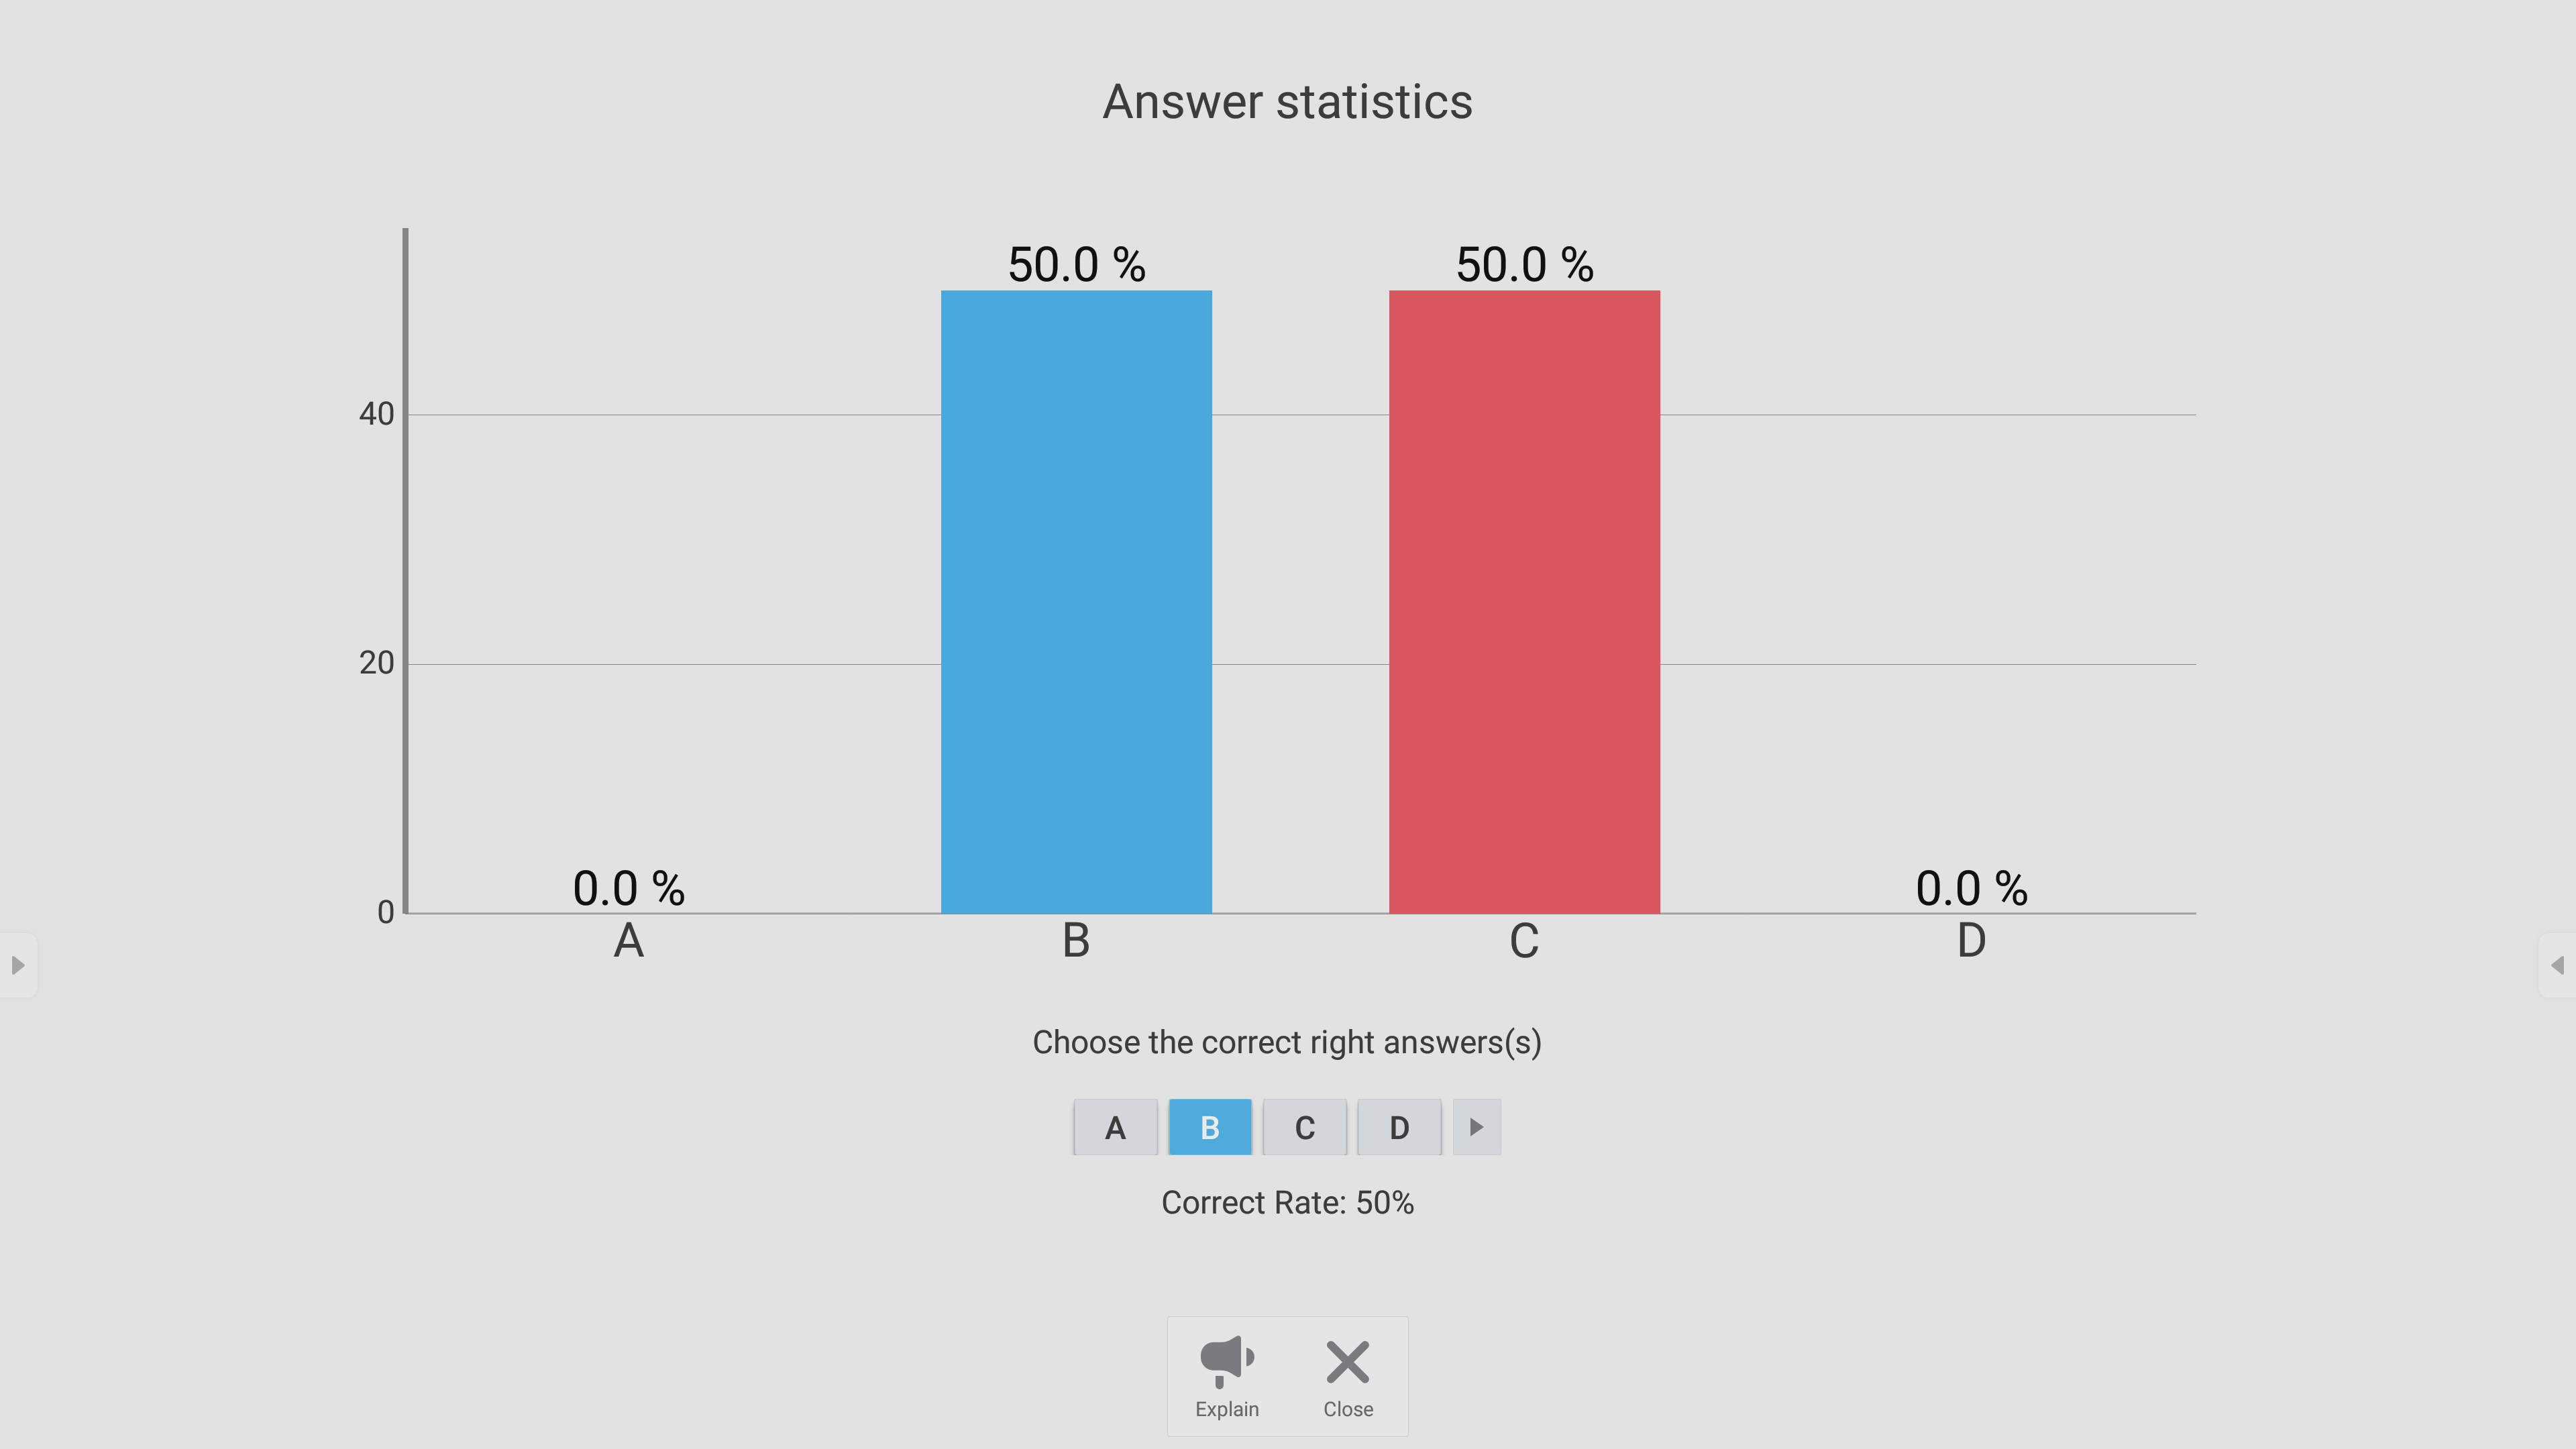
Participant answer breakdown after correct answer is revealed.
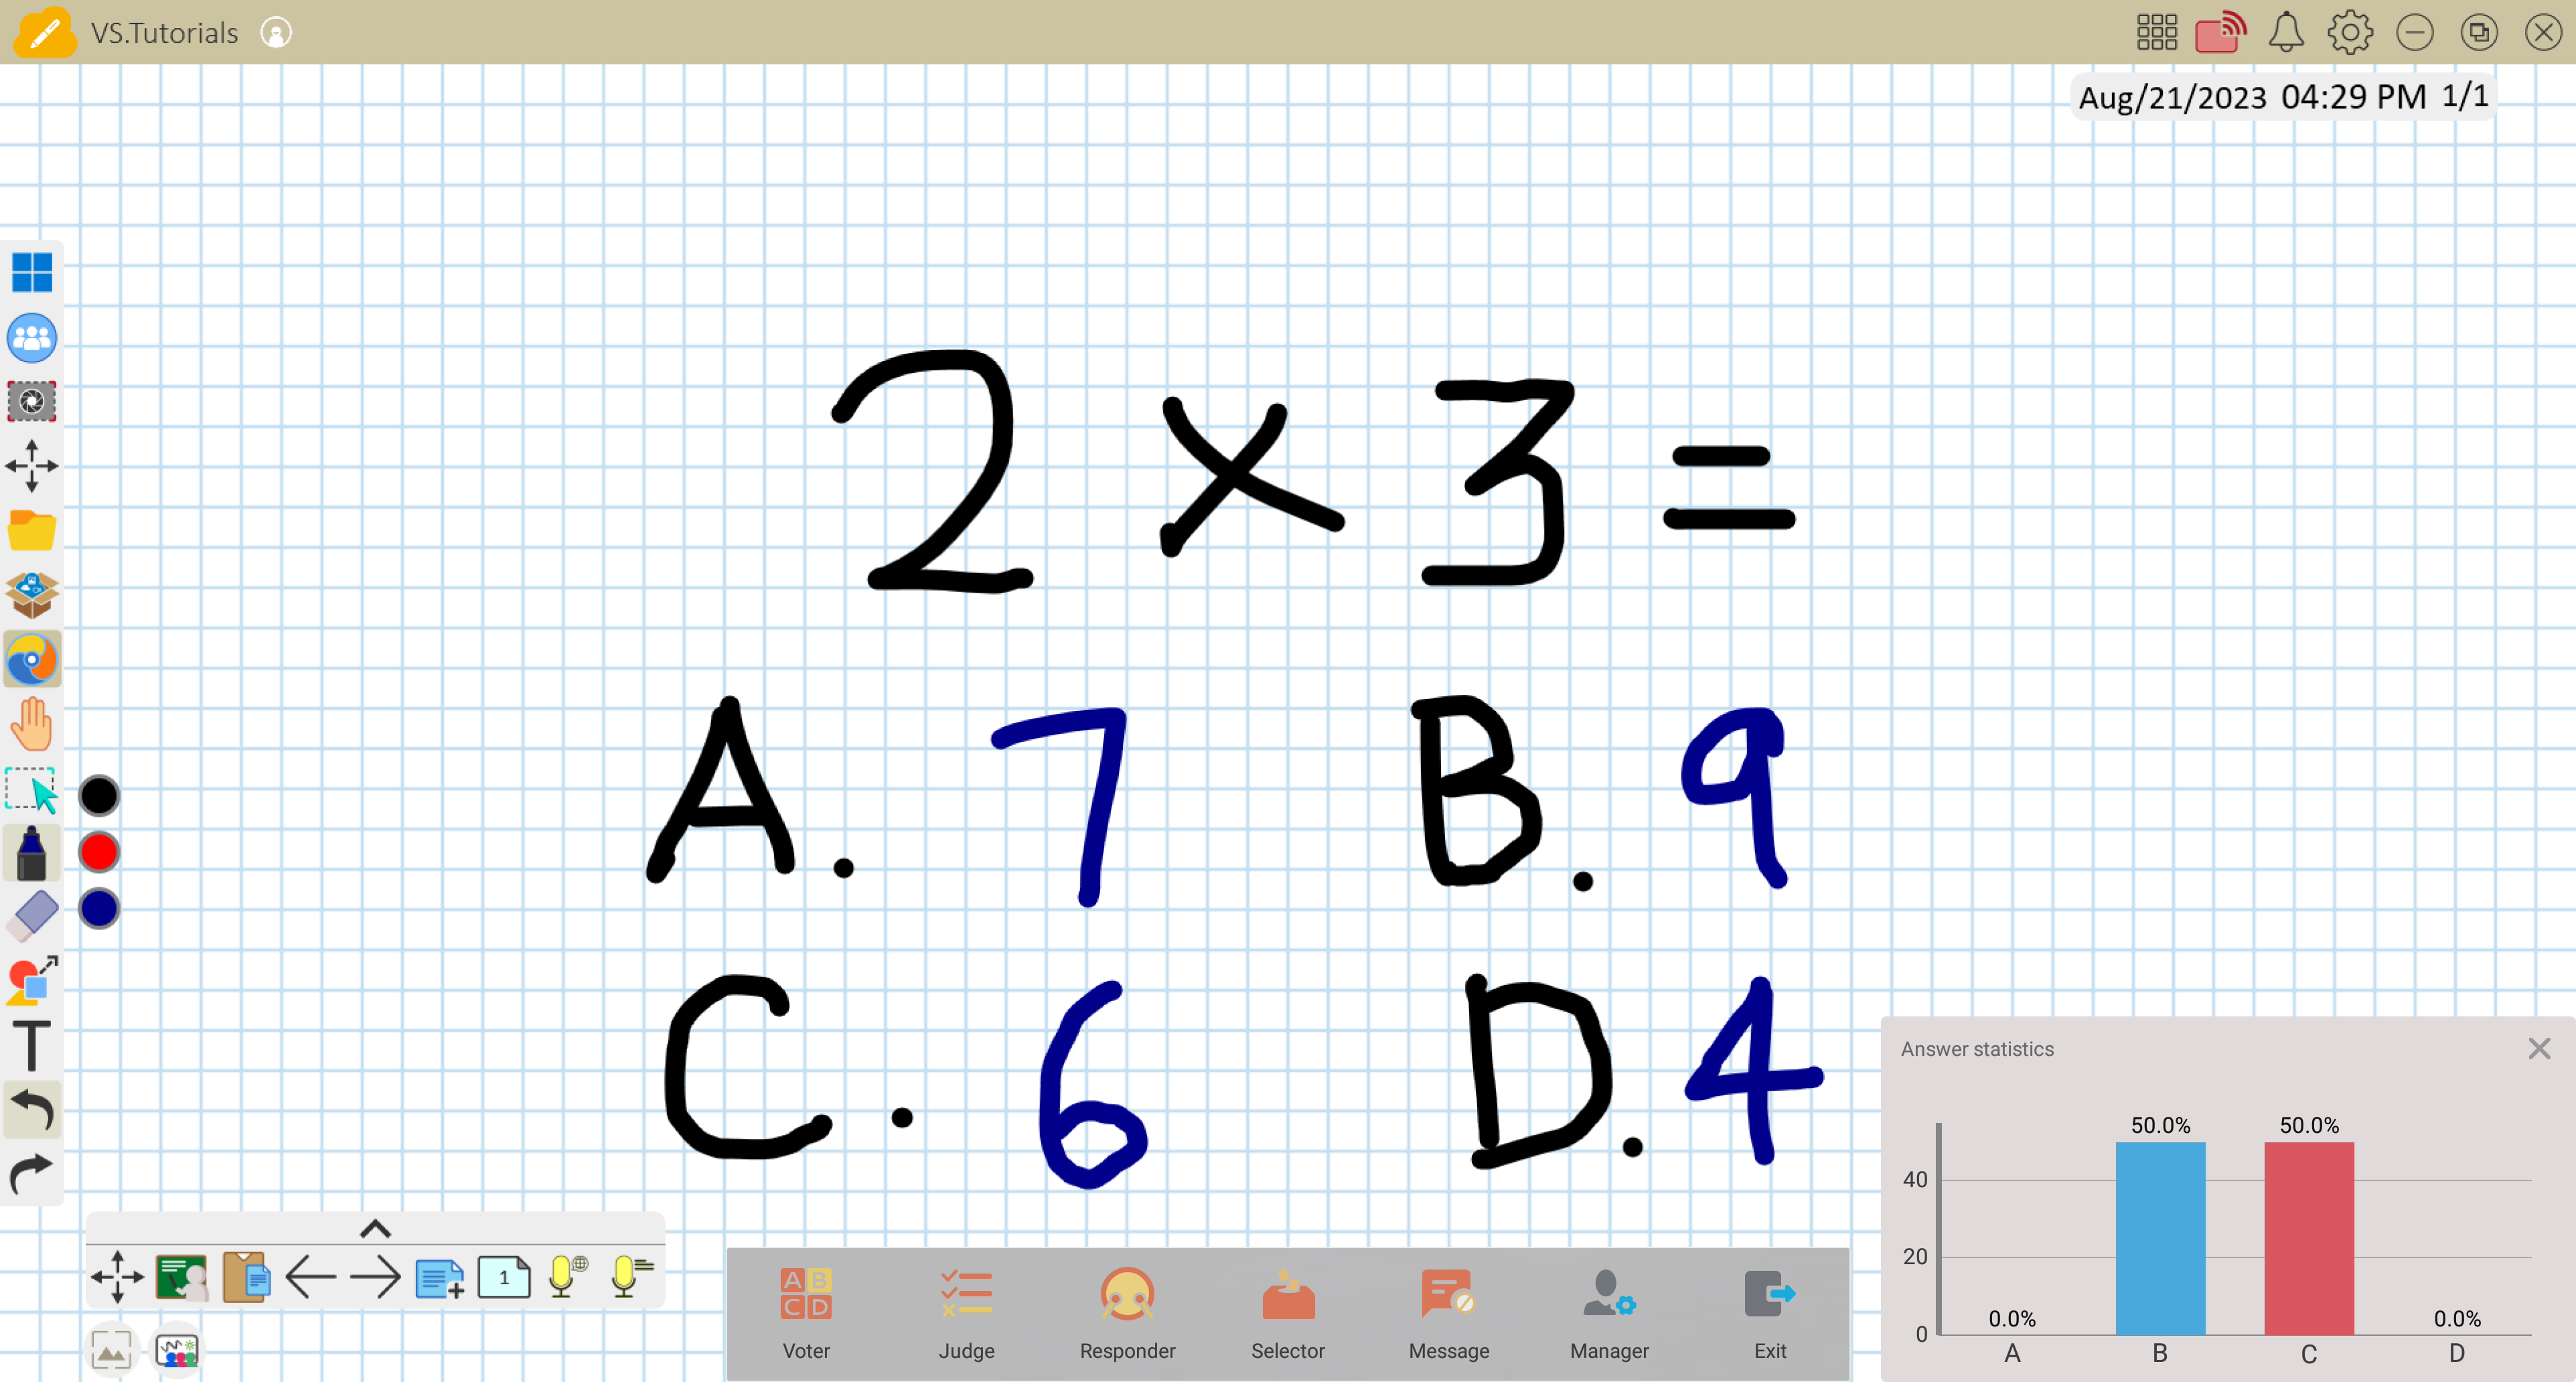
Shows results over myViewBoard, where original question was displayed.
Judge
Judge limits participants to just a true/false answer in response to a question.
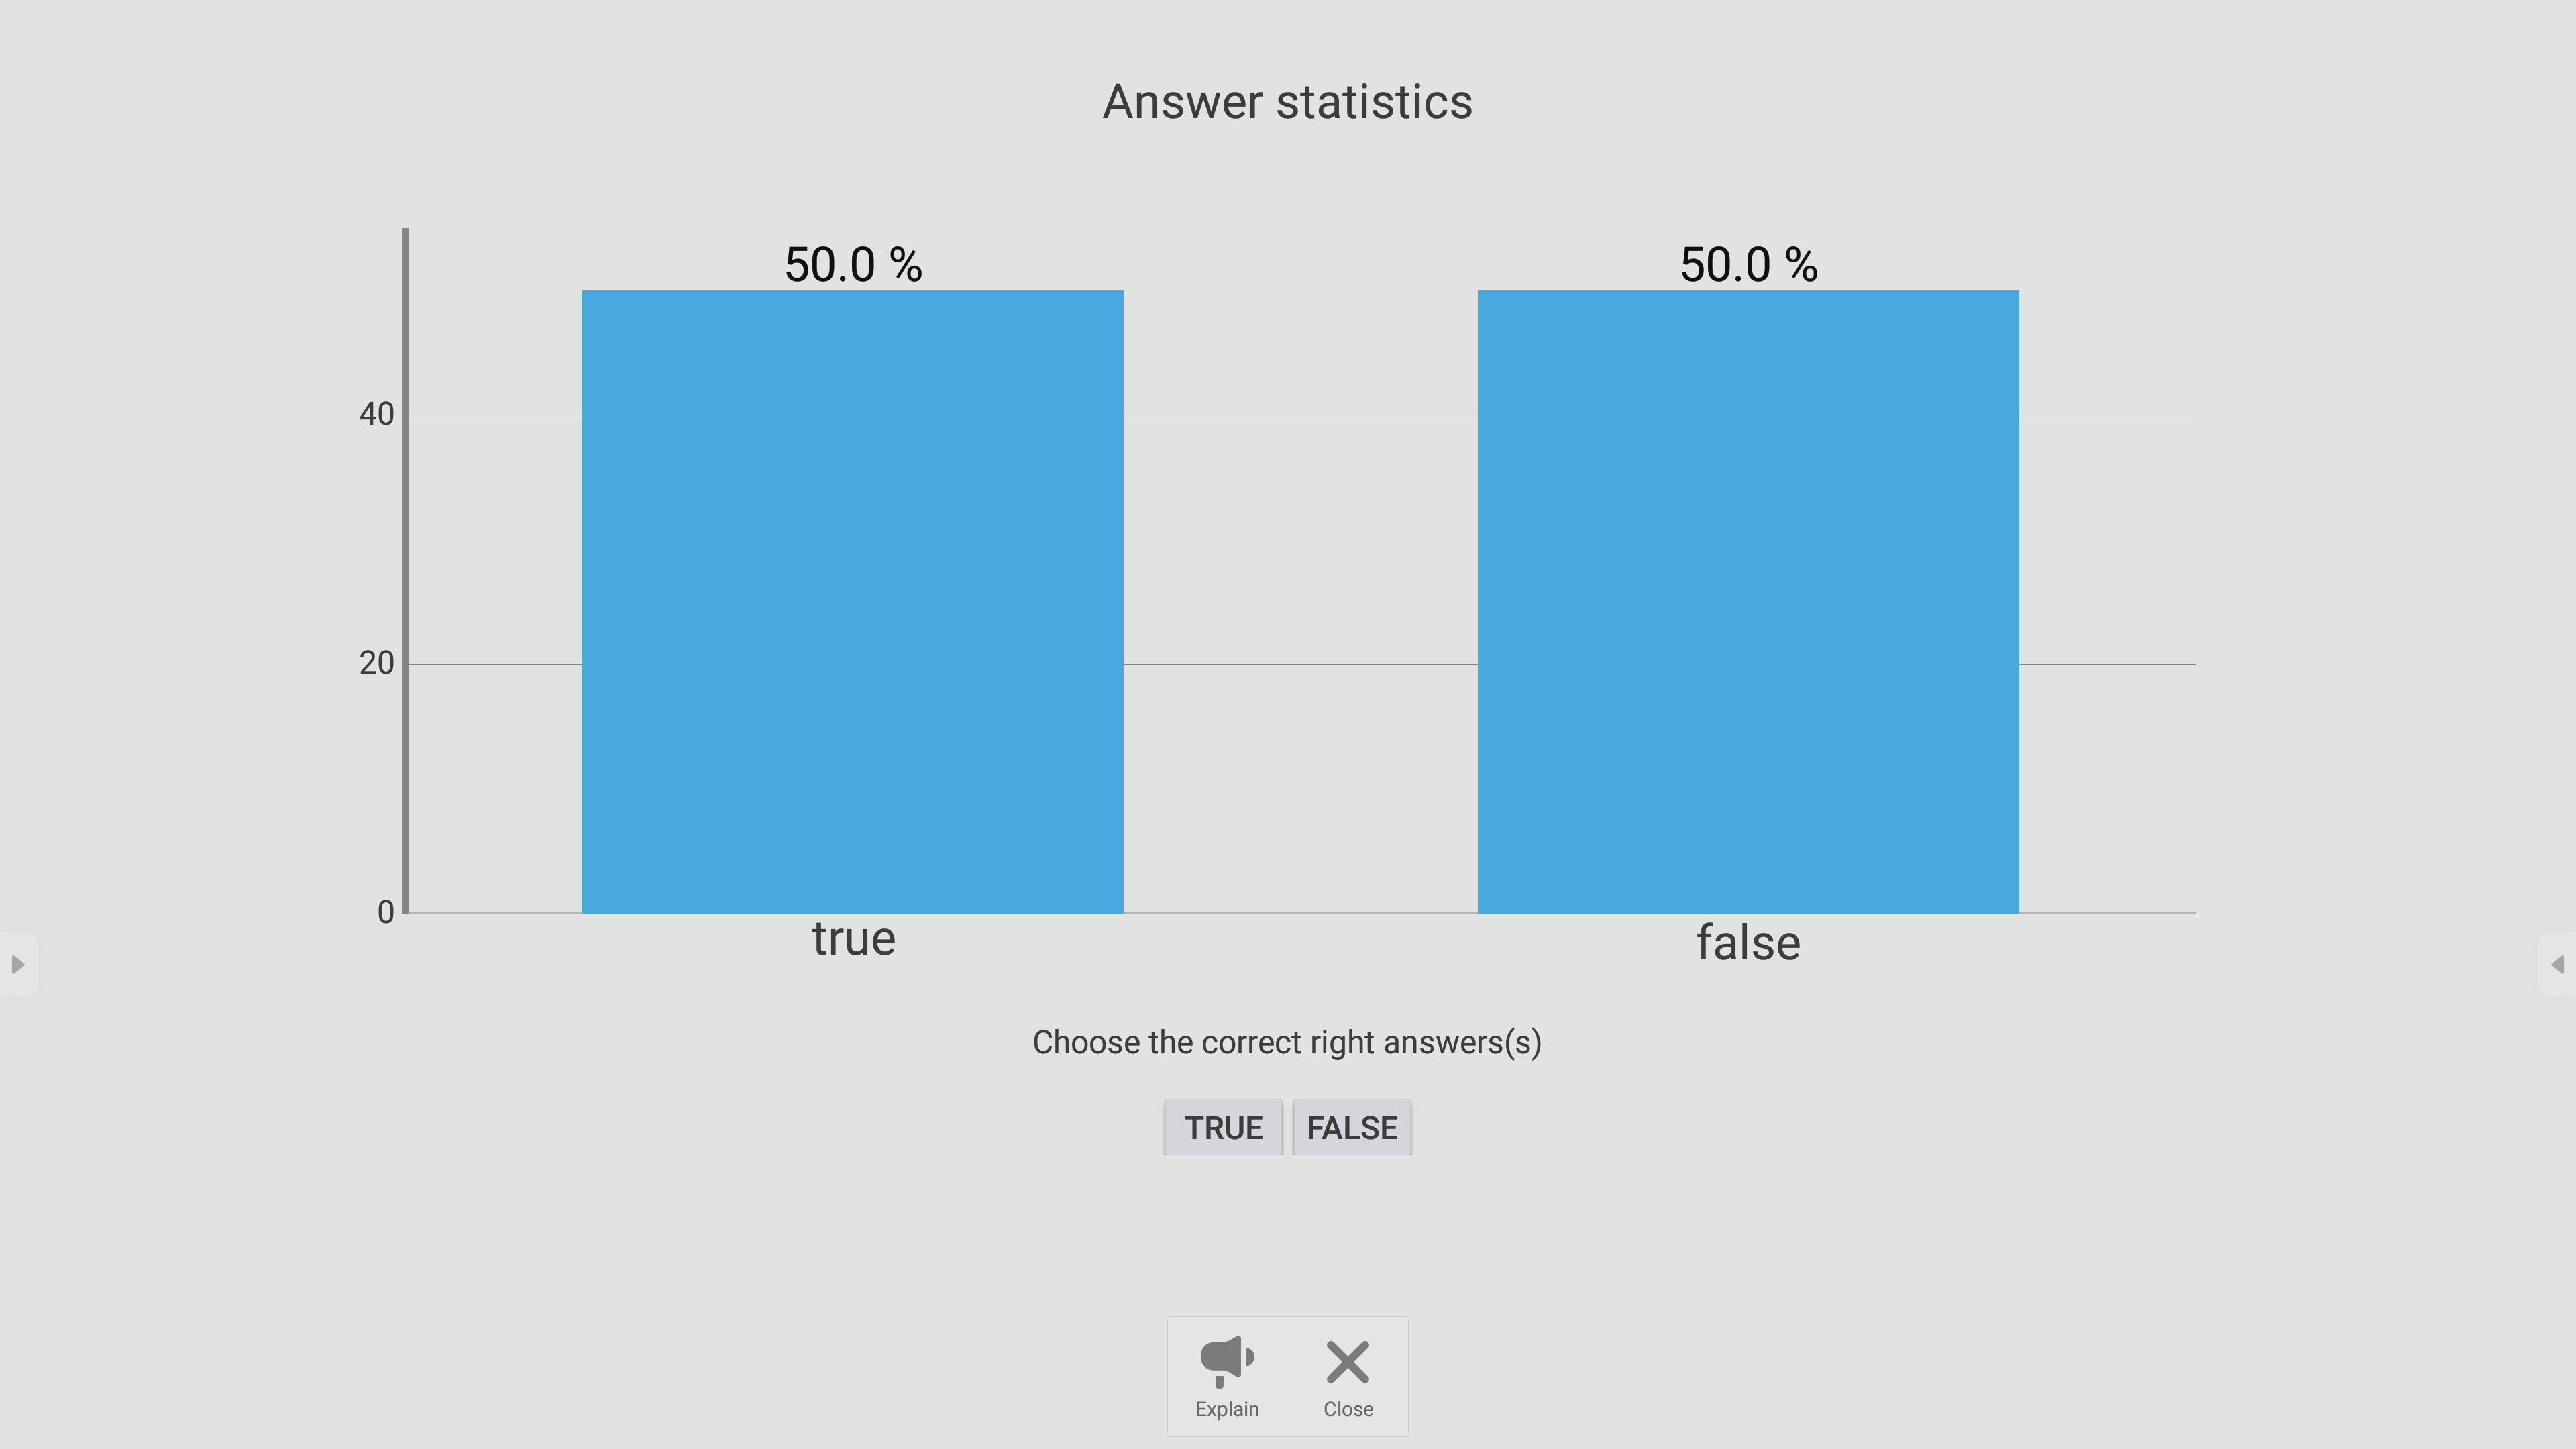
Participant answer breakdown without answer being revealed.
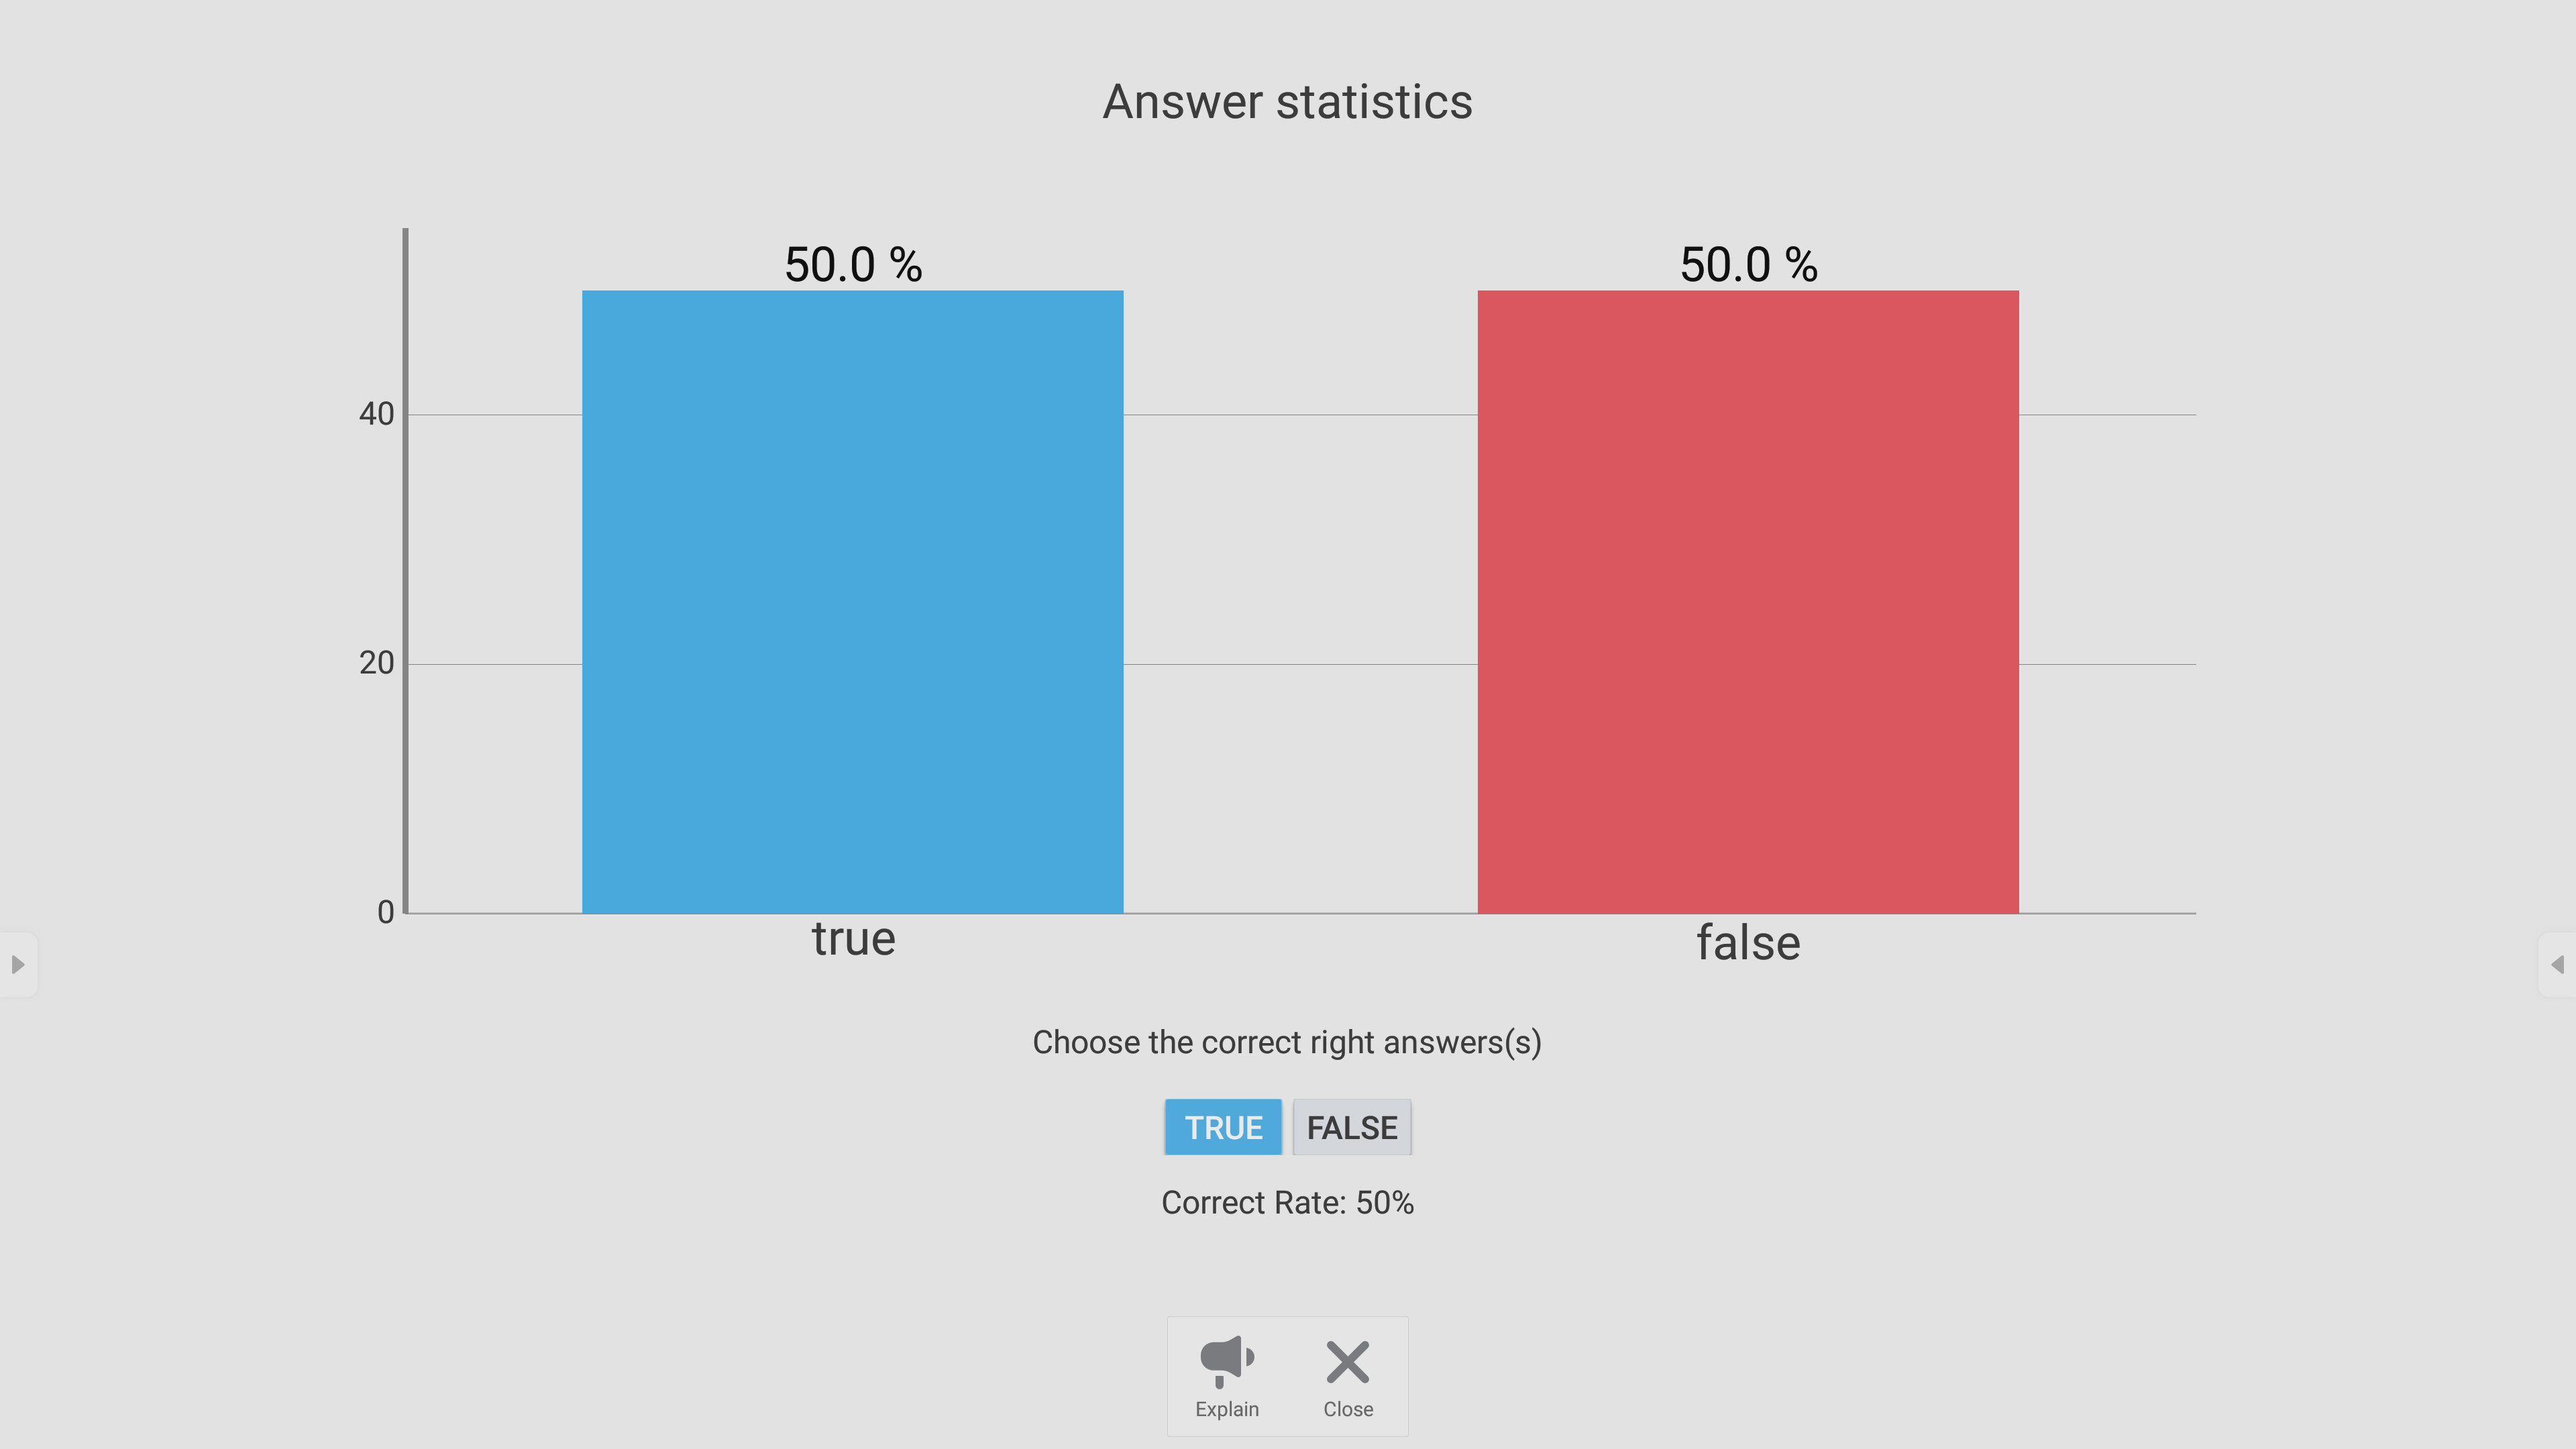
Participant answer breakdown after correct answer is revealed.
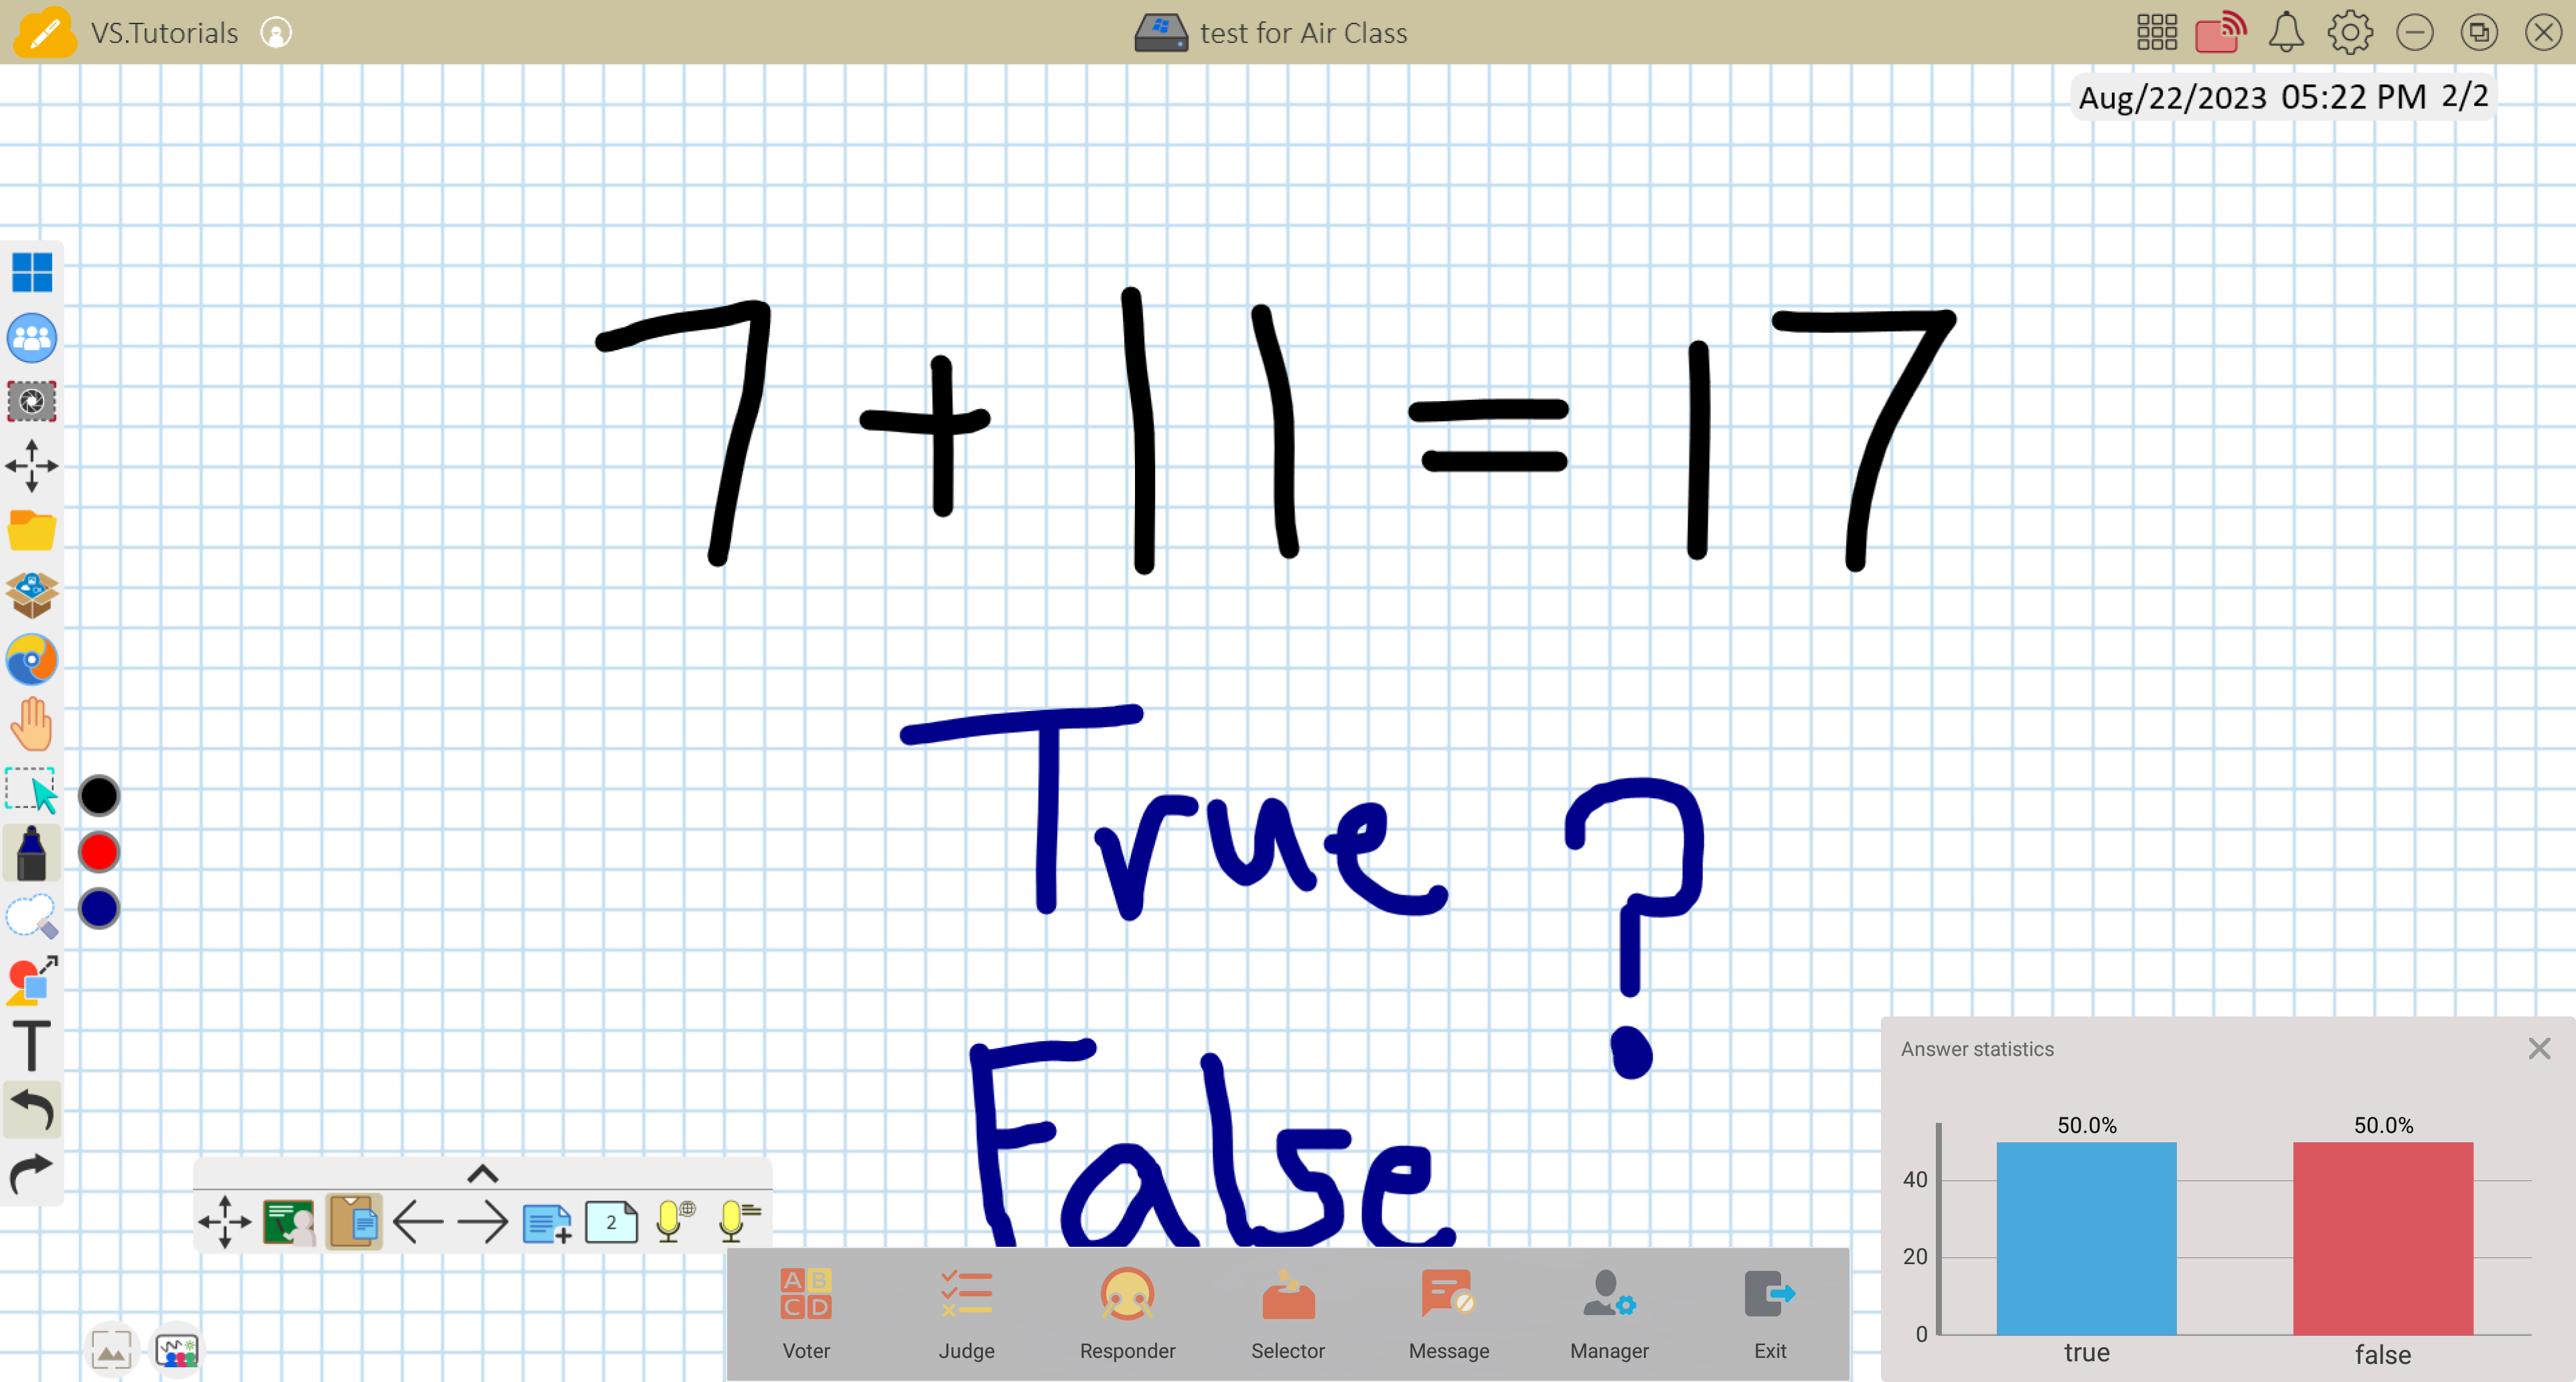
Shows results over myViewBoard, where original question was displayed.
Selector
Randomly select a participant.
Responder
Participants race to submit their answer first. Remind participants that answers will only be submitted after they press OK.
Grouping
Assign participants to groups. Select an icon to represent the different groups participants are assigned to.
Message
Allow participants to send messages to the ViewBoard.
- Tap Message to enable this feature for participants.
- On their mobile device, participants should switch to the Message tab.
- After typing a message, participants should press SEND to share their message.
- The message will scroll across the top of the ViewBoard screen.
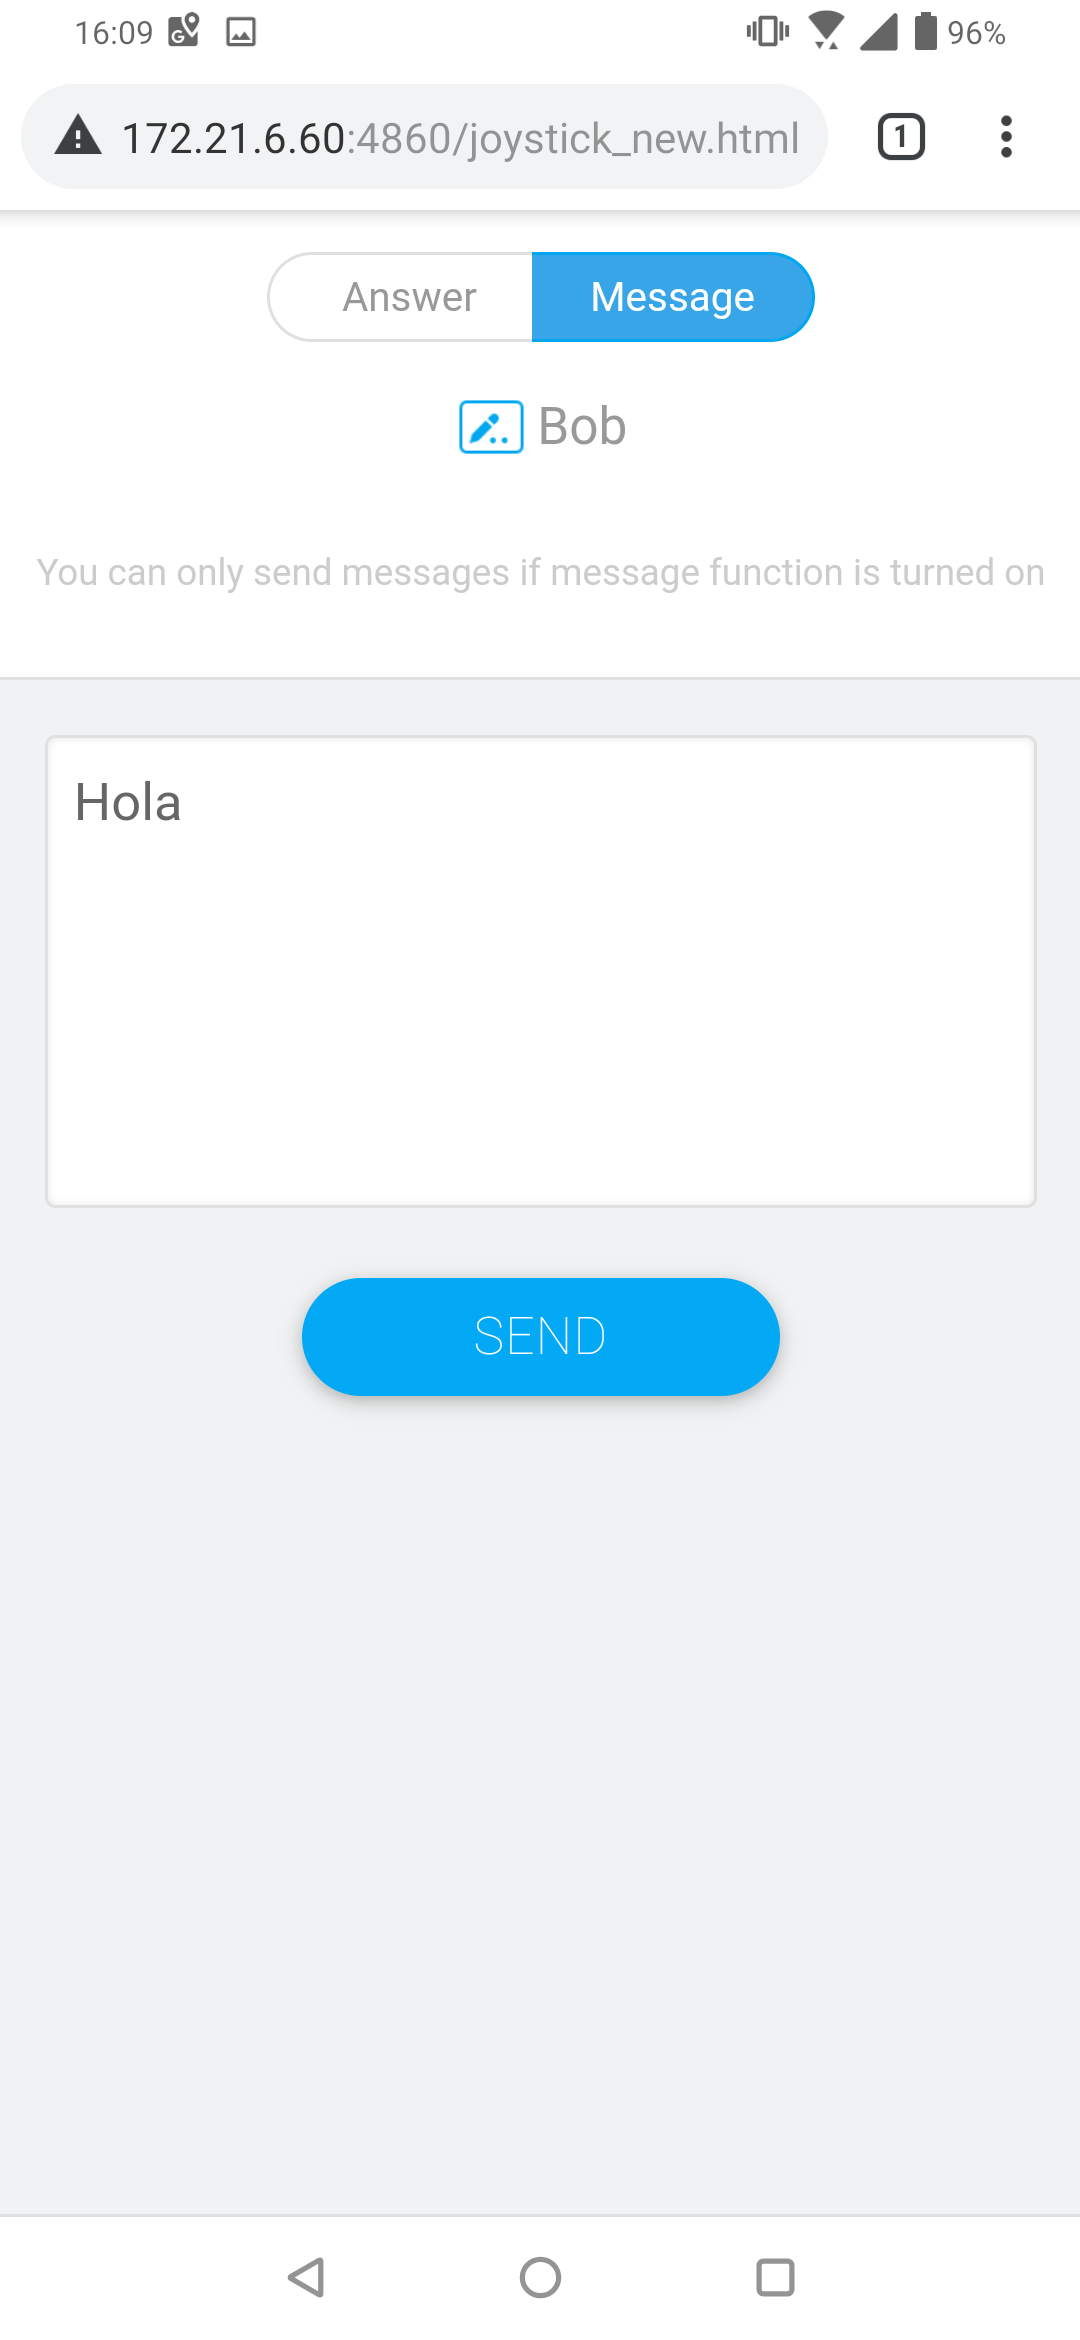 Participant on the Message tab ready to send a message to a ViewBoard.
Manager
Access the Manager menu to allow more participants to join the class.
Exit
Tap to close the Air Class interface.
 Visualizer
Connect an external camera to your ViewBoard and display the image onto the screen.
Finder
The Finder app provides a simple built-in method to easily navigate, locate, and organize files and folders with the ViewBoard device.
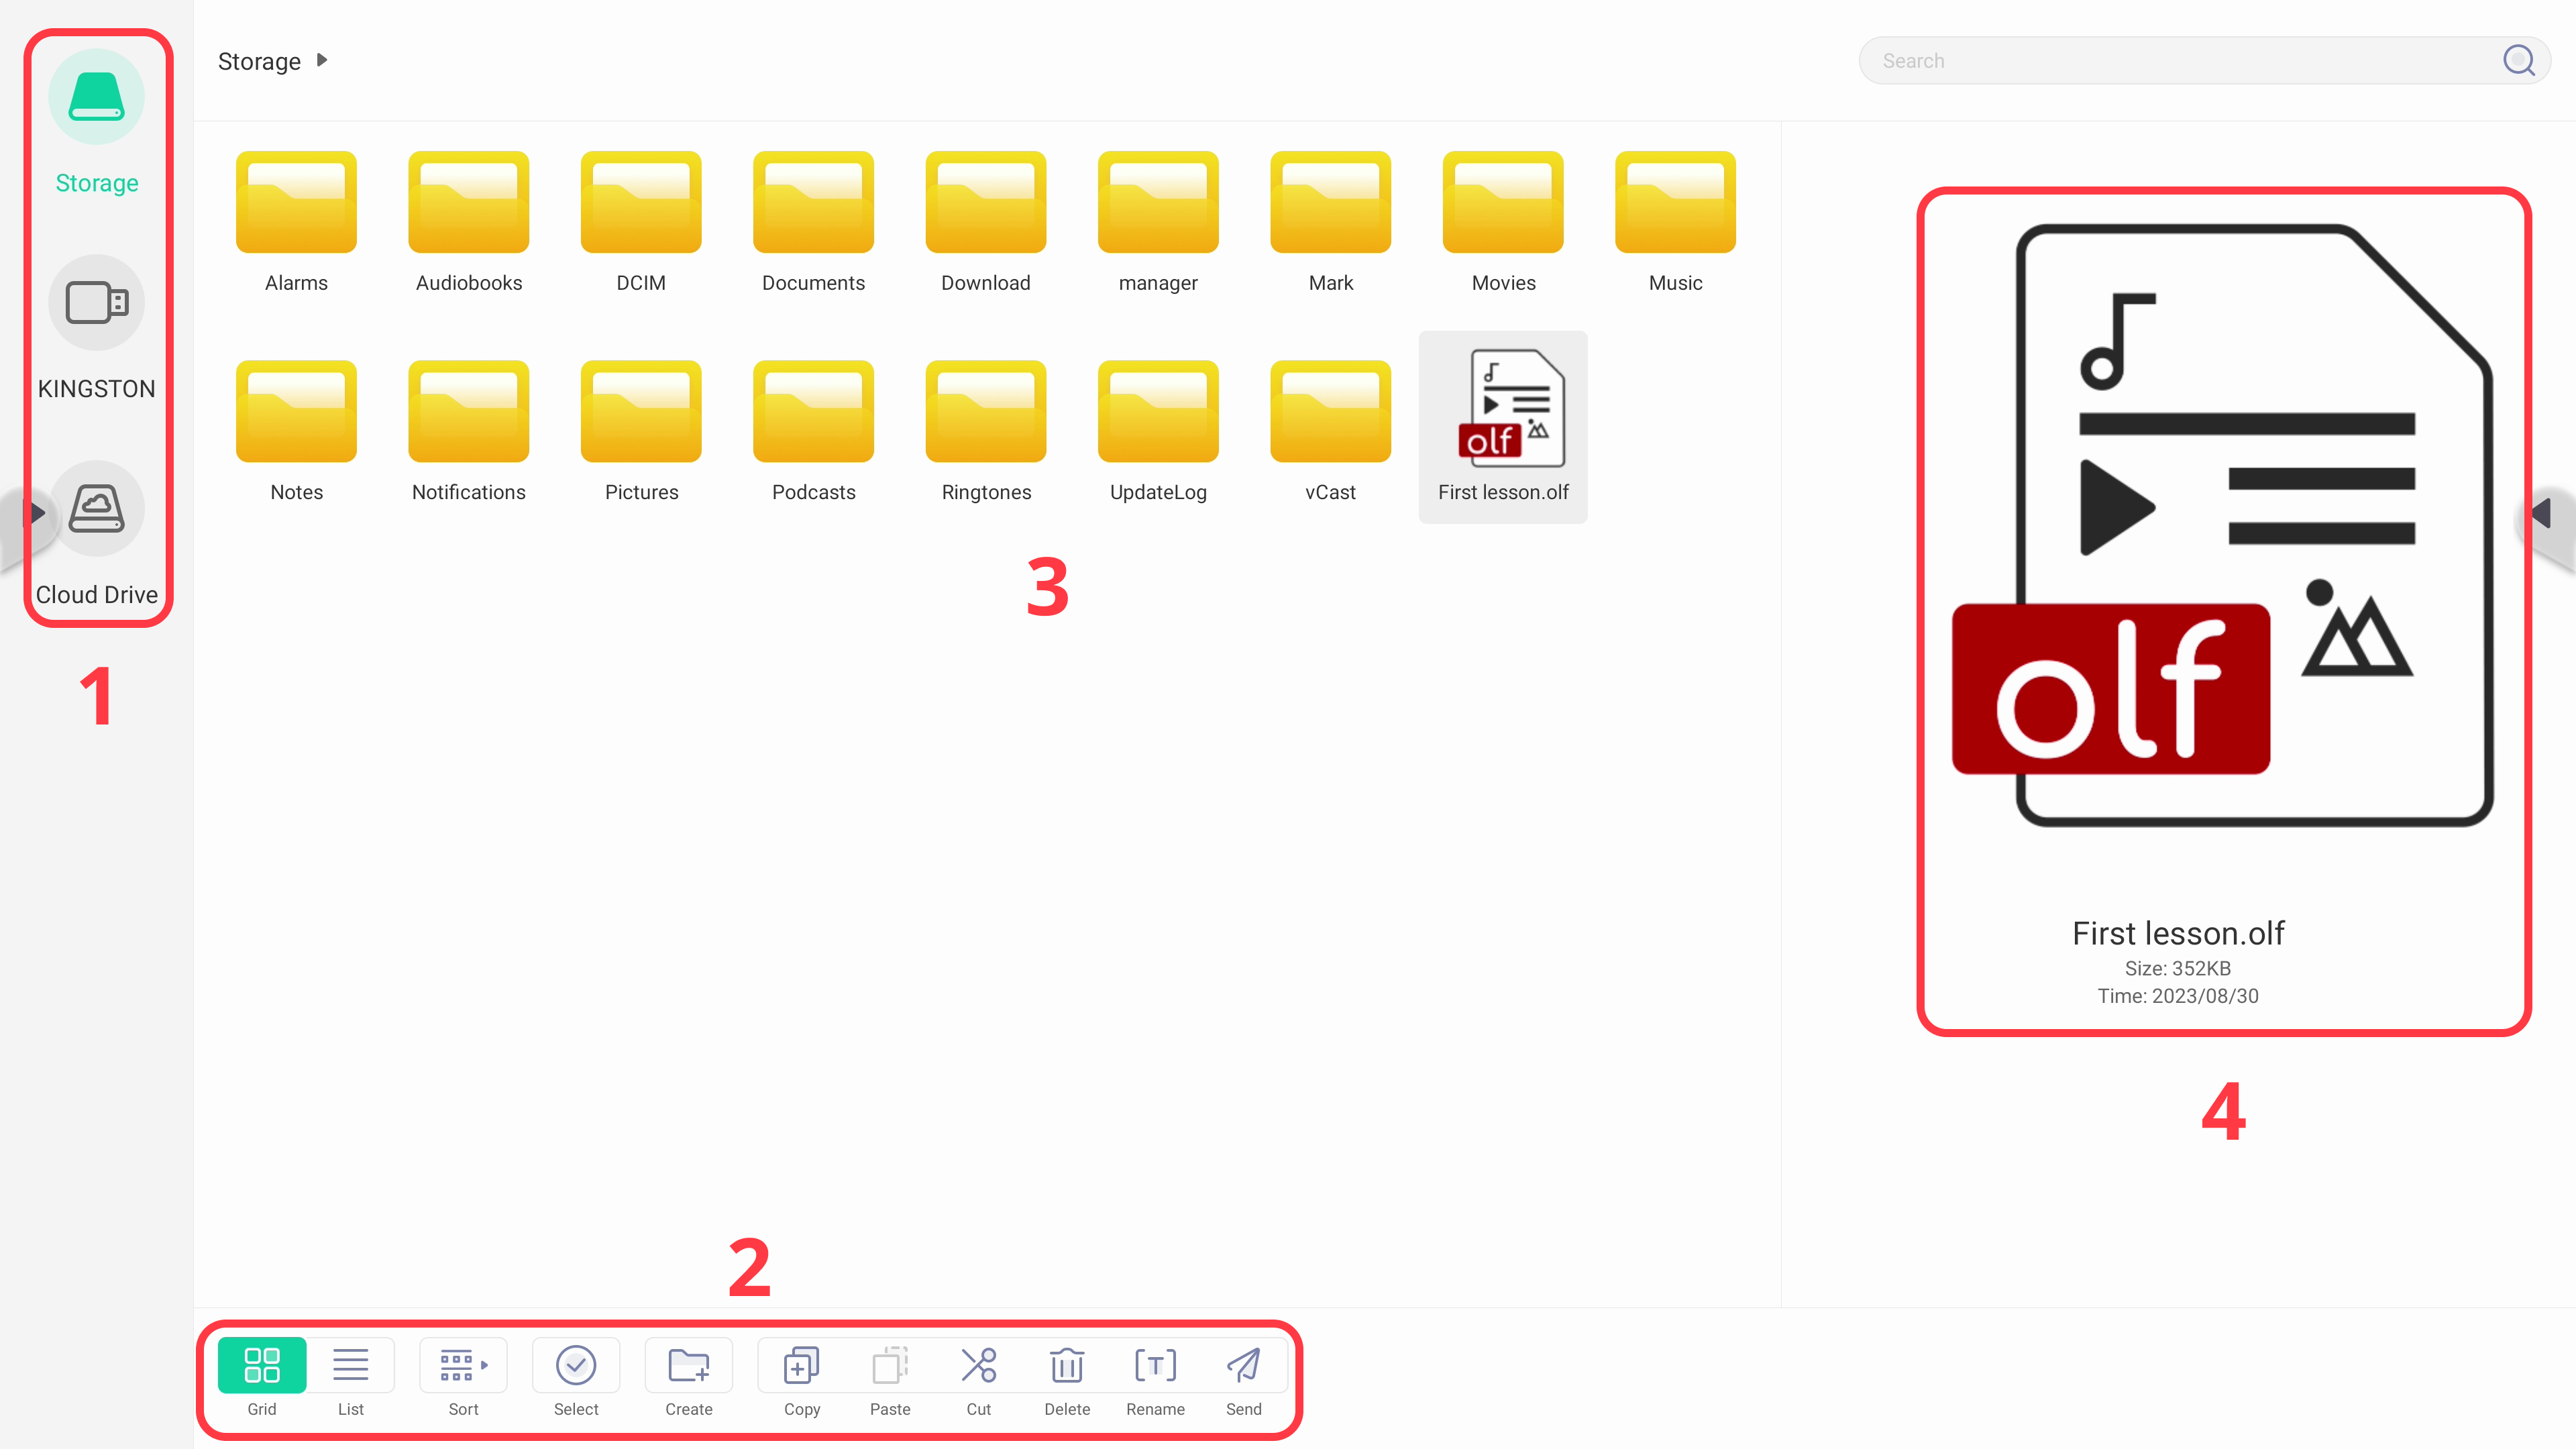
Where:
Storage categories
Options menu
Folders and files
File information
Use the following options to manage your files:
| Option | Description |
|---|---|
 |
Grid view Present folders and files in a grid. |
 |
List view Present folders and files in a list. |
 |
Filter Sort folders and files by categories. |
 |
Select Enable to select folders and files by tapping. |
 |
Create Create a new folder. |
 |
Copy Copy the selected folders and files to the clipboard. |
 |
Paste Paste copied items into the current folder. |
 |
Cut Cut the selected folders and files to the clipboard. |
 |
Delete Delete the selected folders and files. |
 |
Rename Rename the currently selected folder or file. |
 |
Send Send folders and files by email. |
 Miracast
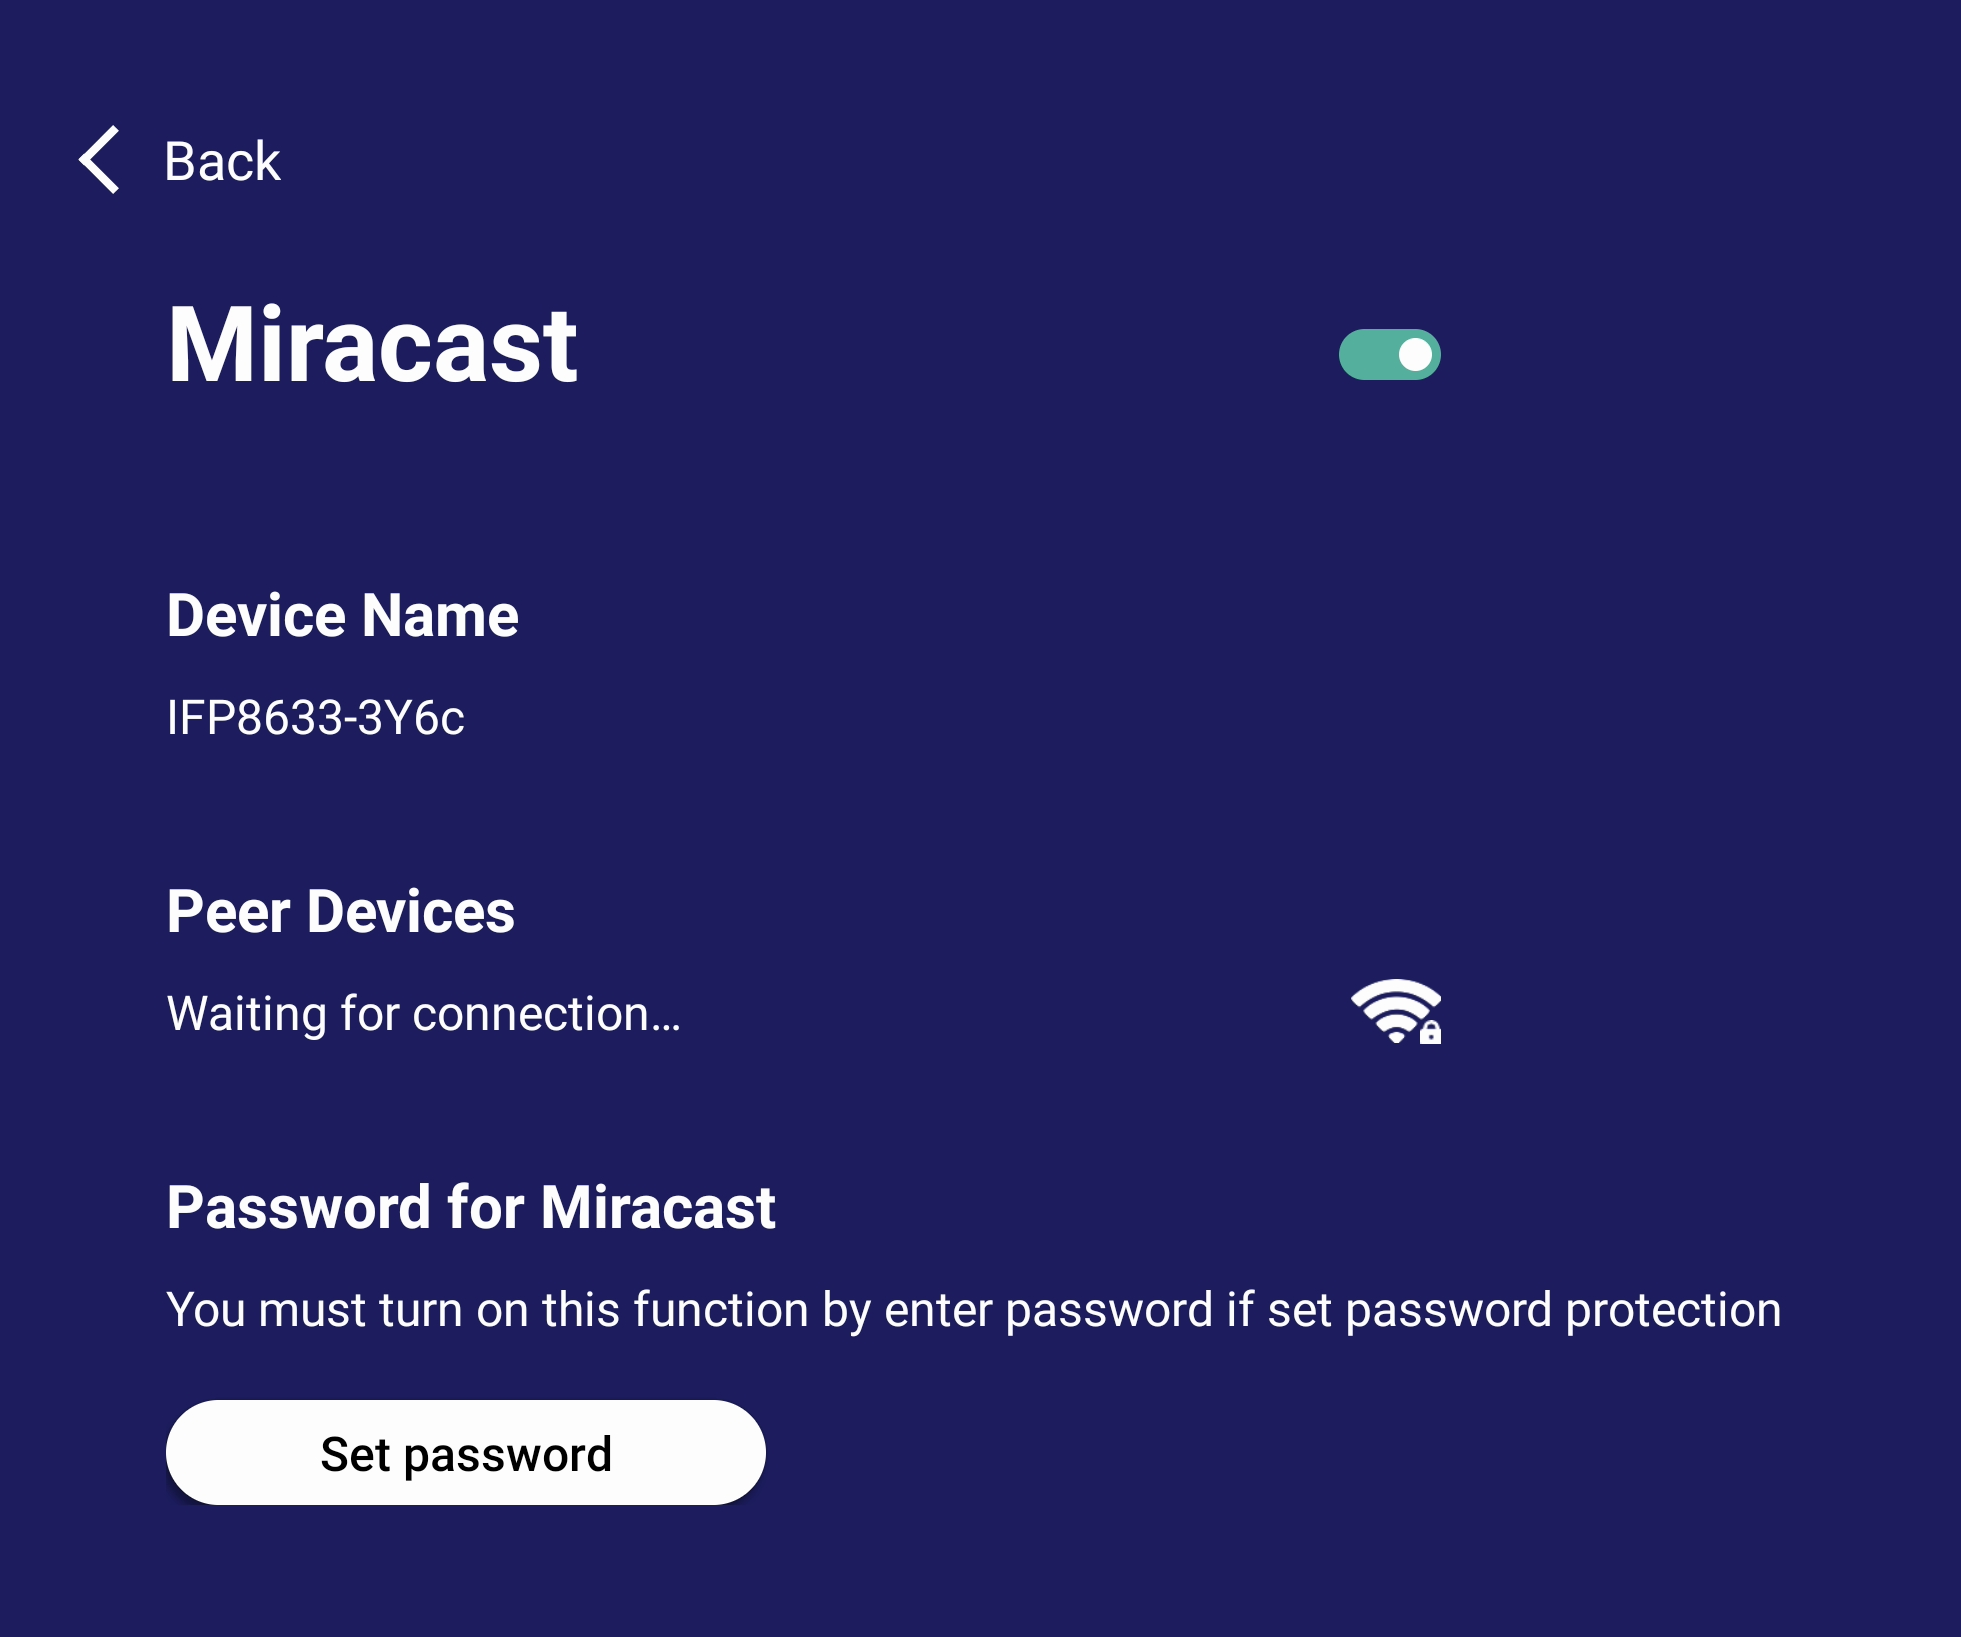
Miracast allows Windows and Android devices to wirelessly cast their screens to your ViewBoard. The Miracast app includes the option to require a password from any device attempting to cast.
 PIP
PIP
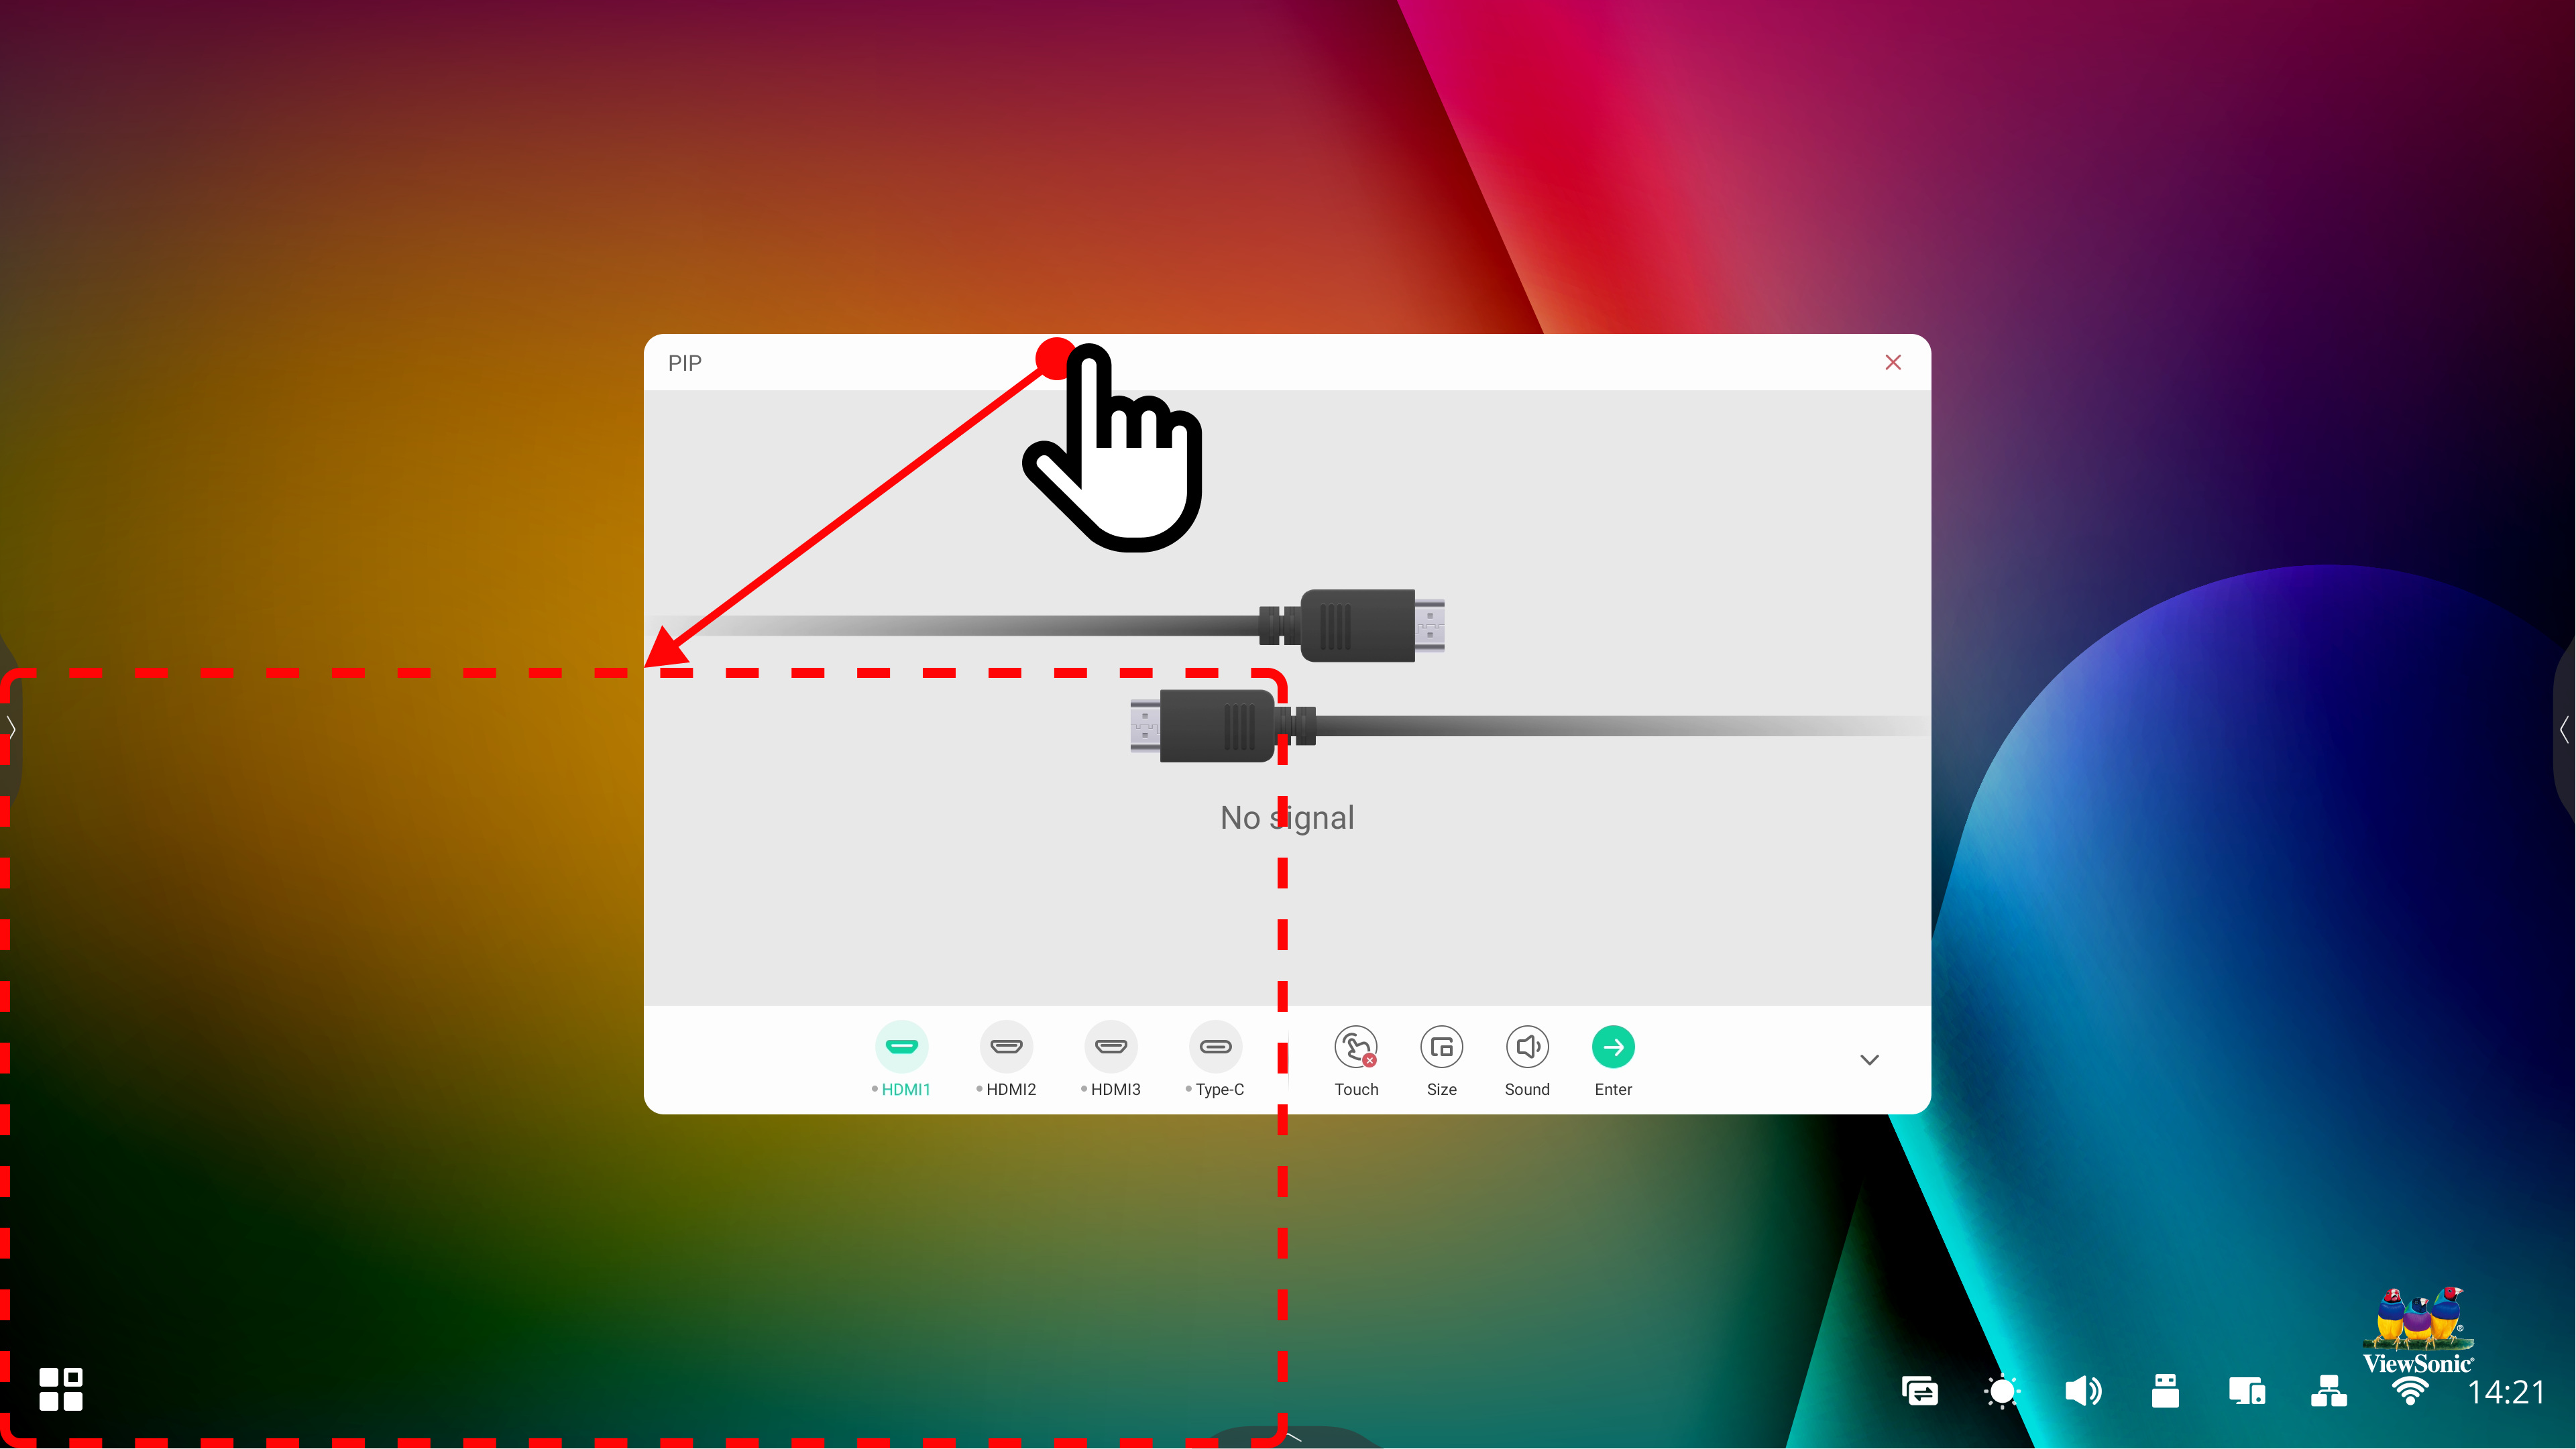
Add an inset window that mirrors and streams a live feed from the screen of an external device. The device to stream must be connected to an external input source. PIP stands for Picture-in-Picture.
To use the PIP feature, open the side toolbar and select All Apps > PIP. Use the following options to interact with the PIP window:
- Press and drag the window to change the position of the inset window. .
- Tap any of the input source icons to switch input source.
- Tap Touch to enable touch interaction with the input source.
- Tap Size to adjust the size of the inset window.
- Tap Sound to adjust the volume of the input source.
- Tap Enter to switch to the PIP input source.