Display settings (IFP52)
This article provides an overview of different audio, screen, and other display settings for all input sources connected to your ViewBoard. Looking for settings related to ViewBoard OS? Start here.
Accessing display settings
Access display settings through one of two options:
- Option 1: Press-hold anywhere on the home screen background. This method gives access to General and Widget settings.
-
Option 2: Press the input button
 on the remote control. This method gives access to General and Input settings.
- This menu can also be accessed by pressing the side toolbar button
 and then the input settings button
  .
.
- This menu can also be accessed by pressing the side toolbar button
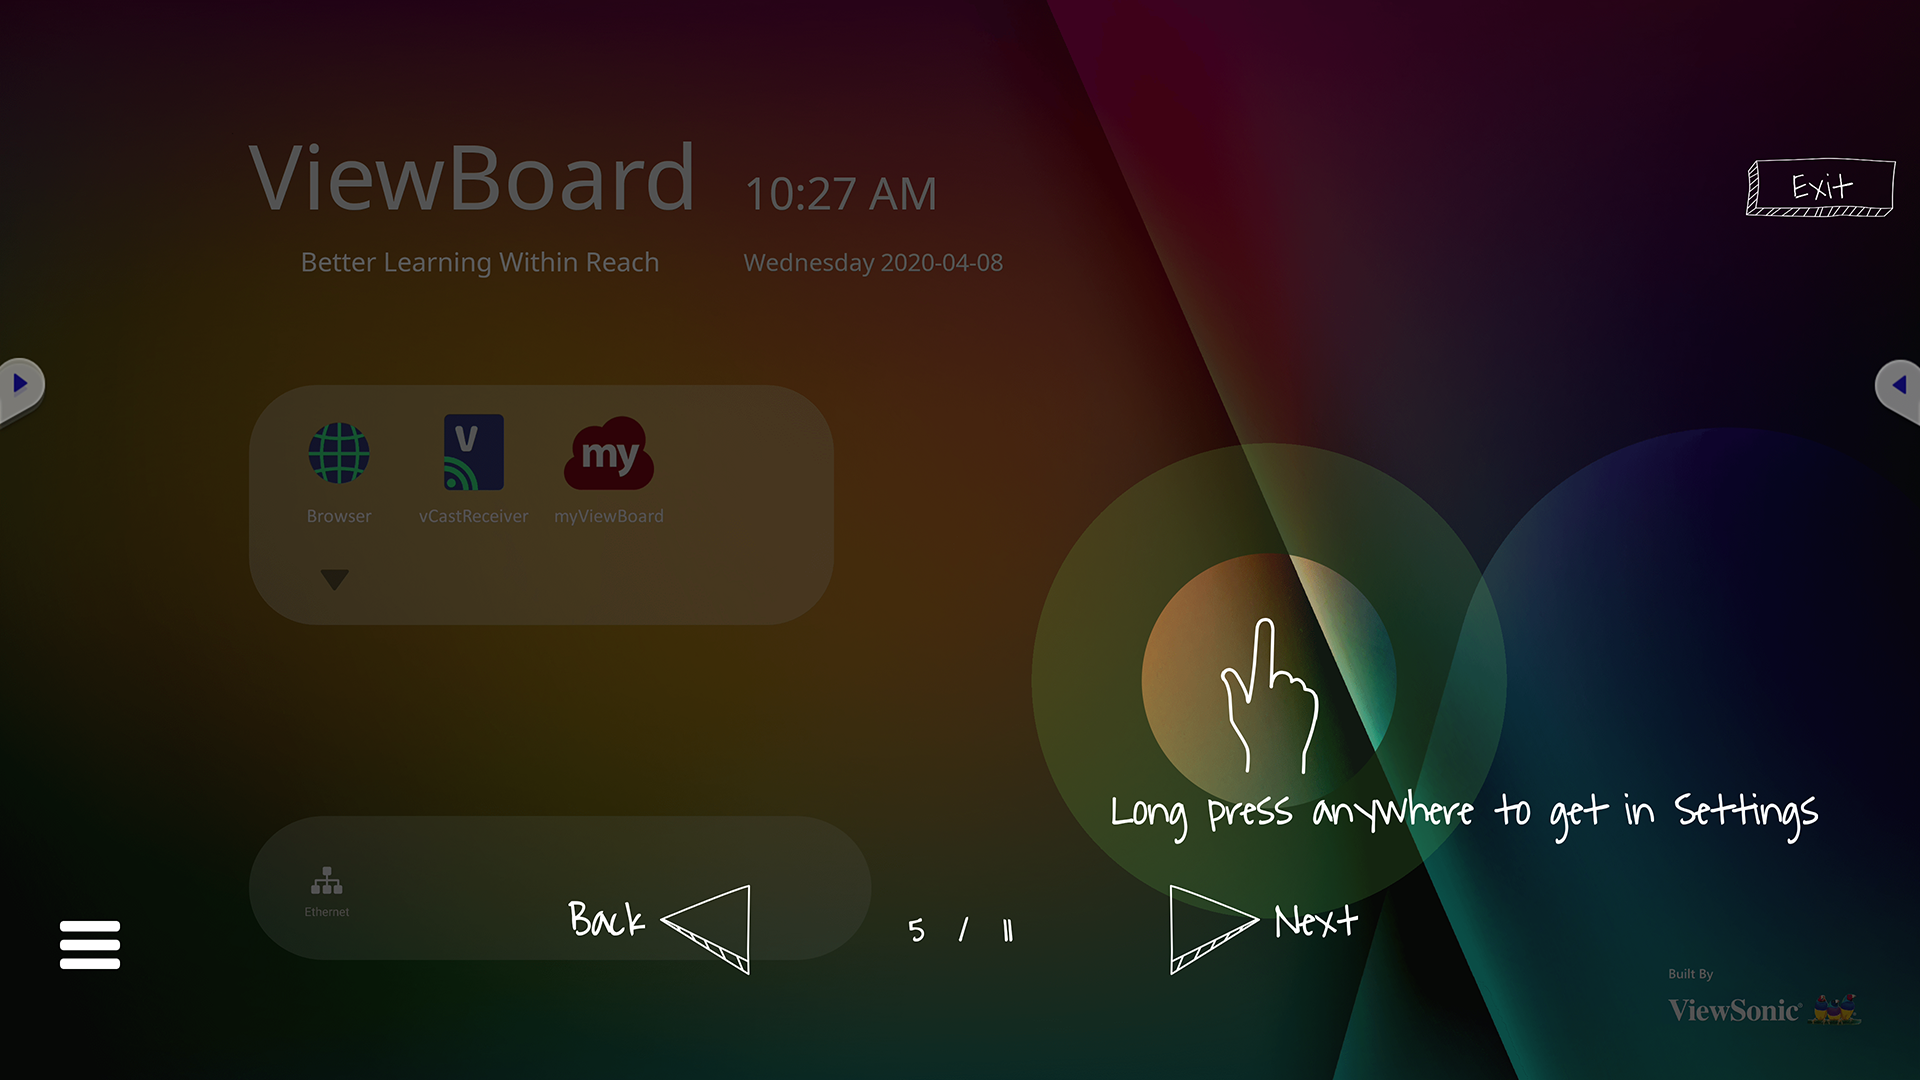 Option 1: Instructions to press-hold on the home screen background to open settings.
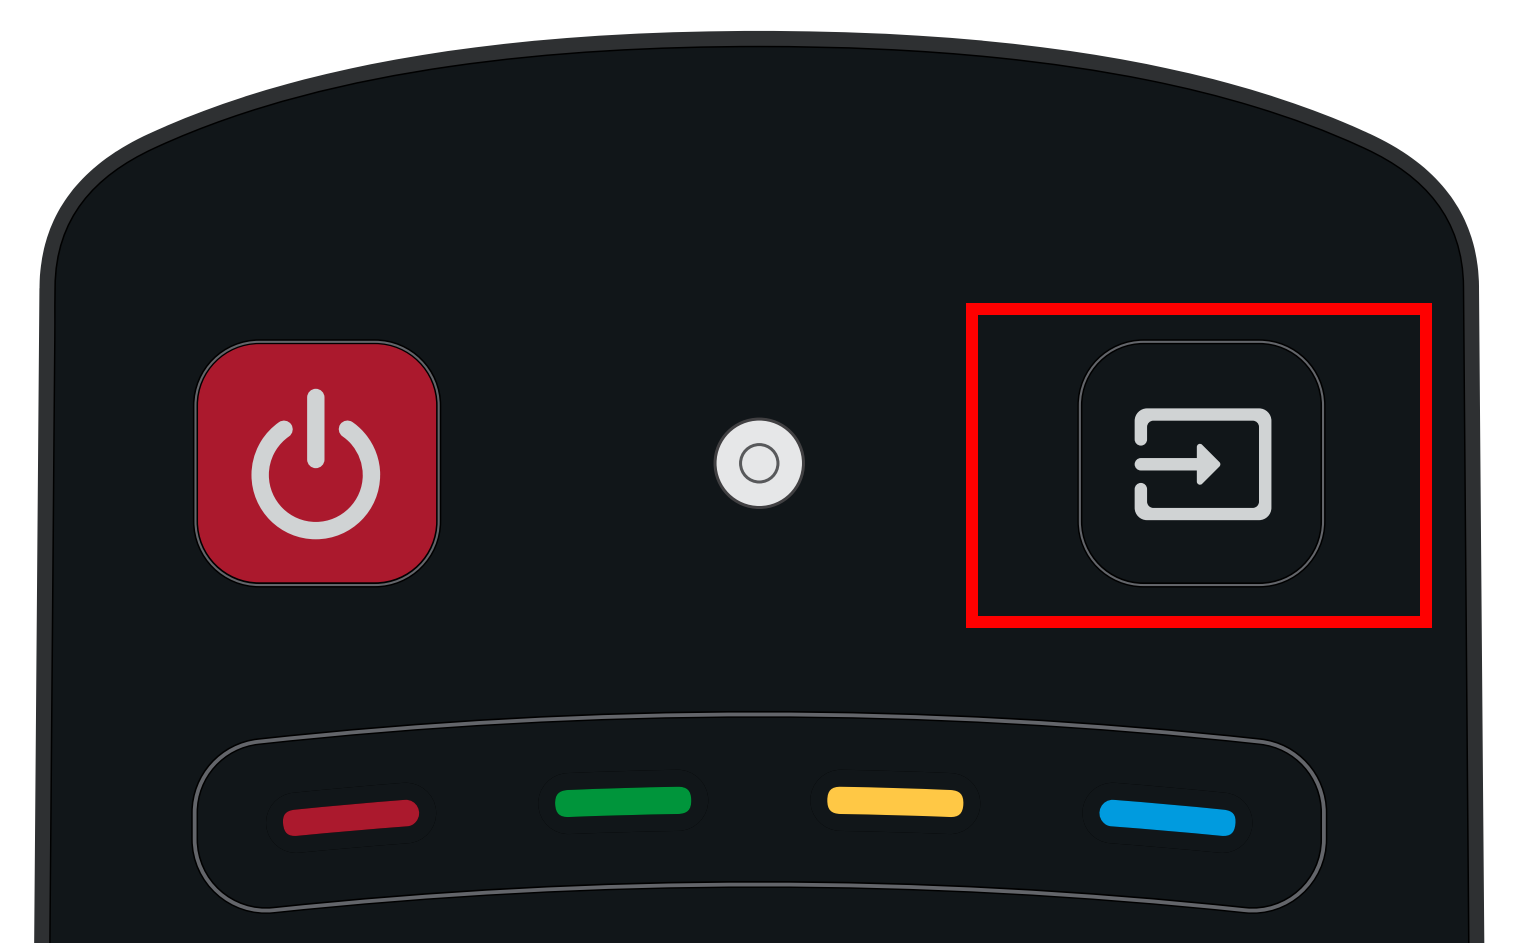 Option 2: Input button highlighted to open settings.
To exit any settings menu, press the back button  on the remote control or touch any blank area in a settings menu.
General
Adjust basic display settings from the General settings menu.
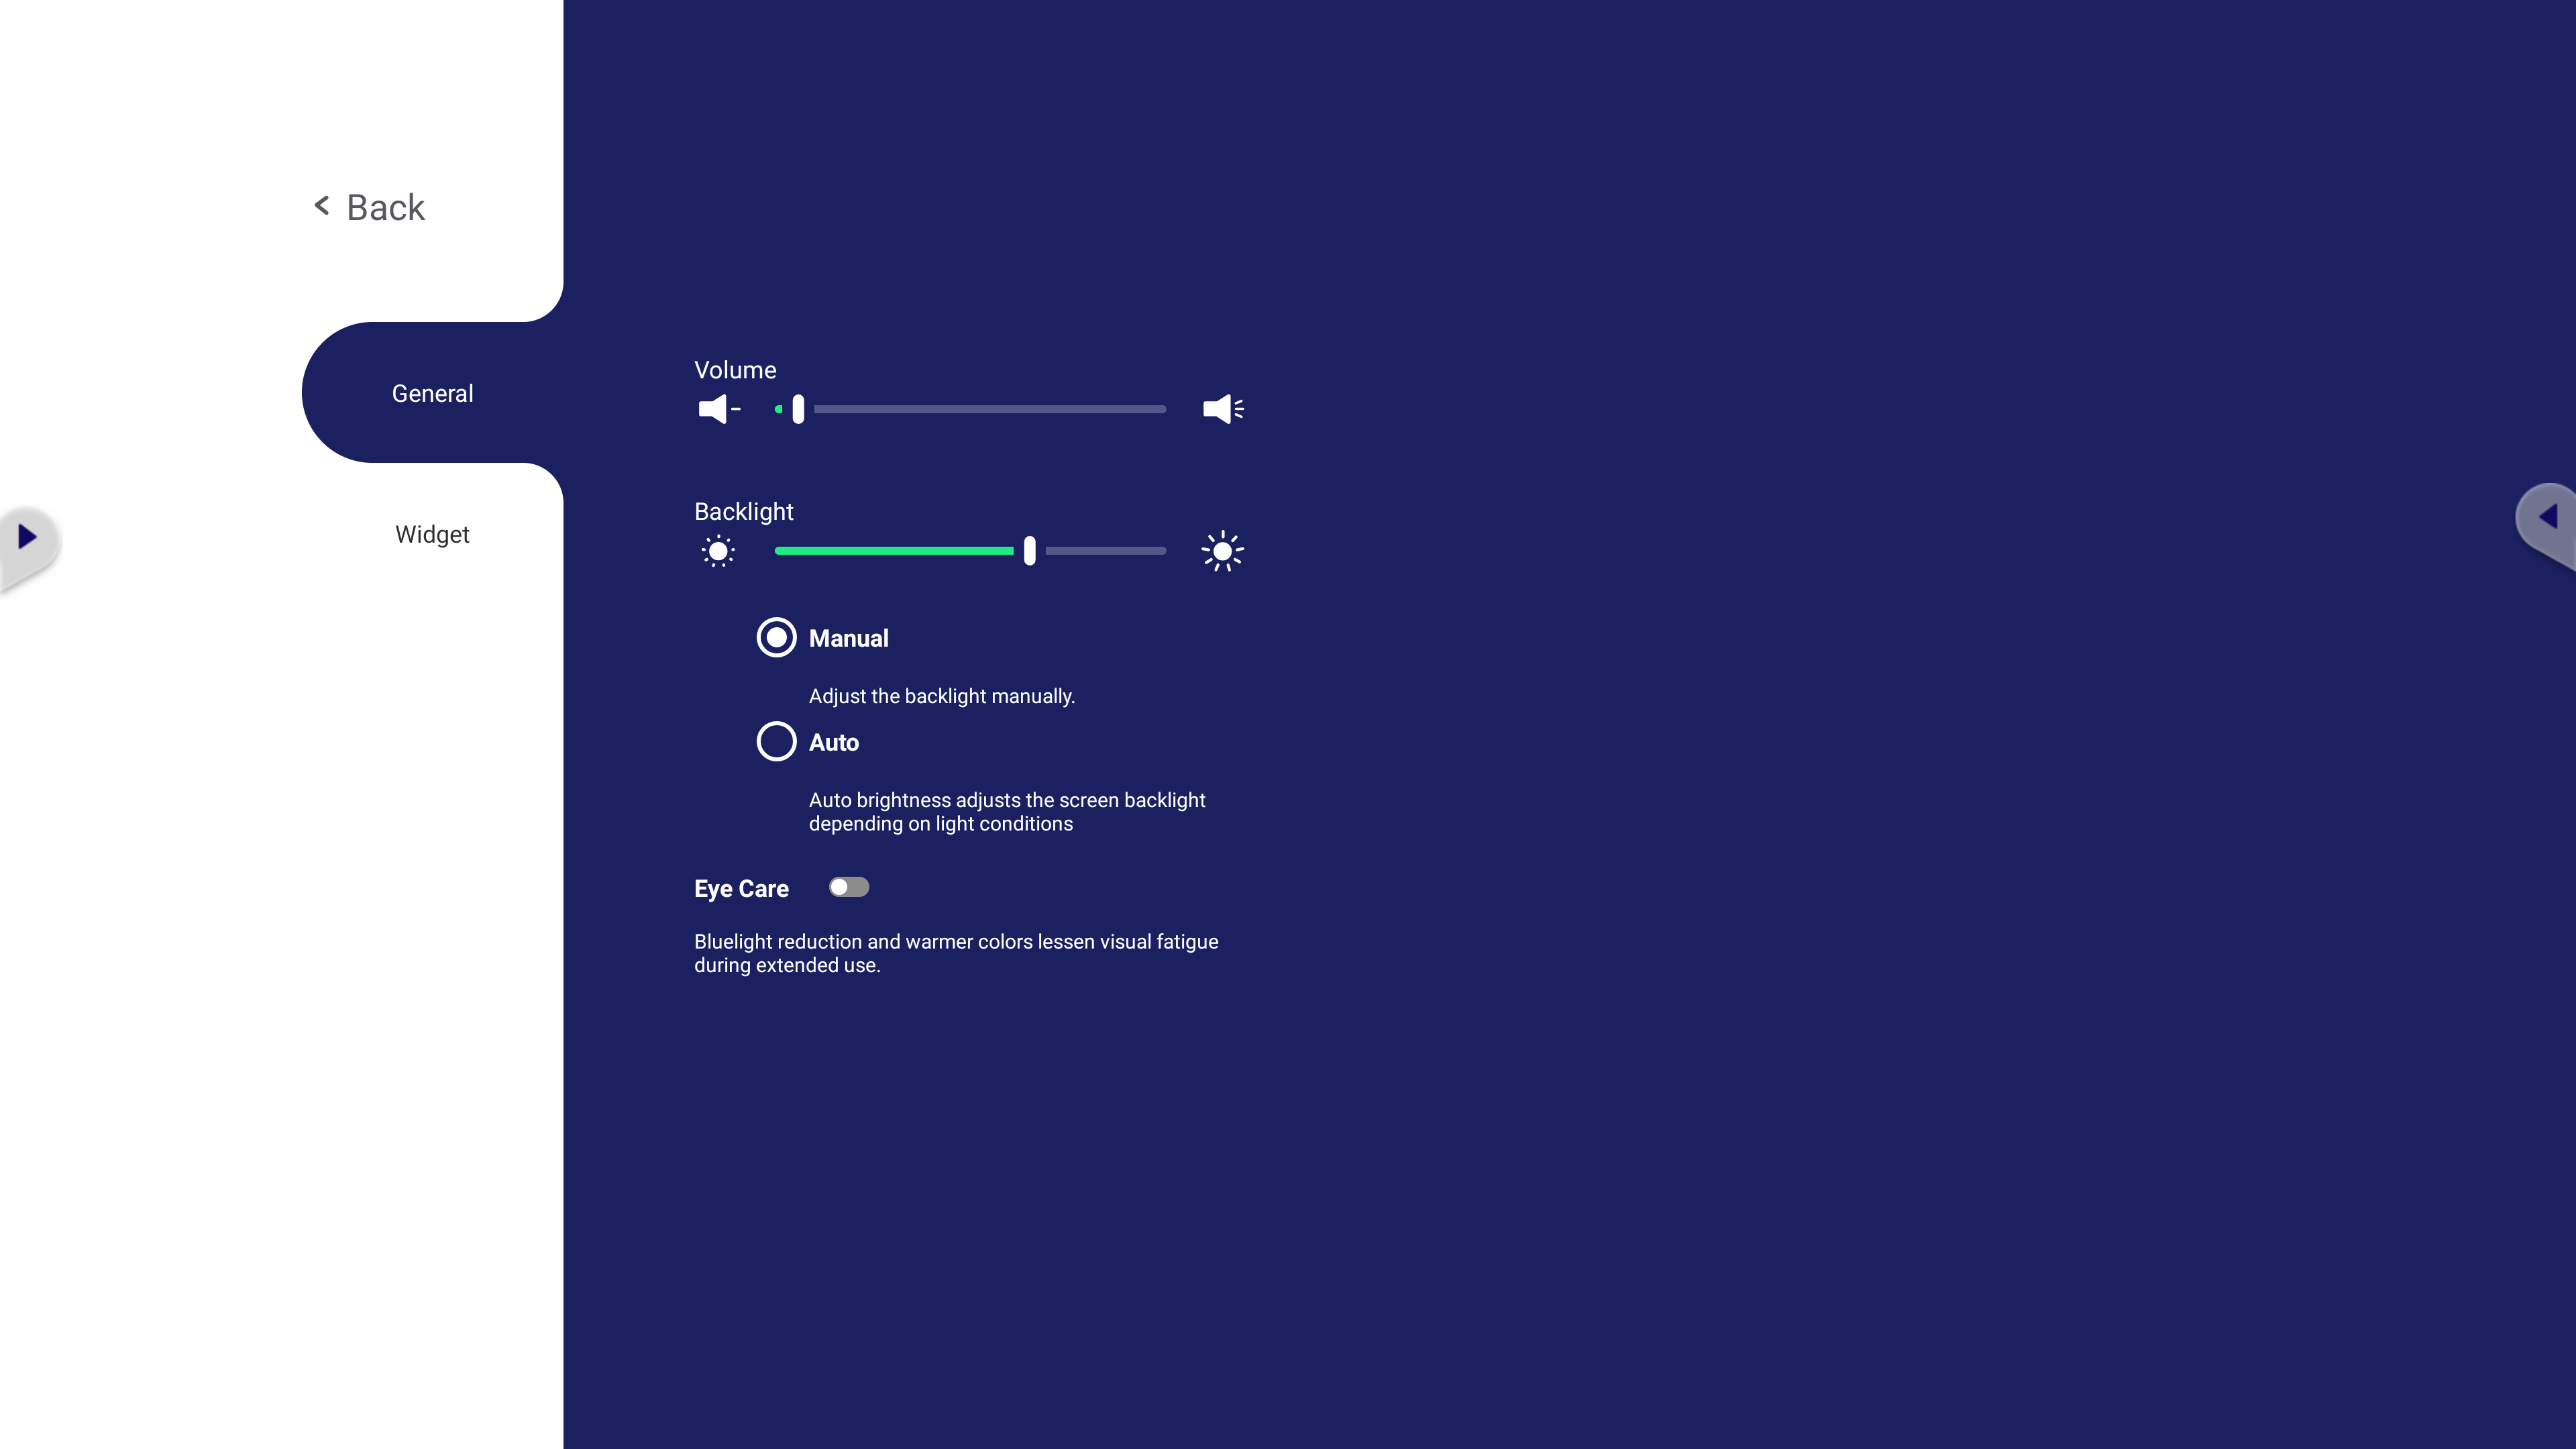 General settings menu.
-
Volume:
- Drag the volume slider to adjust the volume level.
- Press
 and
and  on the remote control in the volume section
  to adjust the volume level.
 - Press the mute button
 on the remote control to enable or disable volume.
-
Backlight:
- Drag the brightness slider to adjust the backlight level.
- Press ▼ and ▲ on the remote control in the brightness section
 to adjust the brightness level.
 - Set backlight to Auto to allow your device to detect your room's lighting and adjust lighting accordingly.
- Enable Eye Care mode to reduce blue light colors for less eye strain.
Input
Select your desired input source and open the input's settings through this menu.
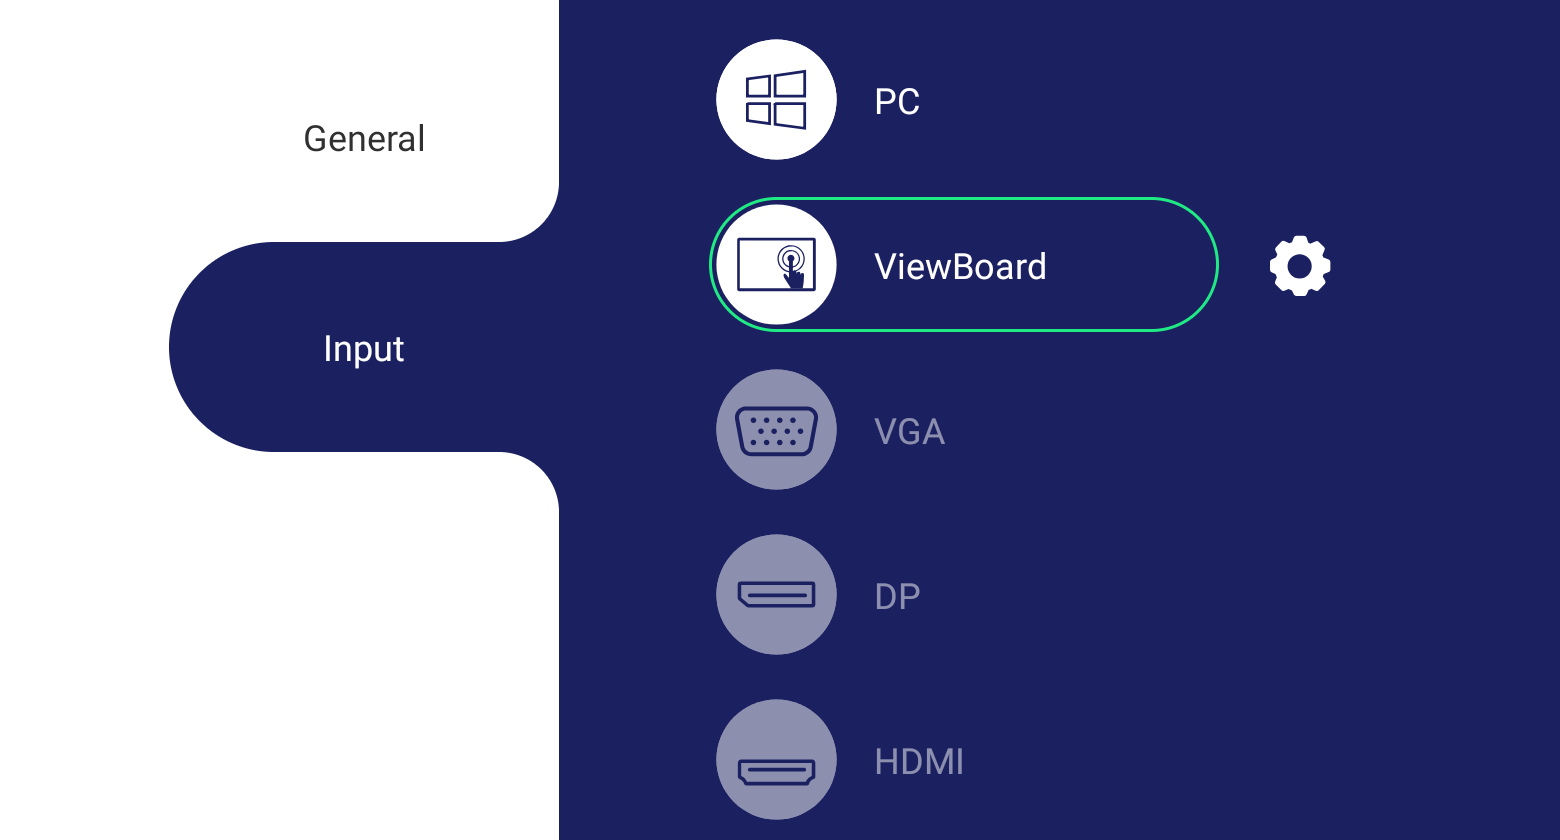 Input settings menu with ViewBoard input source selected. Note: PC input source is only available when a slot-in computer is selected.
- To change input source:
- On the remote control, press ▼/▲ to highlight your desired input source and then OK to select it.
- On the ViewBoard, press your desired input source twice to select it.
- To access an input source's settings, the input source must be active: On the ViewBoard, press the settings button
 next to the currently selected input source.
Widget
Shortcut widgets can be added to the home screen through the Widget menu.
Note, widgets can only be customized by interacting with the ViewBoard by touch.
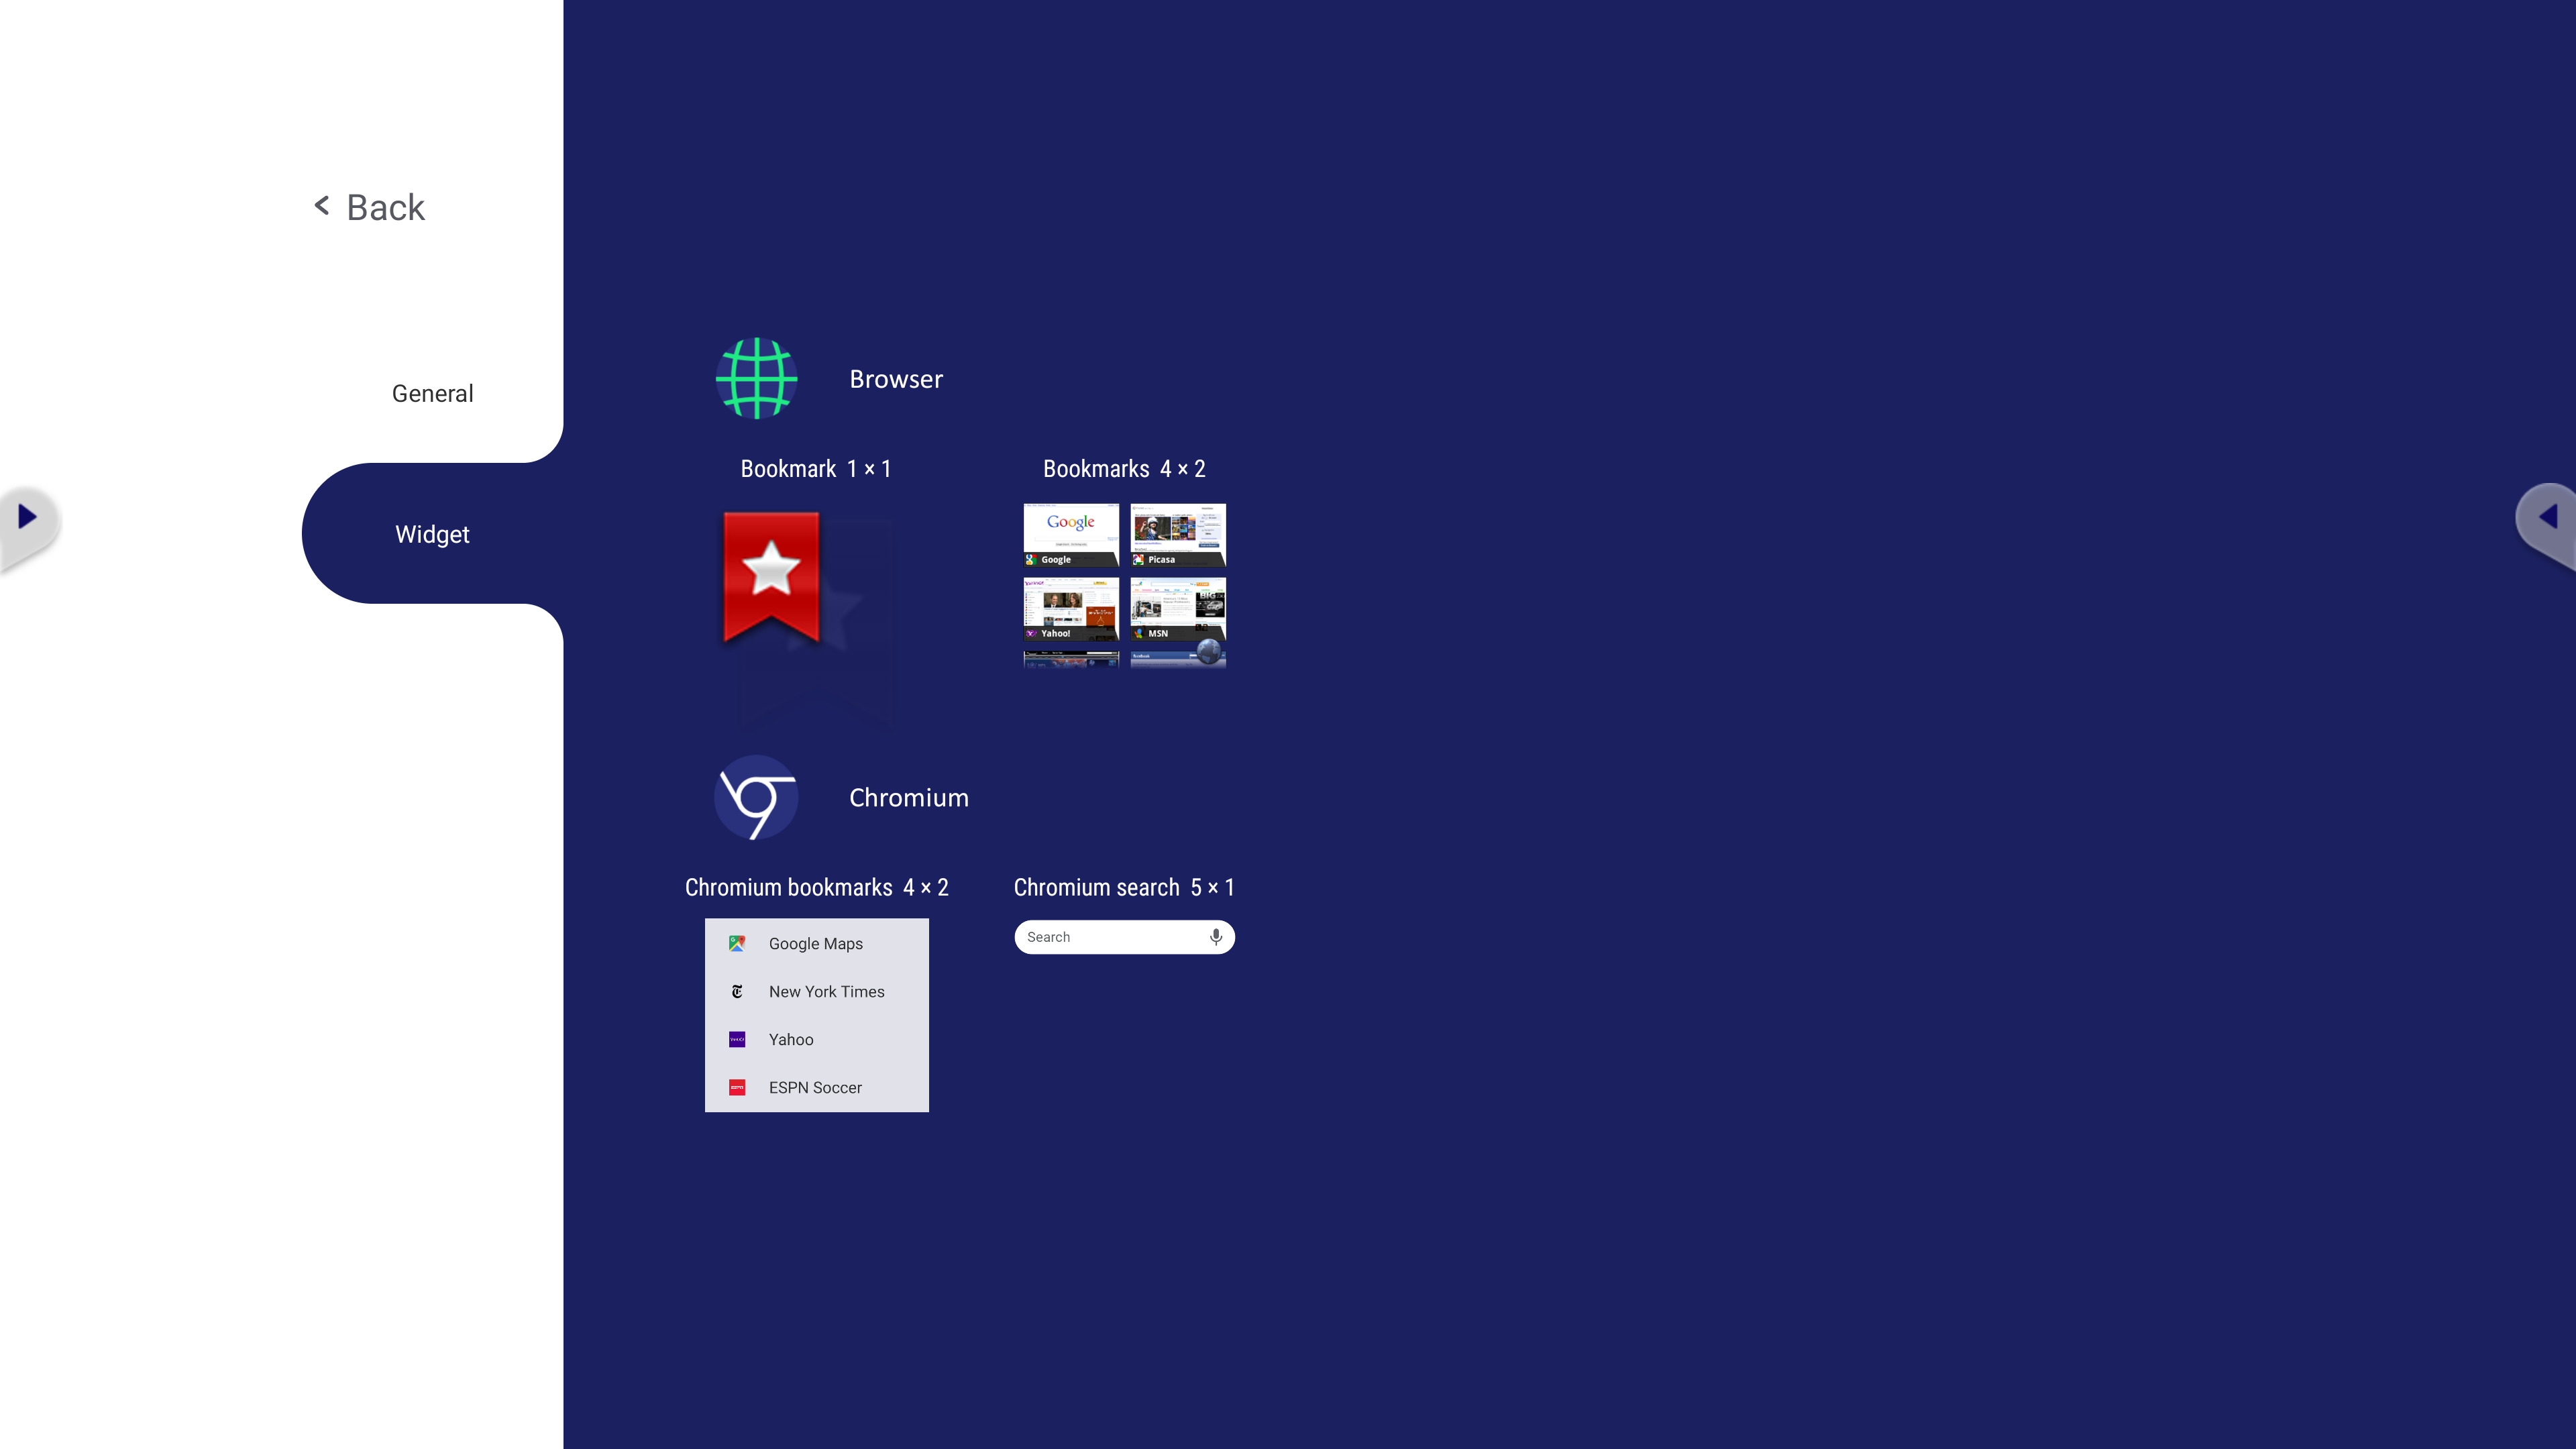 Widget menu.
To add a widget to the home screen:
- On the Widget menu, press and hold your desired widget.
- The home screen will appear. Drag the widget to your desired location.
- Depending on the size of the widget, you may have to place it on a new home screen.
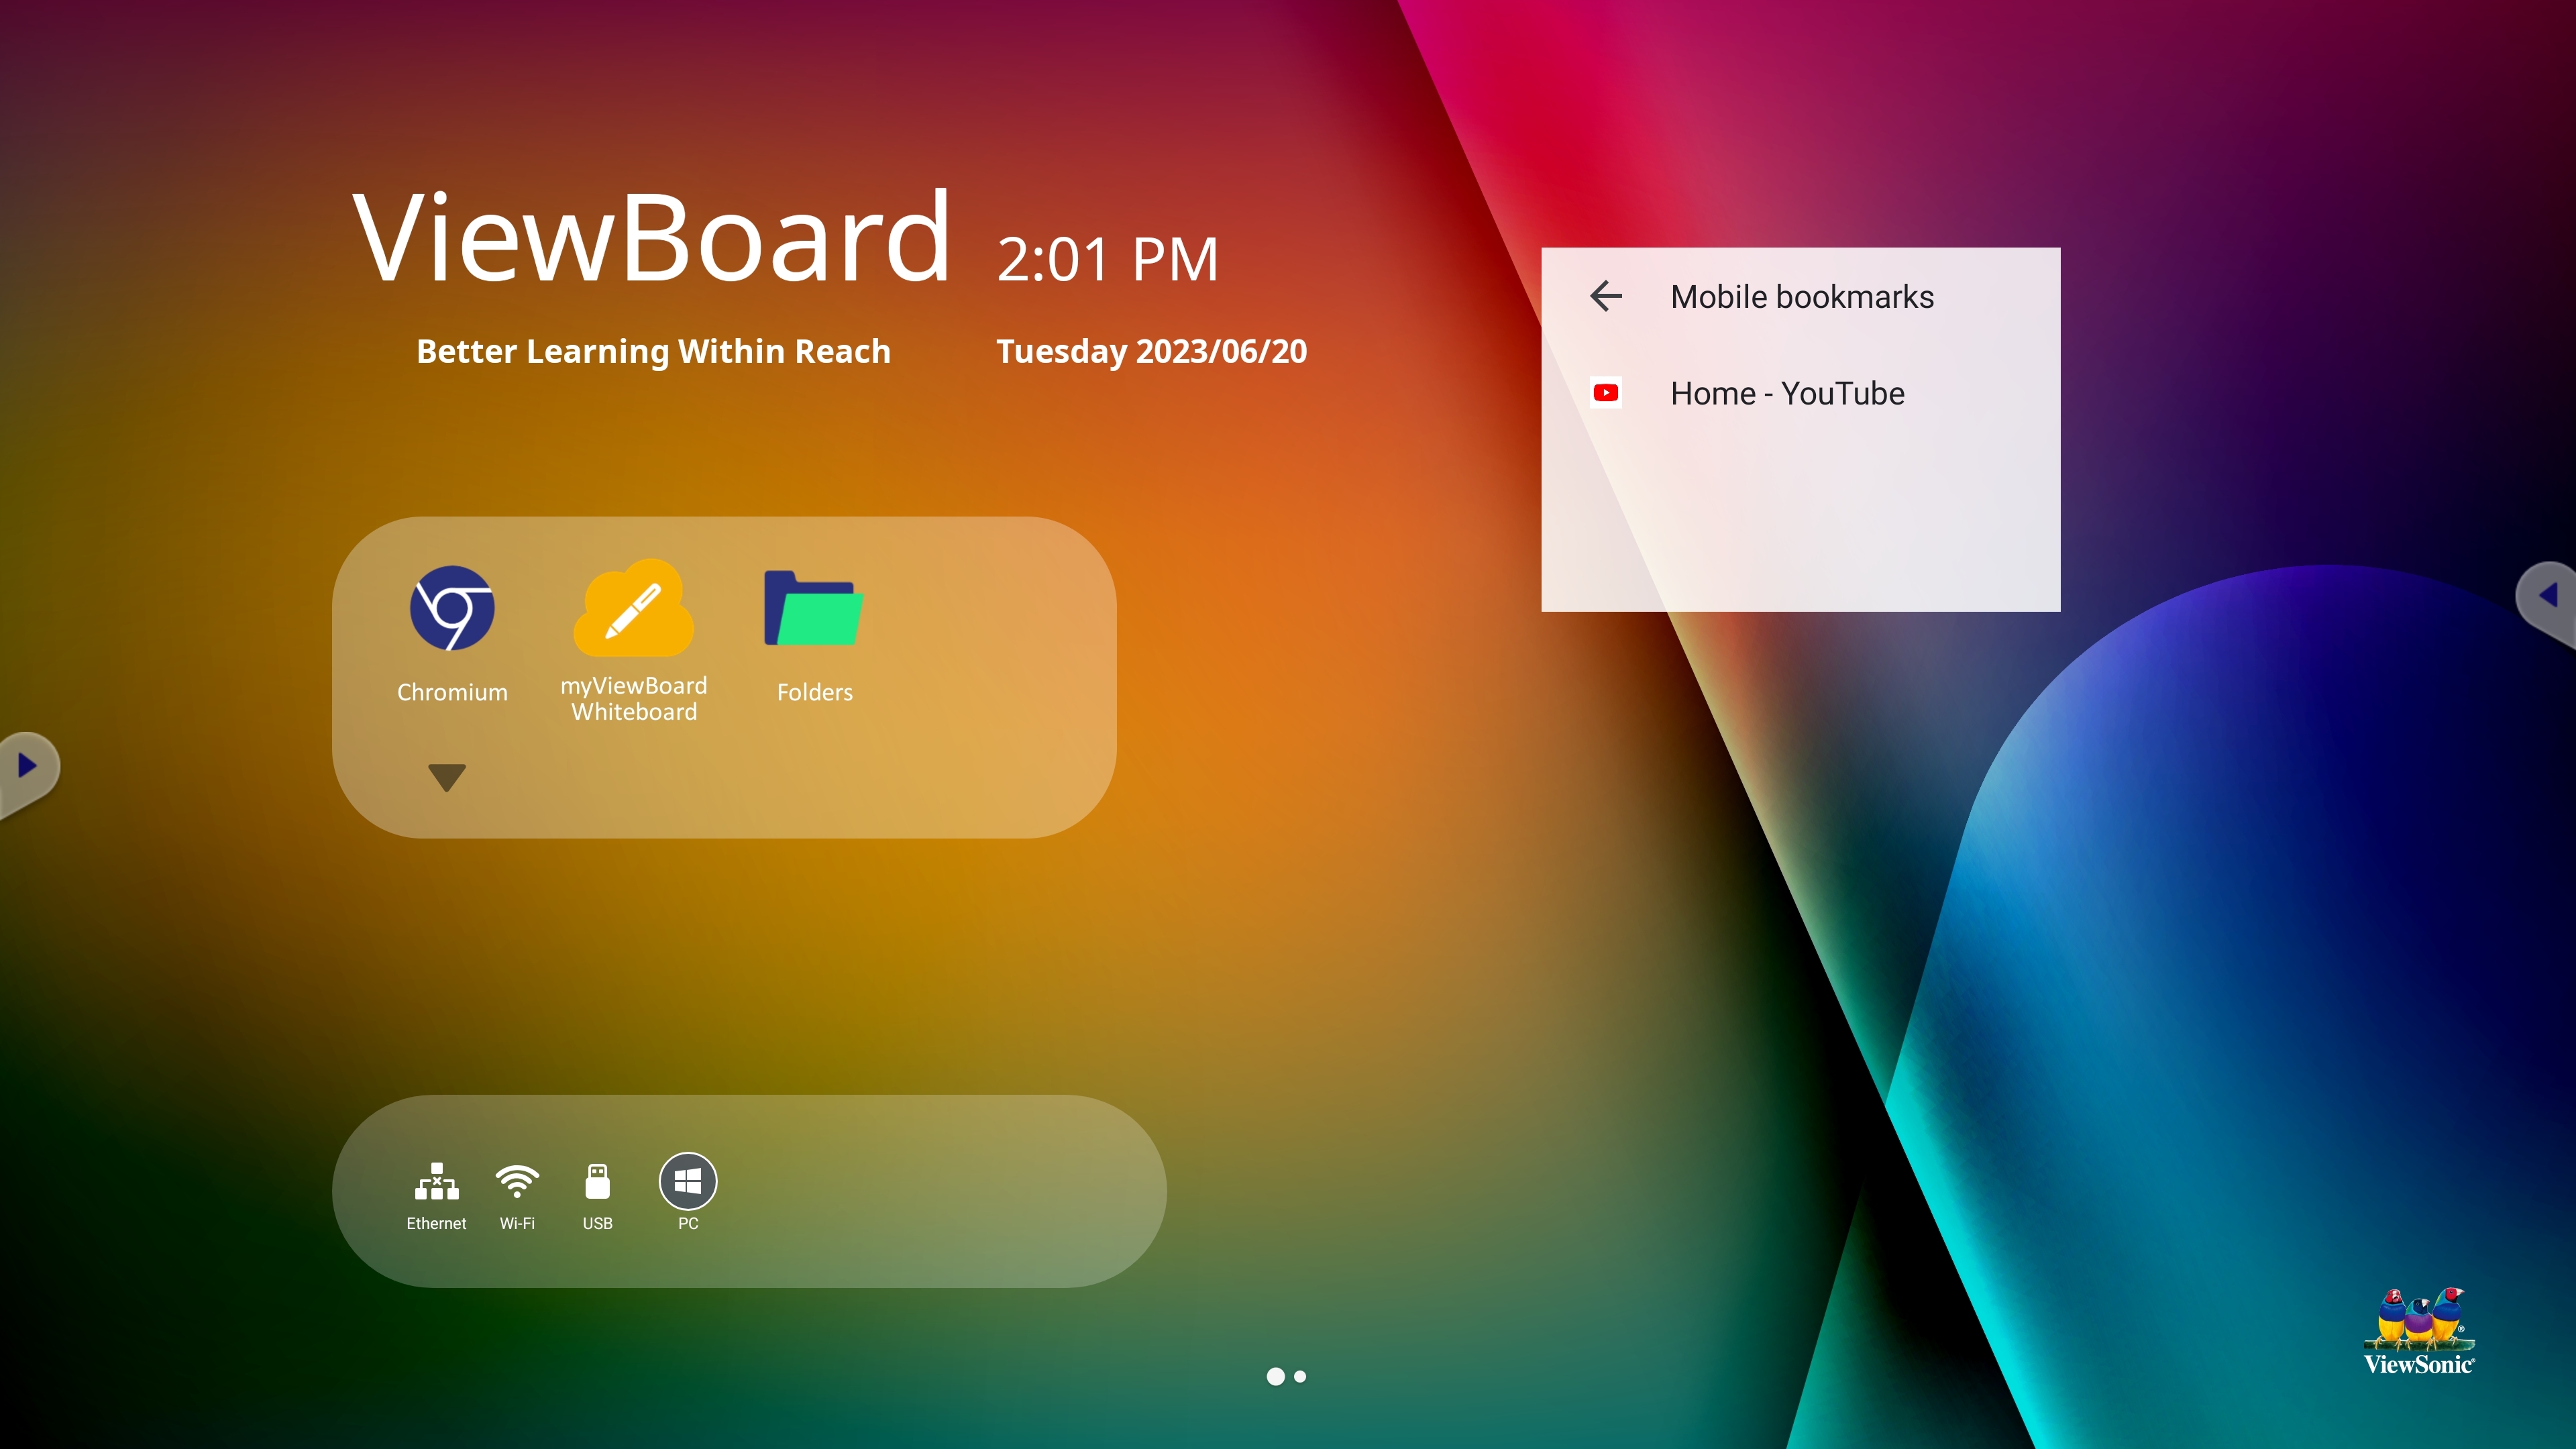 Home screen with Chromium bookmarks widget.
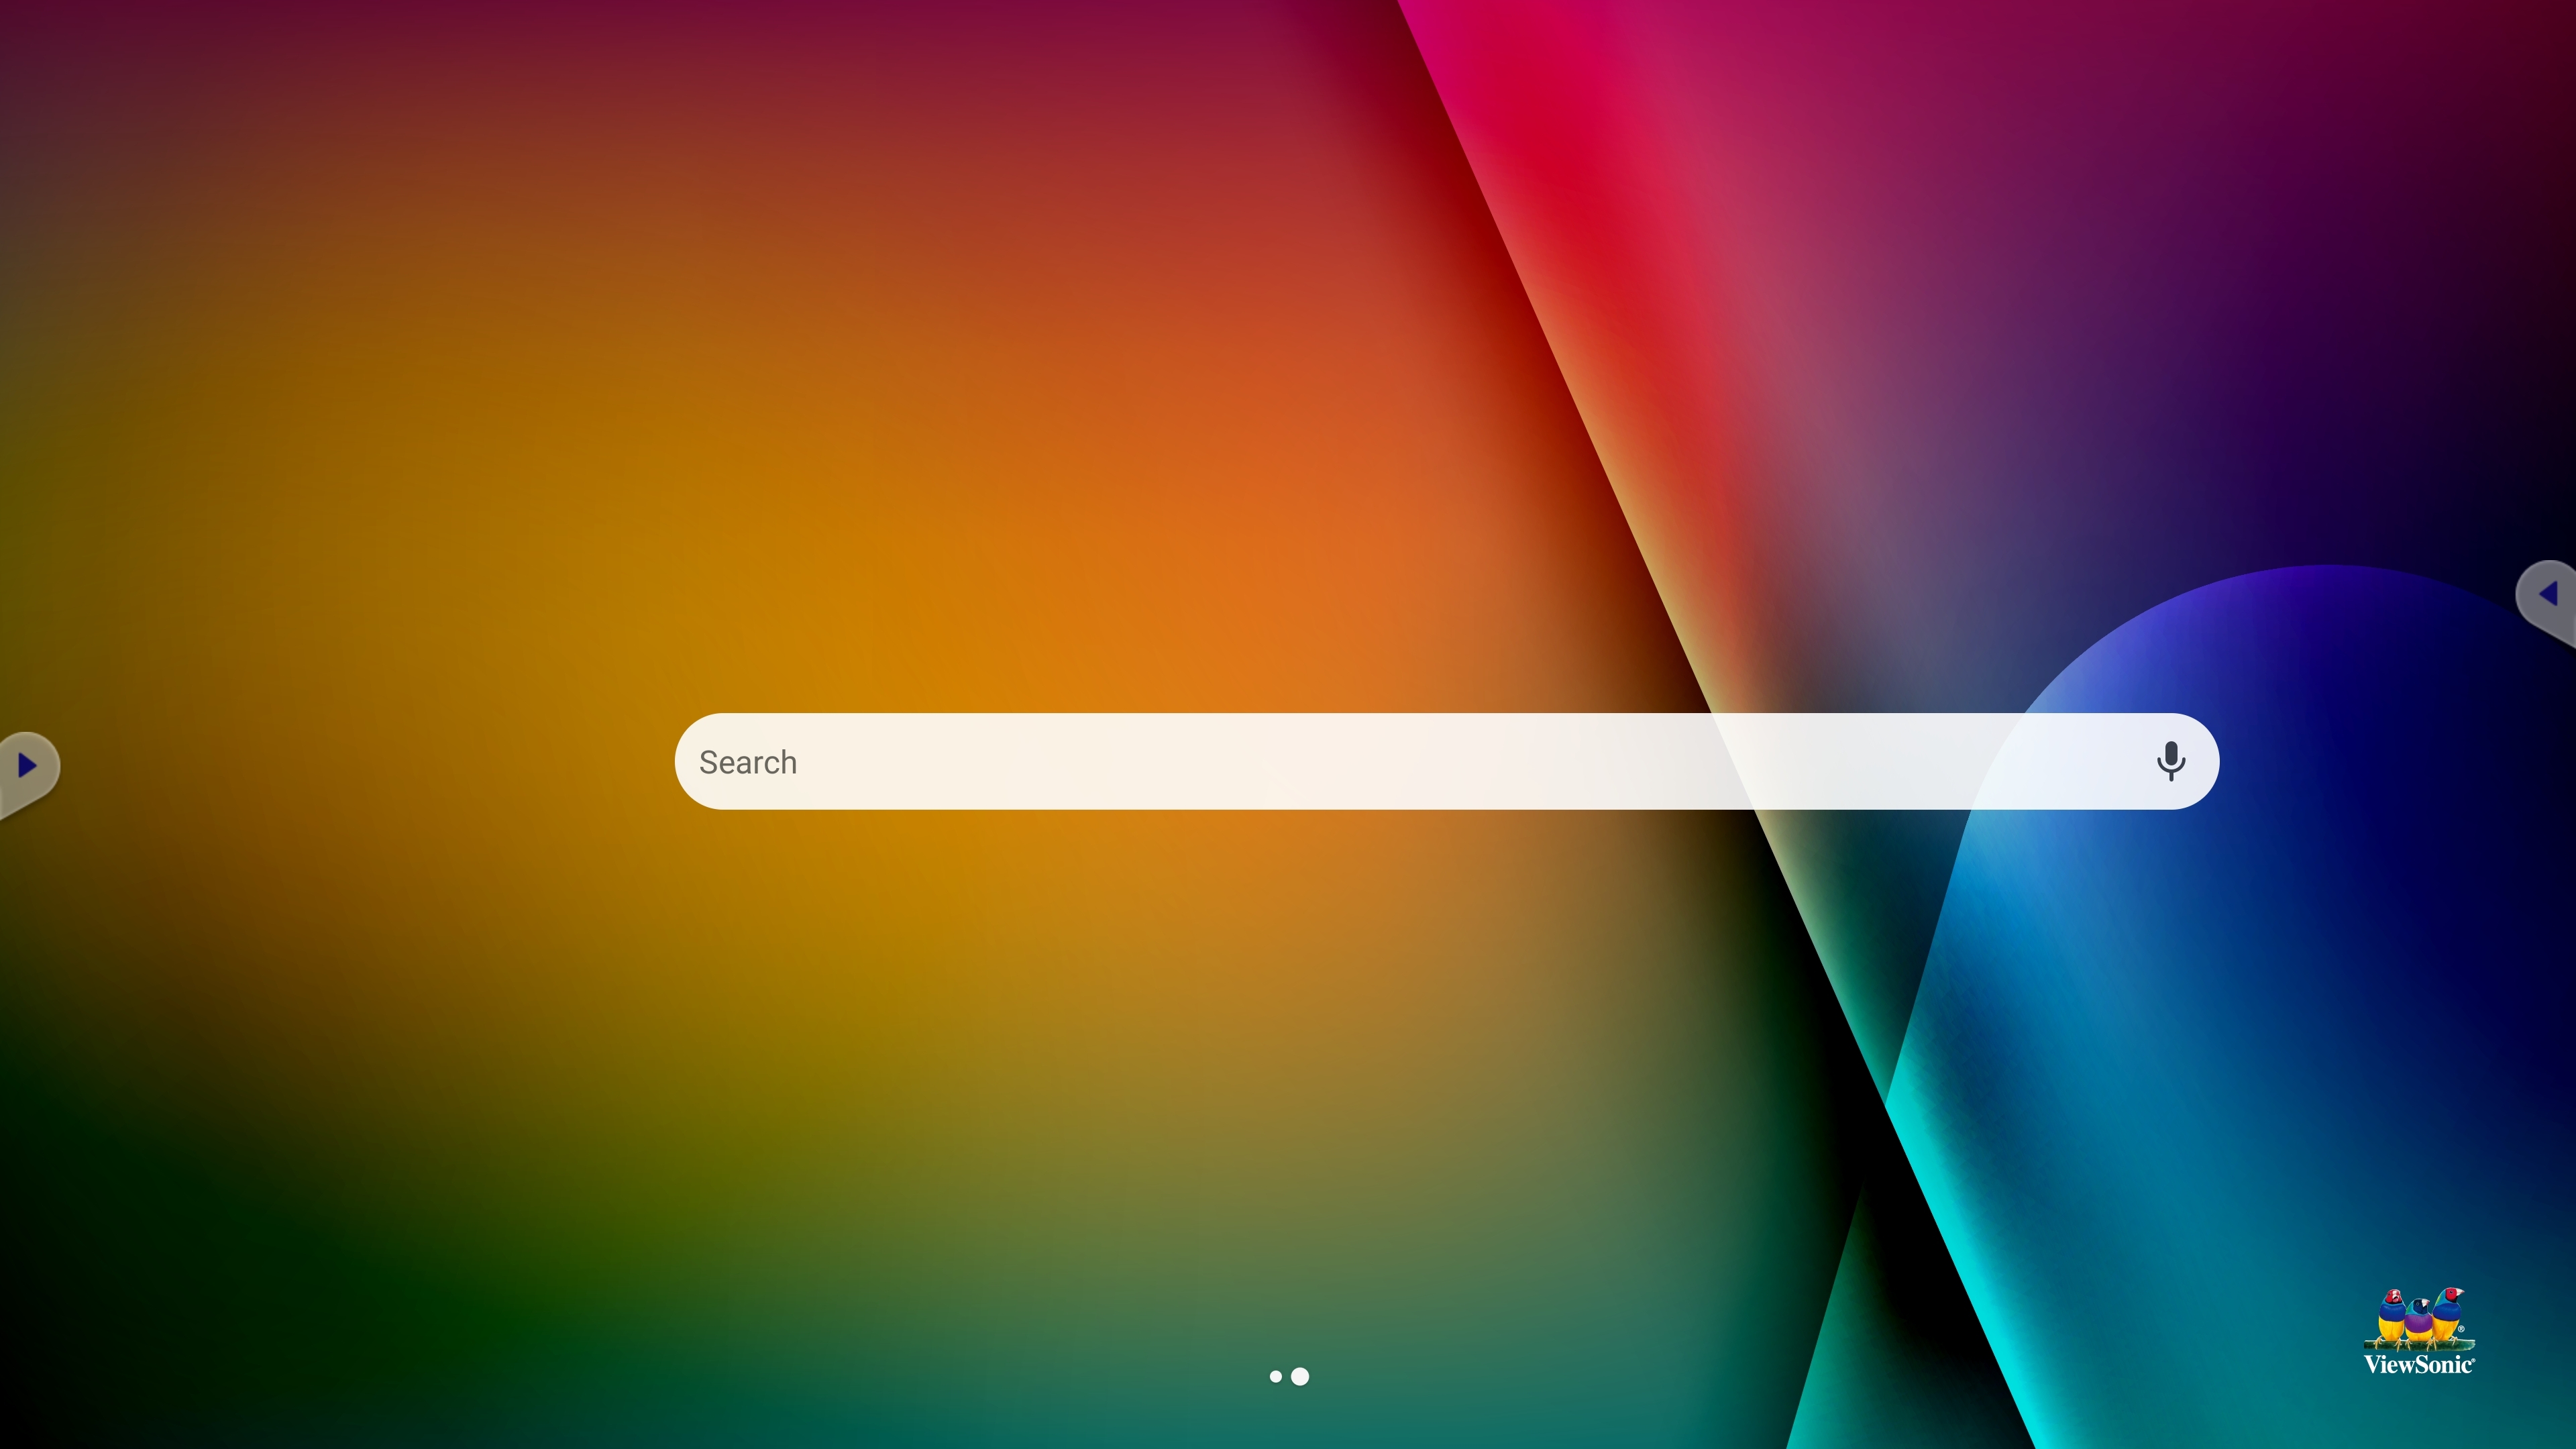 New home screen with Chromium search bar widget.
Non-ViewBoard input source display settings
Access input source settings for audio and screen settings.
To view the settings menu for an active non-ViewBoard input source:
- On a remote control, press the menu button
 .
. - On the ViewBoard, open the Input settings menu by pressing the side toolbar button and then the input settings button . Then press the settings button for the selected (non-ViewBoard) input source.
Audio settings
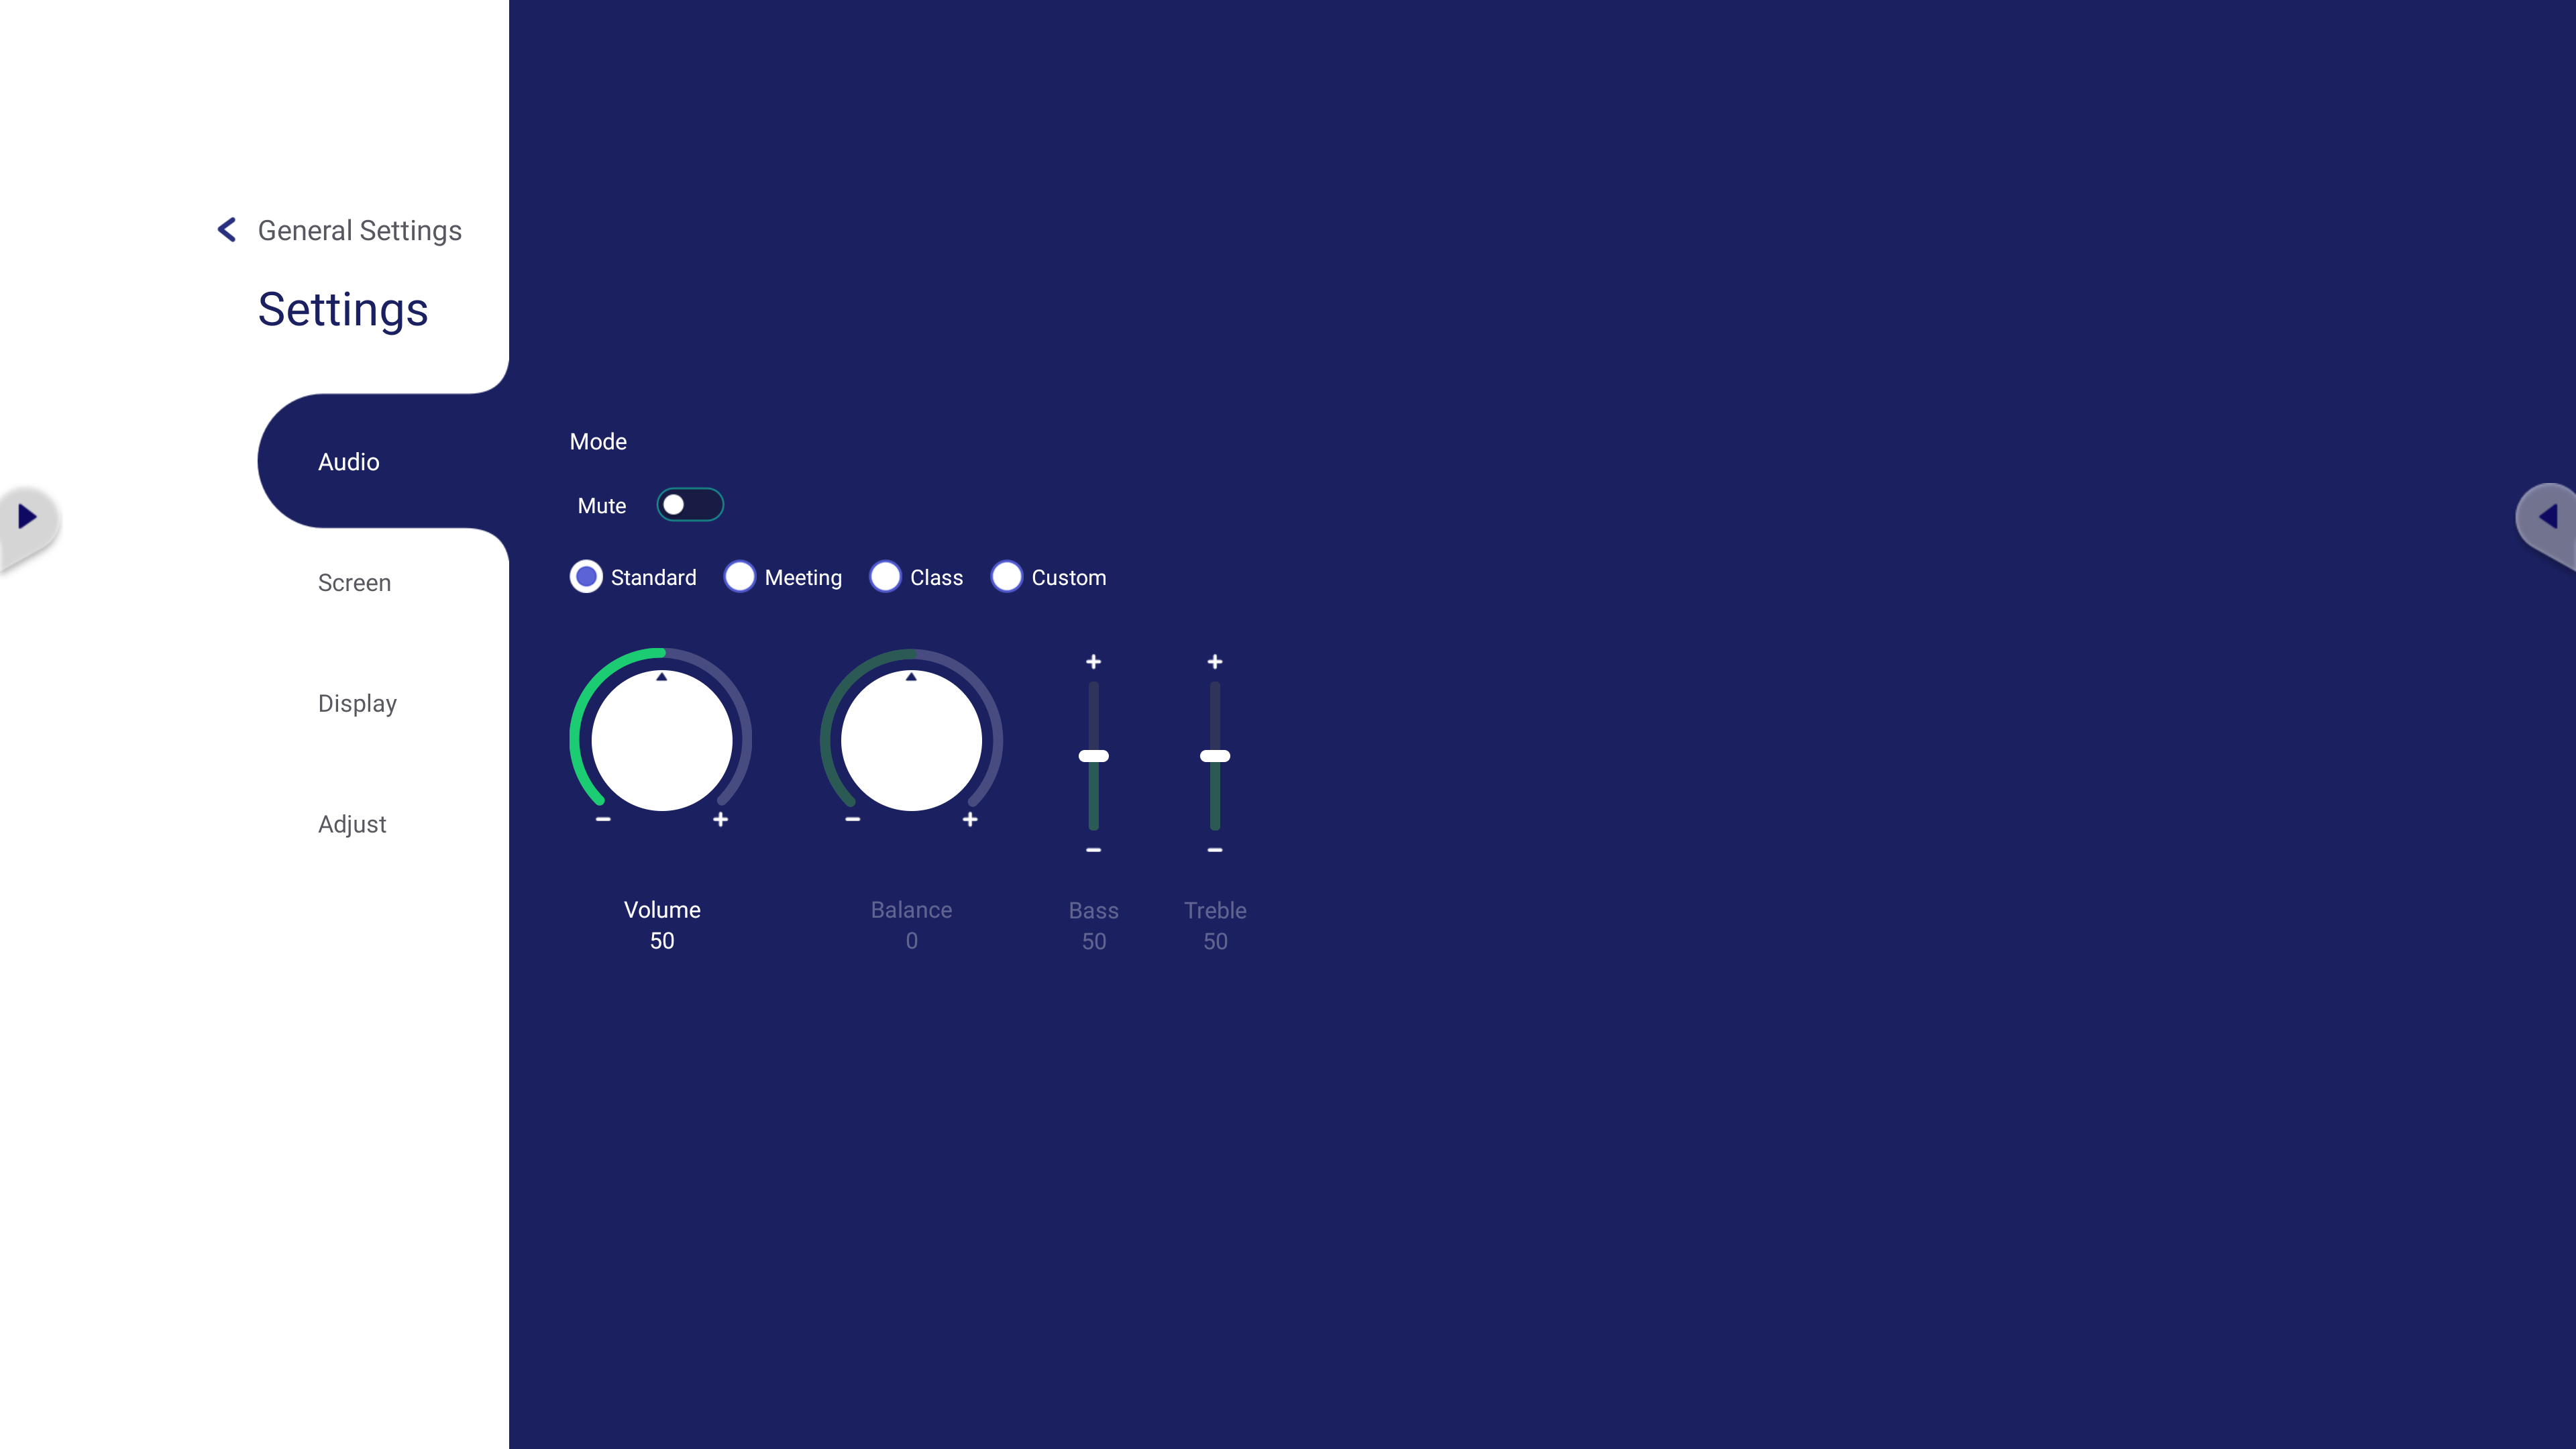 Audio settings menu.
Enter the Audio menu:
- On a remote control:
- Navigate the menu with ▼/▲/◄/► and press OK on an audio setting to change its audio level.
- Toggle Mute on or off by highlighting the option and pressing OK.
- On the ViewBoard:
- Interact with options by pressing or touching and dragging sliders.
- Press the Mute toggle to turn sound on or off.
Screen settings
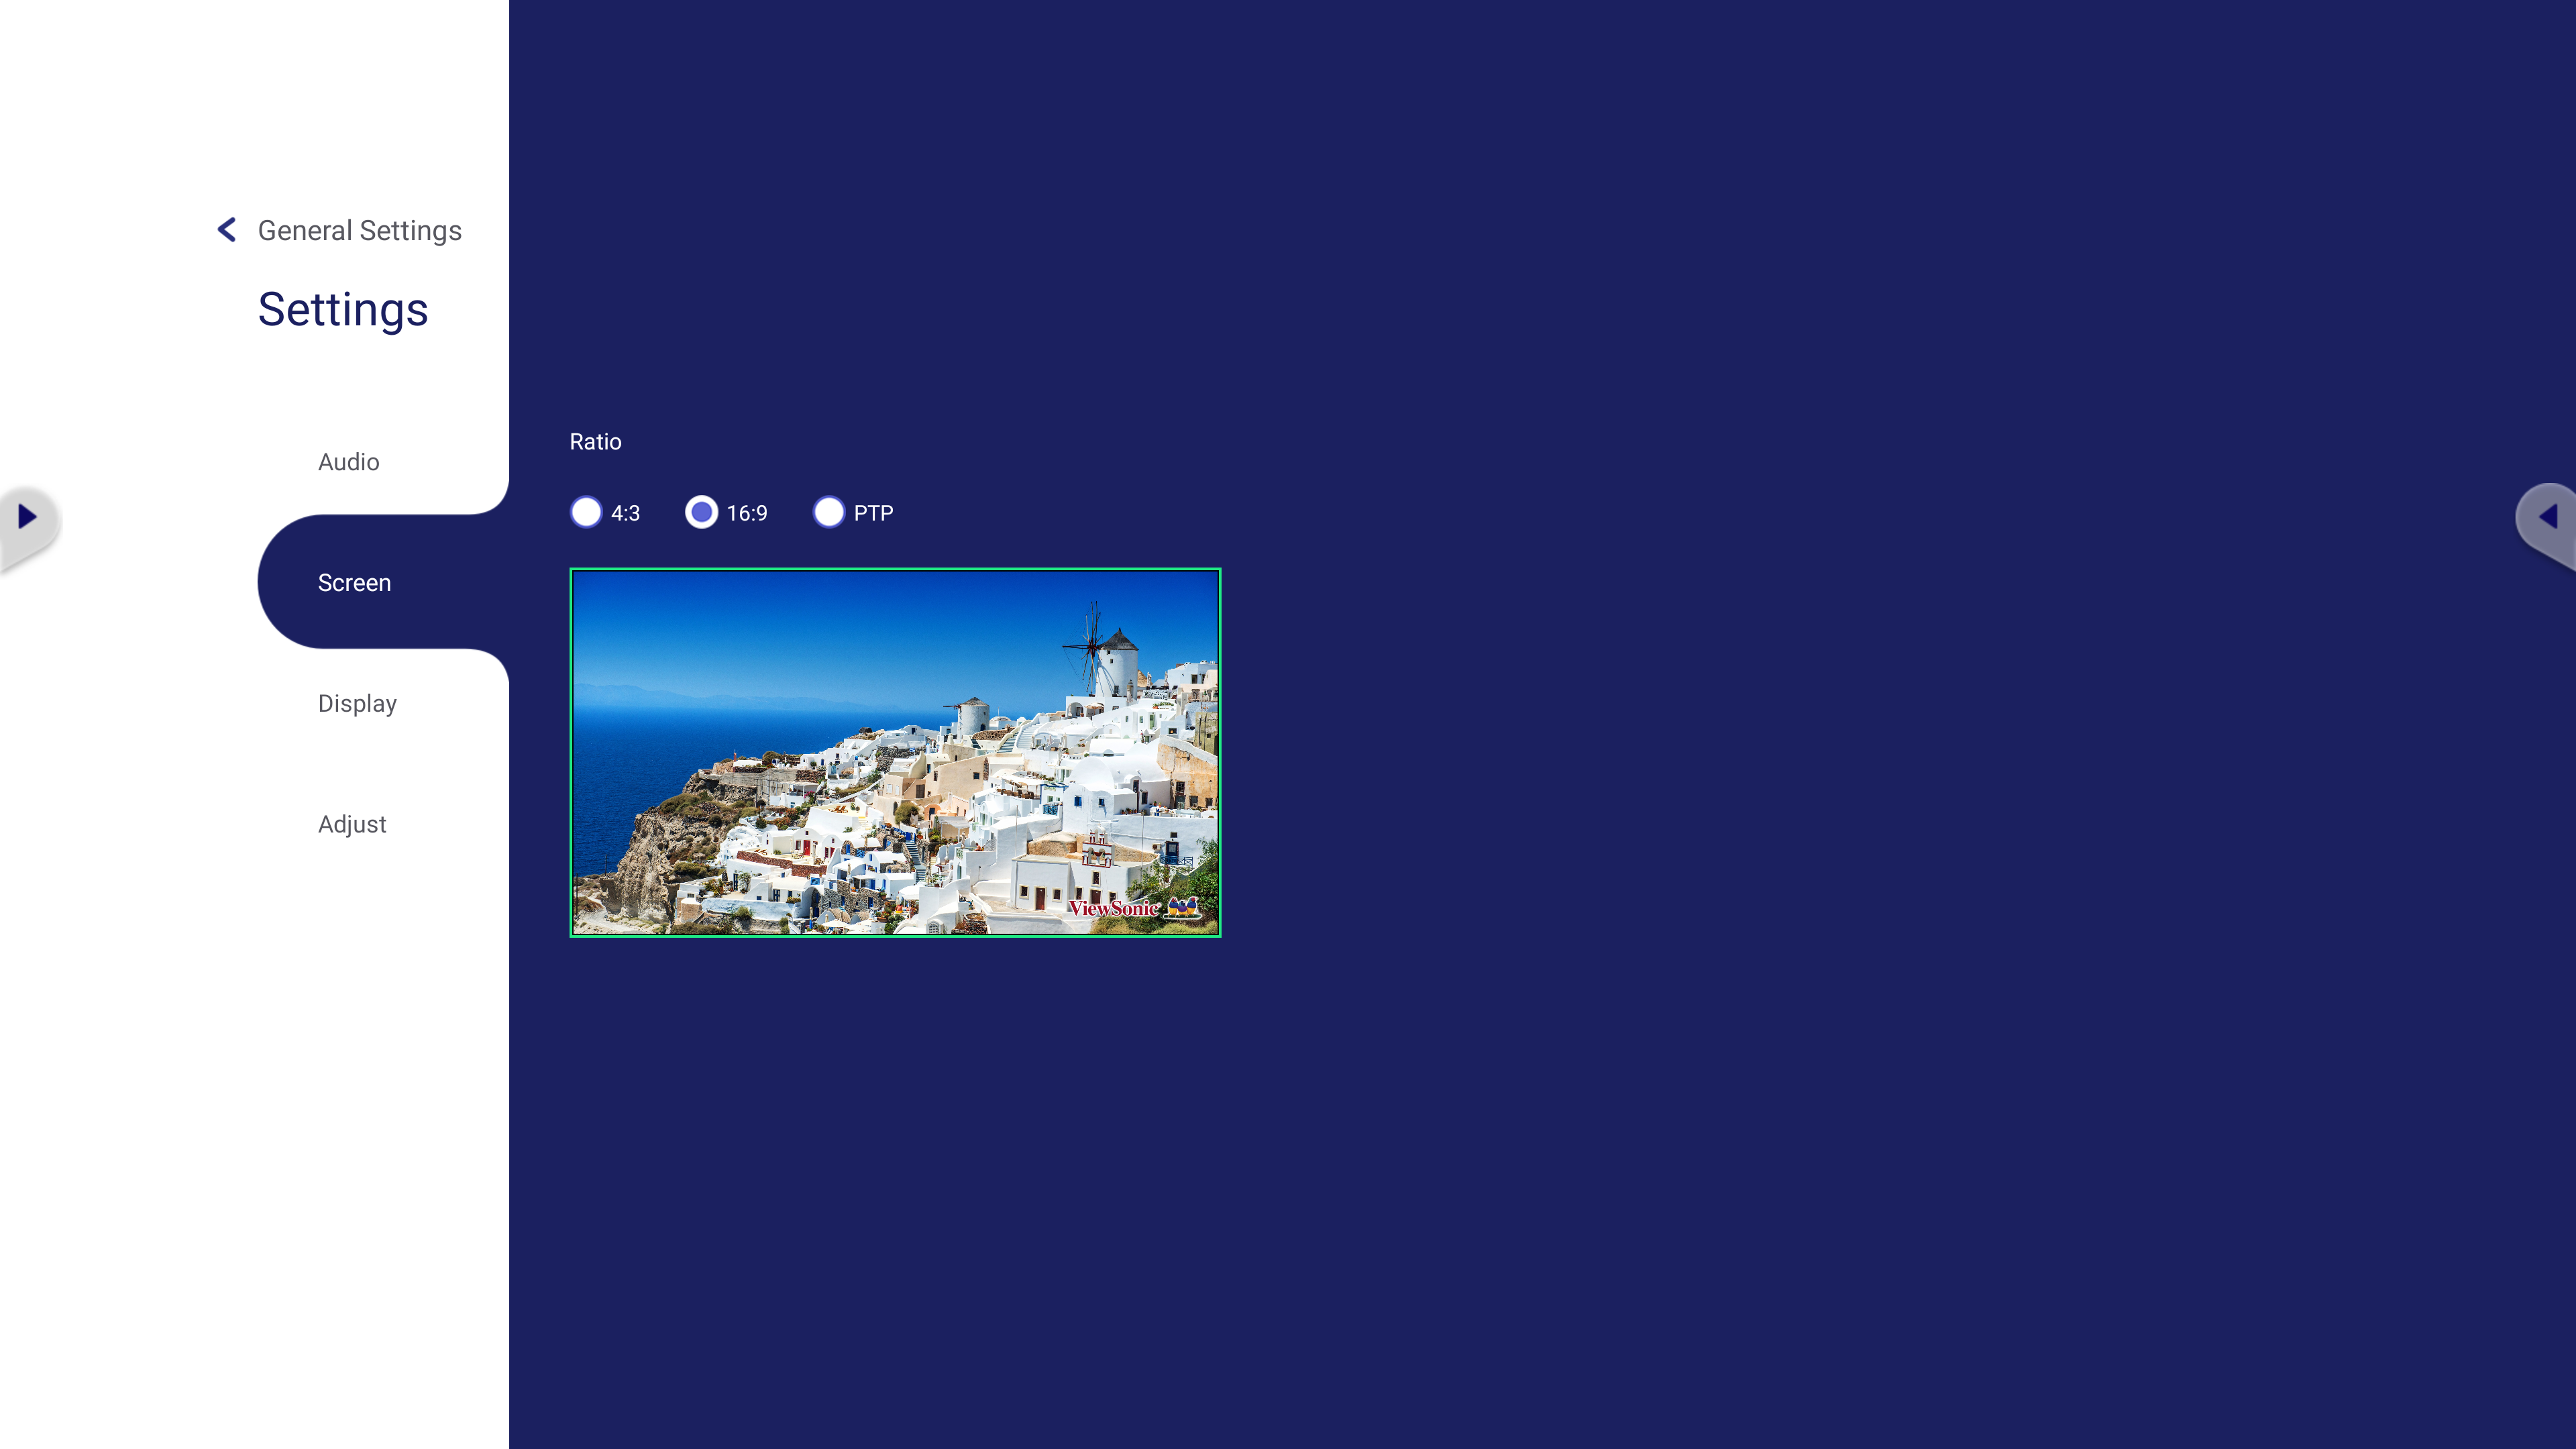 Screen settings menu.
Enter the Screen menu:
- On the remote control, navigate the menu with ▼/▲/◄/► and press OK to change screen resolution.
- On the ViewBoard, press your desired option to change screen resolution.
Display settings
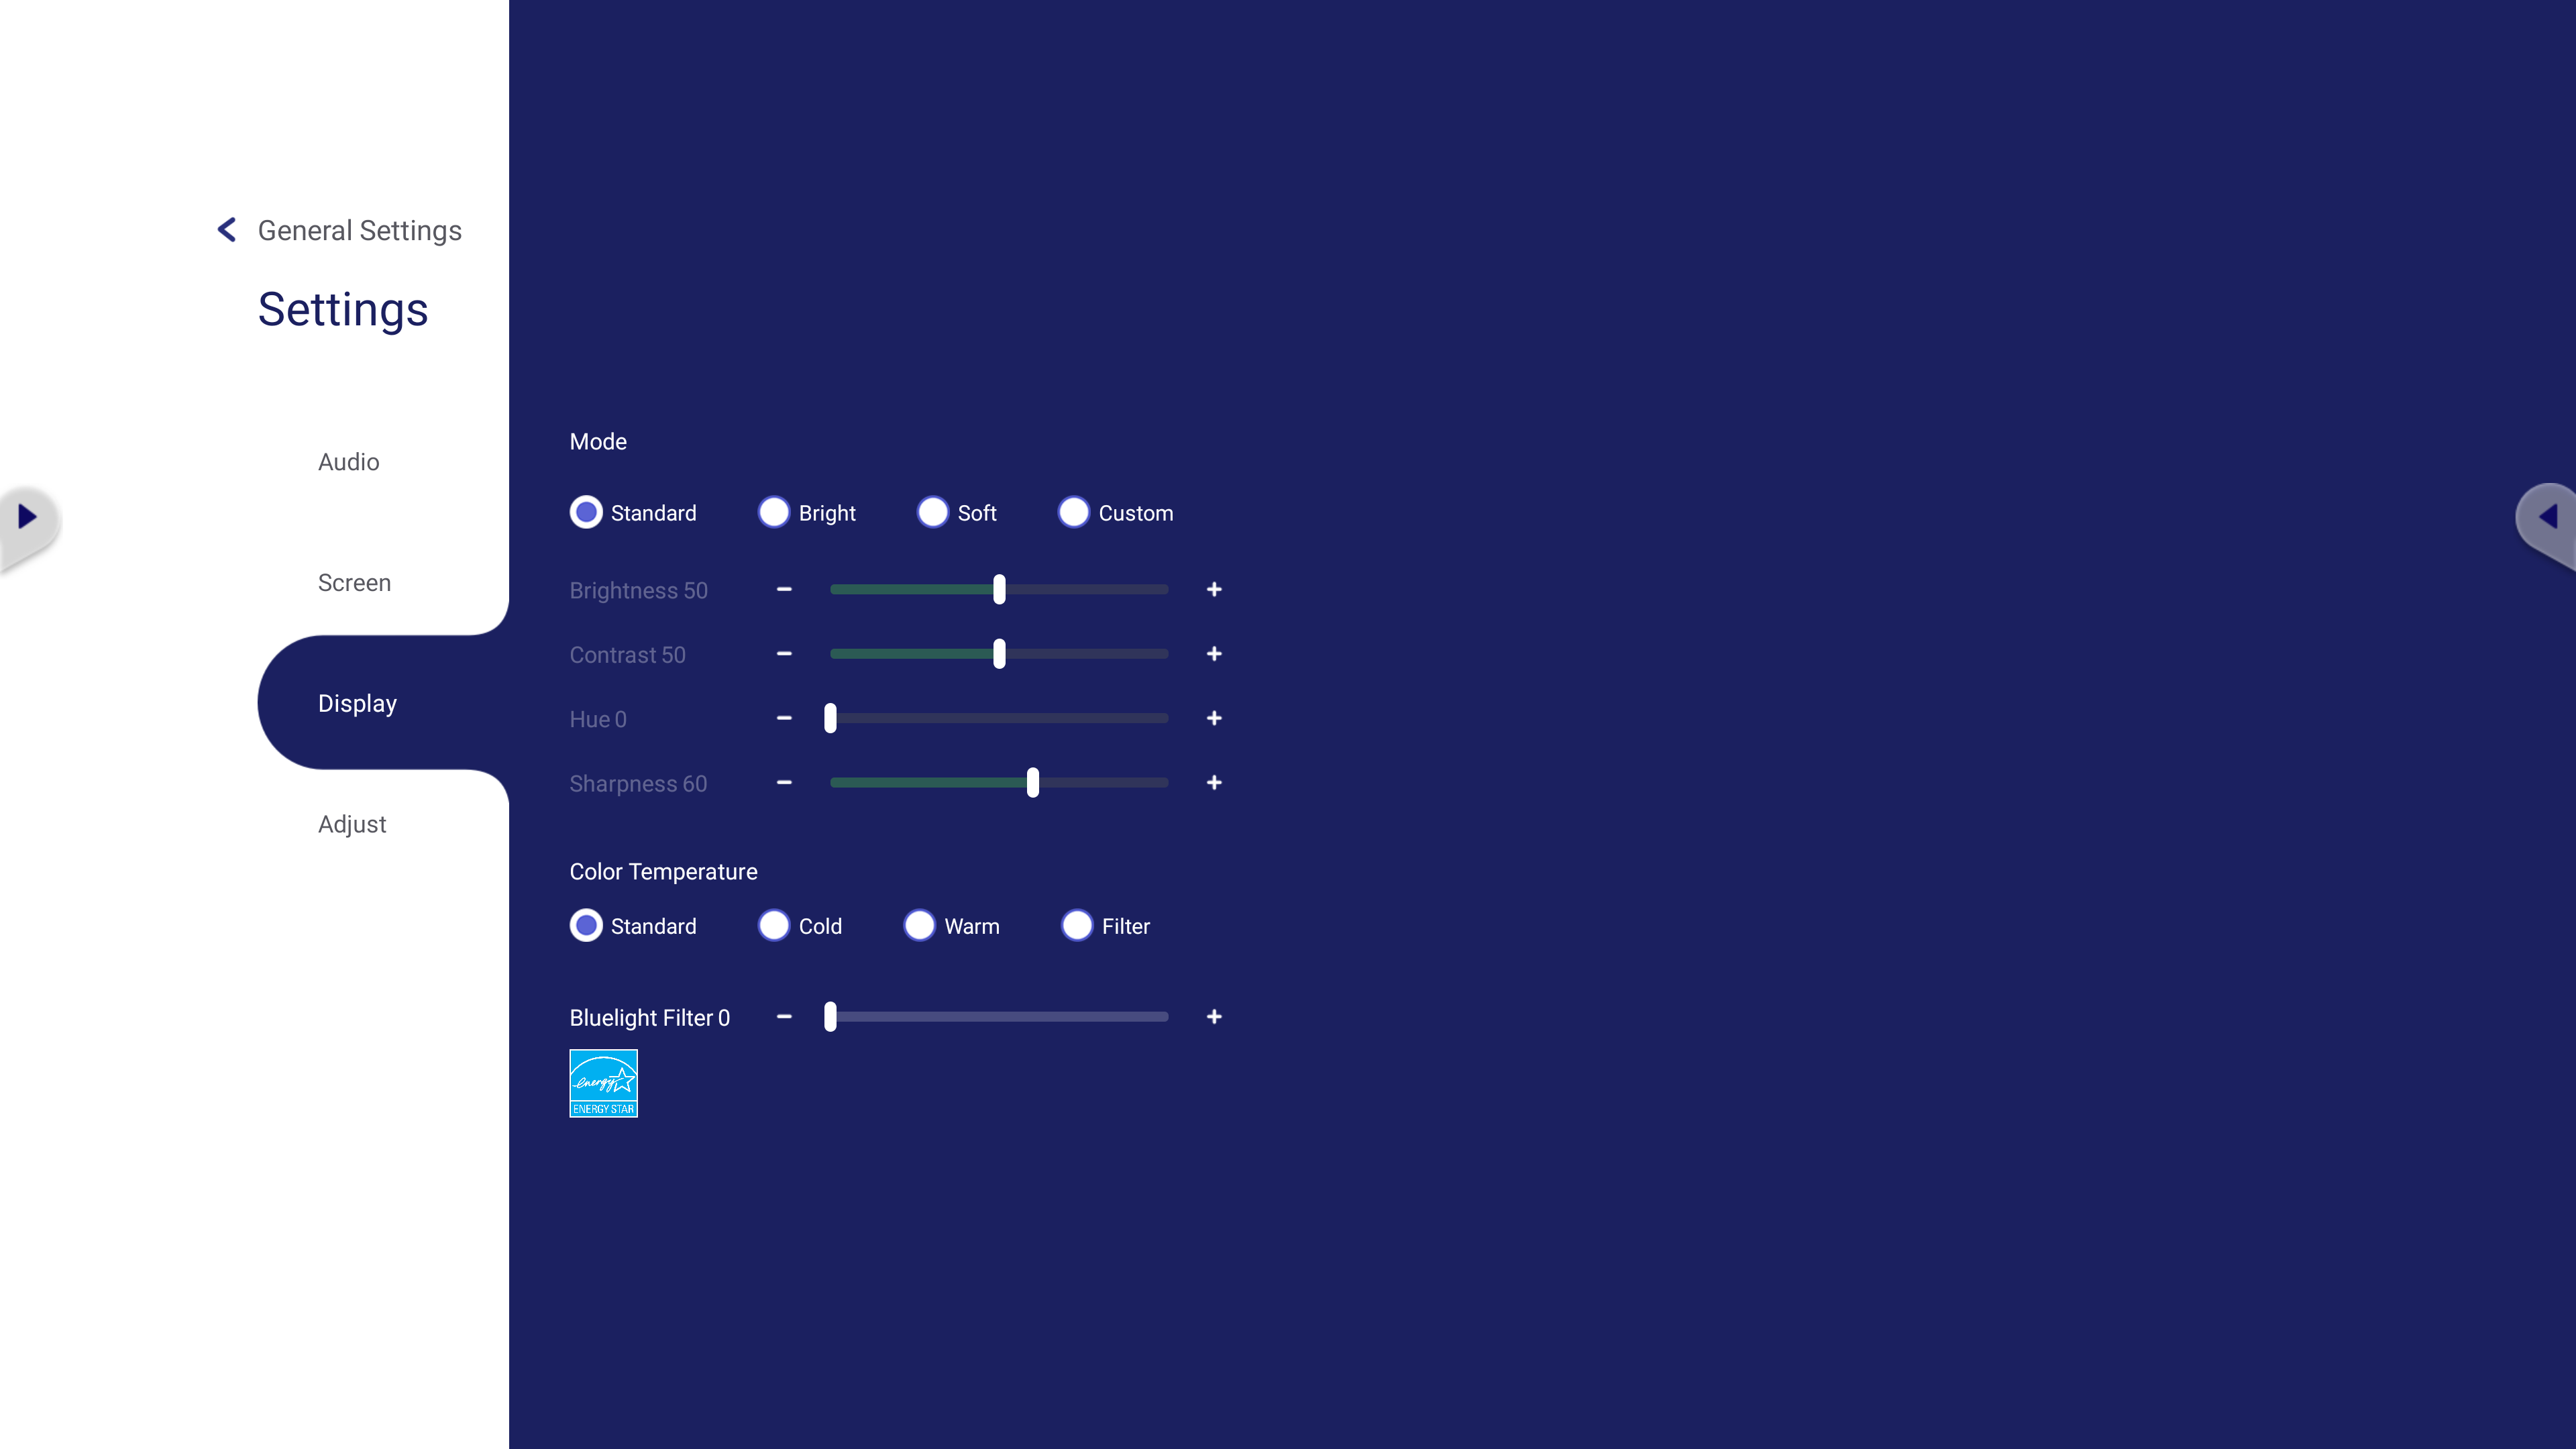 Display settings menu.
Enter the Display menu:
- On a remote control, navigate the menu with ▼/▲/◄/► and press OK on a display setting to change a screen effect.
- On the ViewBoard, interact with options by pressing or touching and dragging sliders.
Set display to low blue light for better eye health:
Adjust blue light settings for a more comfortable viewing experience.
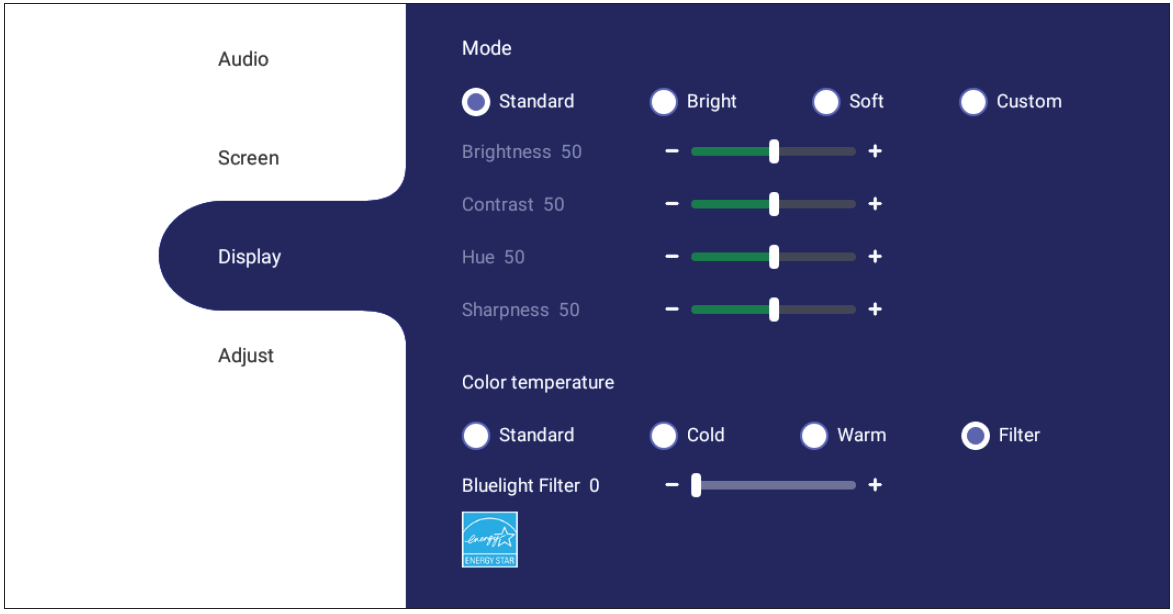 Display settings menu with blue light settings selected. (See below blue note box.)
Calculating Breaks
When viewing screens for extended periods, it is recommended to take periodic breaks from viewing. Short breaks of at least 10 minutes are recommended after one (1) hour of continuous viewing.
Taking shorter, more frequent breaks are generally more beneficial than longer, less frequent breaks.
Focus Fatigue (20-20-20 Rule)
To reduce the risk of eye fatigue by constantly looking at the screen, look away from the screen at least every 20 minutes and gaze at a distant object (at least 20 feet away) for at least 20 seconds.
Looking at Distant Objects
While taking breaks, users can further reduce eye strain and dryness by focusing on objects that are further away from them for 10-15 seconds, then gaze at something up close for 10-15 seconds. Repeat this up to 10 times. This exercise reduces the risk of your eyes’ focusing ability to “lock up” after prolonged computer work.
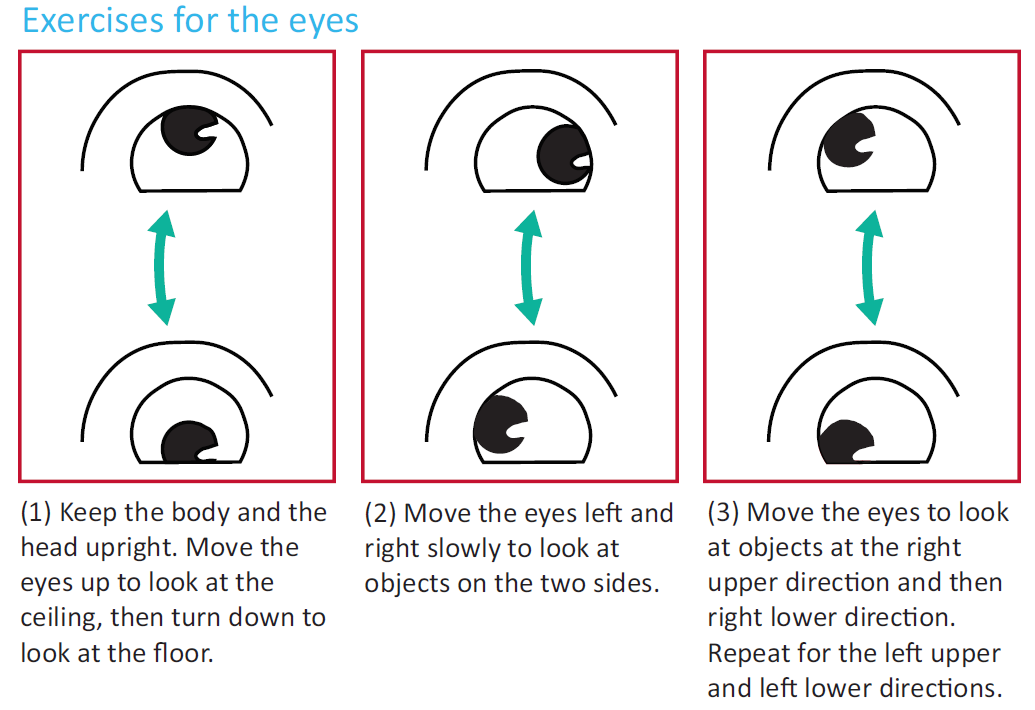
Eye and Neck Exercises
Eye exercises can help minimize eye strain. Slowly roll your eyes to the left, right, up, and down. Repeat as many times as needed.
Neck Exercises
Neck exercises can also help minimize eye strain. Relax your arms and let them hang at your sides, bend forward slightly to stretch the neck, turn your head to the right and to the left. Repeat as many times as needed.
Adjust settings (VGA only)
This menu is specifically for devices connected by VGA cable. These settings adjust the positioning of the screen being input onto the ViewBoard.
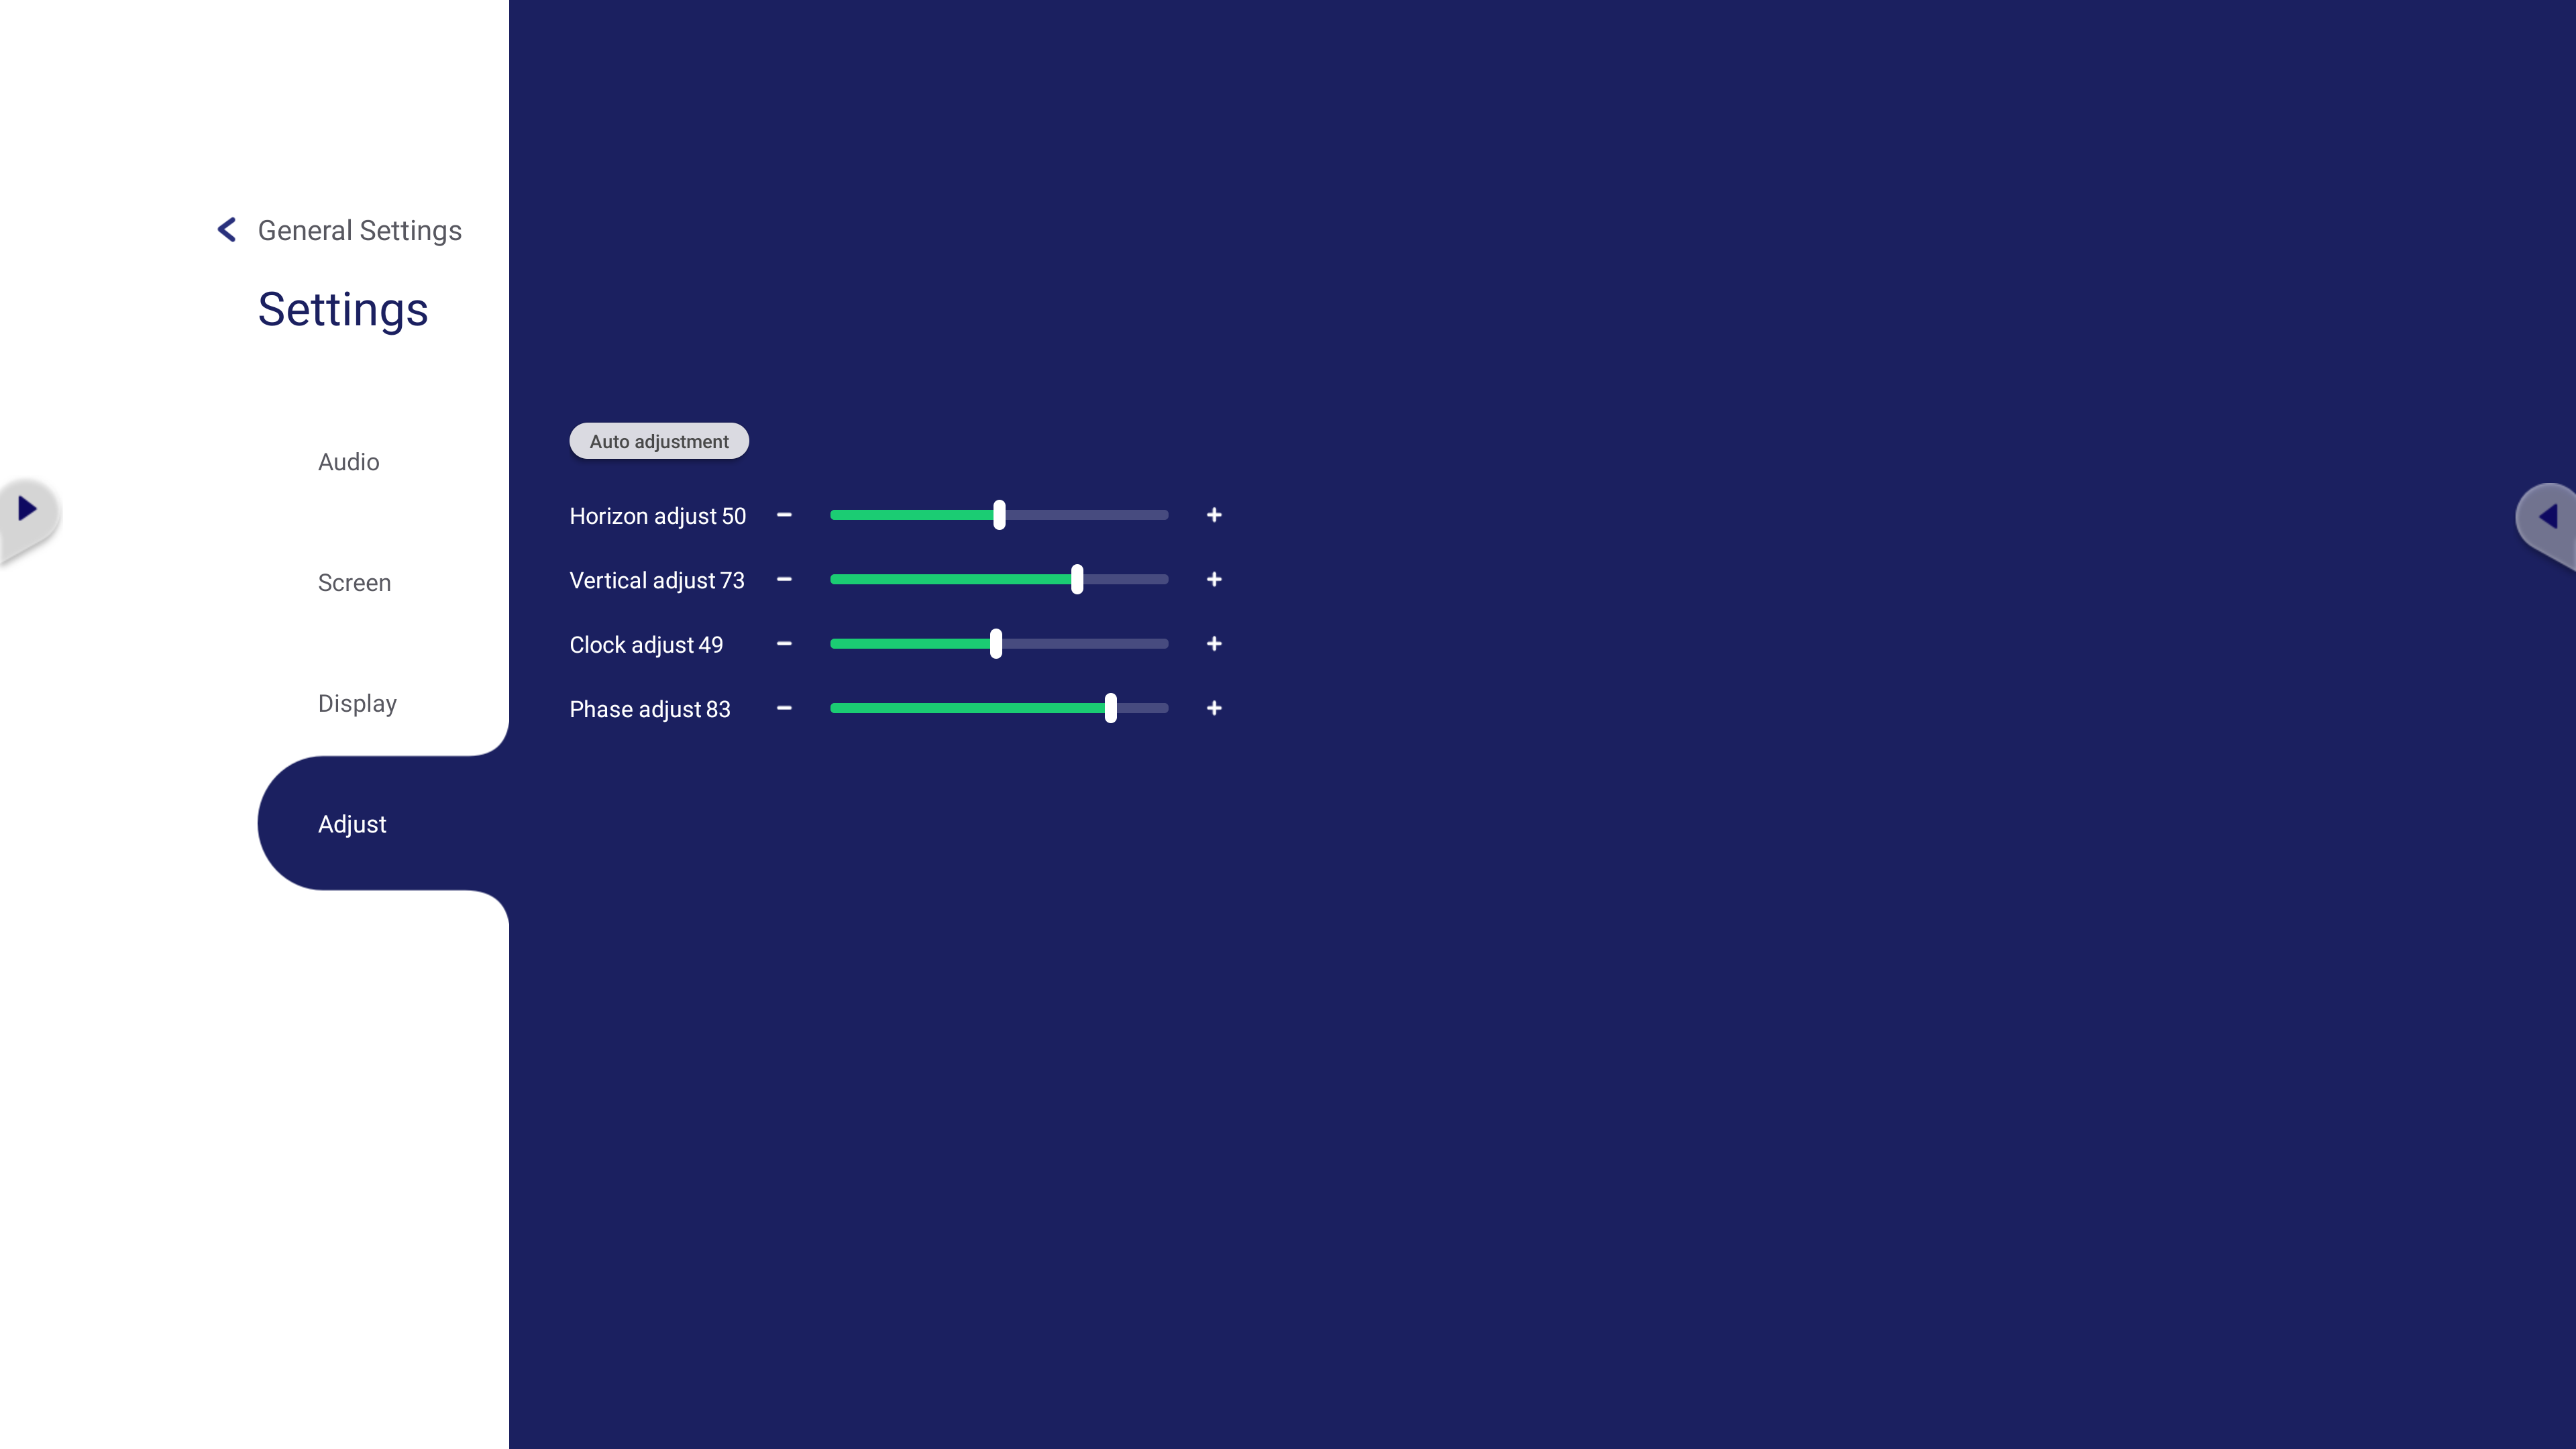
Enter the Adjust menu:
- On a remote control, navigate the menu with ▼/▲/◄/► and press OK on a display setting to change positioning.
- On the ViewBoard, interact with options by pressing or touching and dragging sliders to change positioning.