Powering on and using your IFP52
This article highlights the basics of powering on your IFP52 and getting started with the display.
Power your IFP52 ON/OFF
Follow these steps to start using your ViewBoard:
- Before turning on your ViewBoard, ensure the power cord is connected, plugged into a power outlet, and the device's power switch is in the ON position.
- Press the Power button to turn the ViewBoard ON.
- To turn the ViewBoard off, press and hold the Power button.
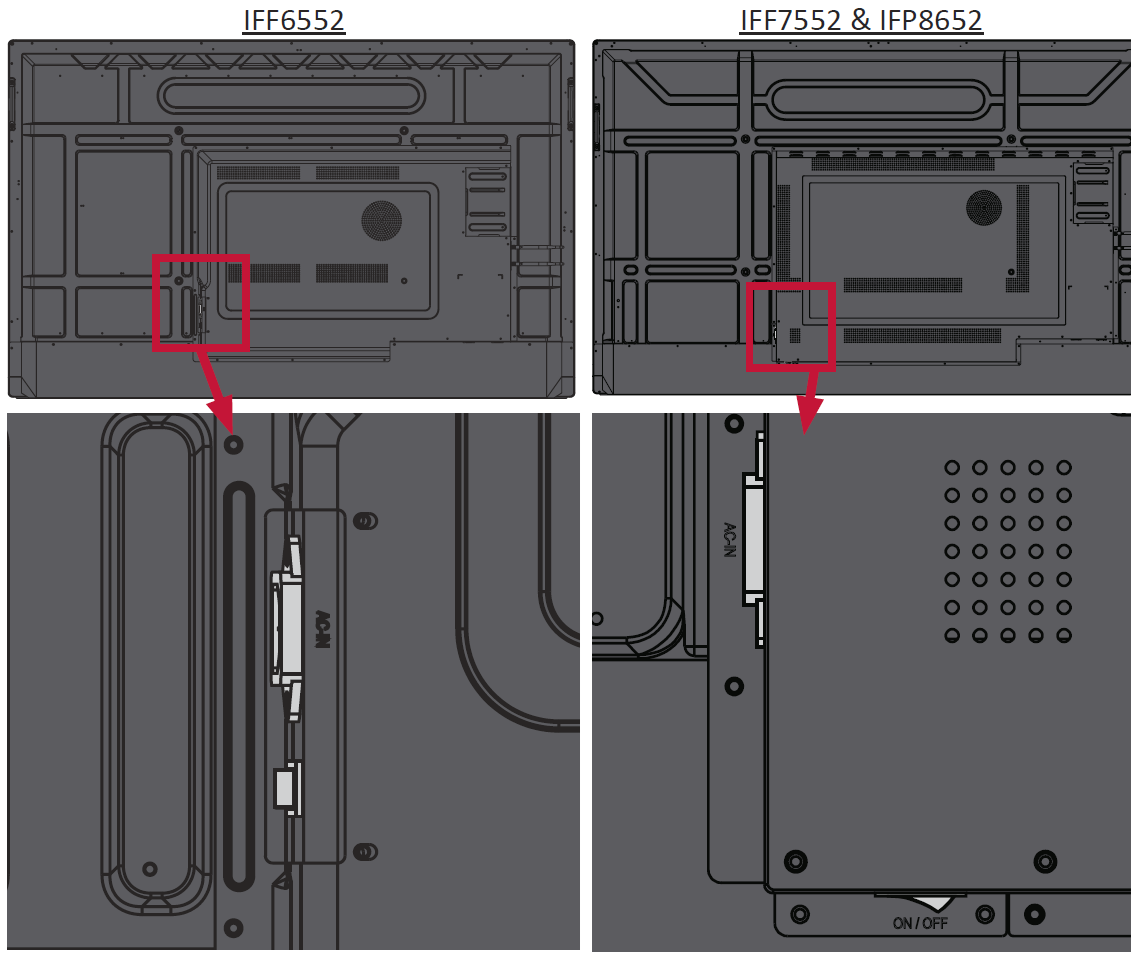 Location of power switch on different models of IFP52. IFP6552 (left) switch is located directly under the AC-IN port. IFP7552 and IFP8652 (right) switch is located on the horizontal panel perpendicular to the AC-IN port.
Initial launch setup
When you turn on your ViewBoard for the first time, an initial setup wizard will guide you through first-time device settings:
- Select your language.
- Setup and verify your ethernet (LAN) connection.
- Set the date and time by using network detected time or selecting a time zone.
- Select your preferred system mode.
- Select your preferred power saving plan.
- Review the privacy and copyright protection statement before continuing.
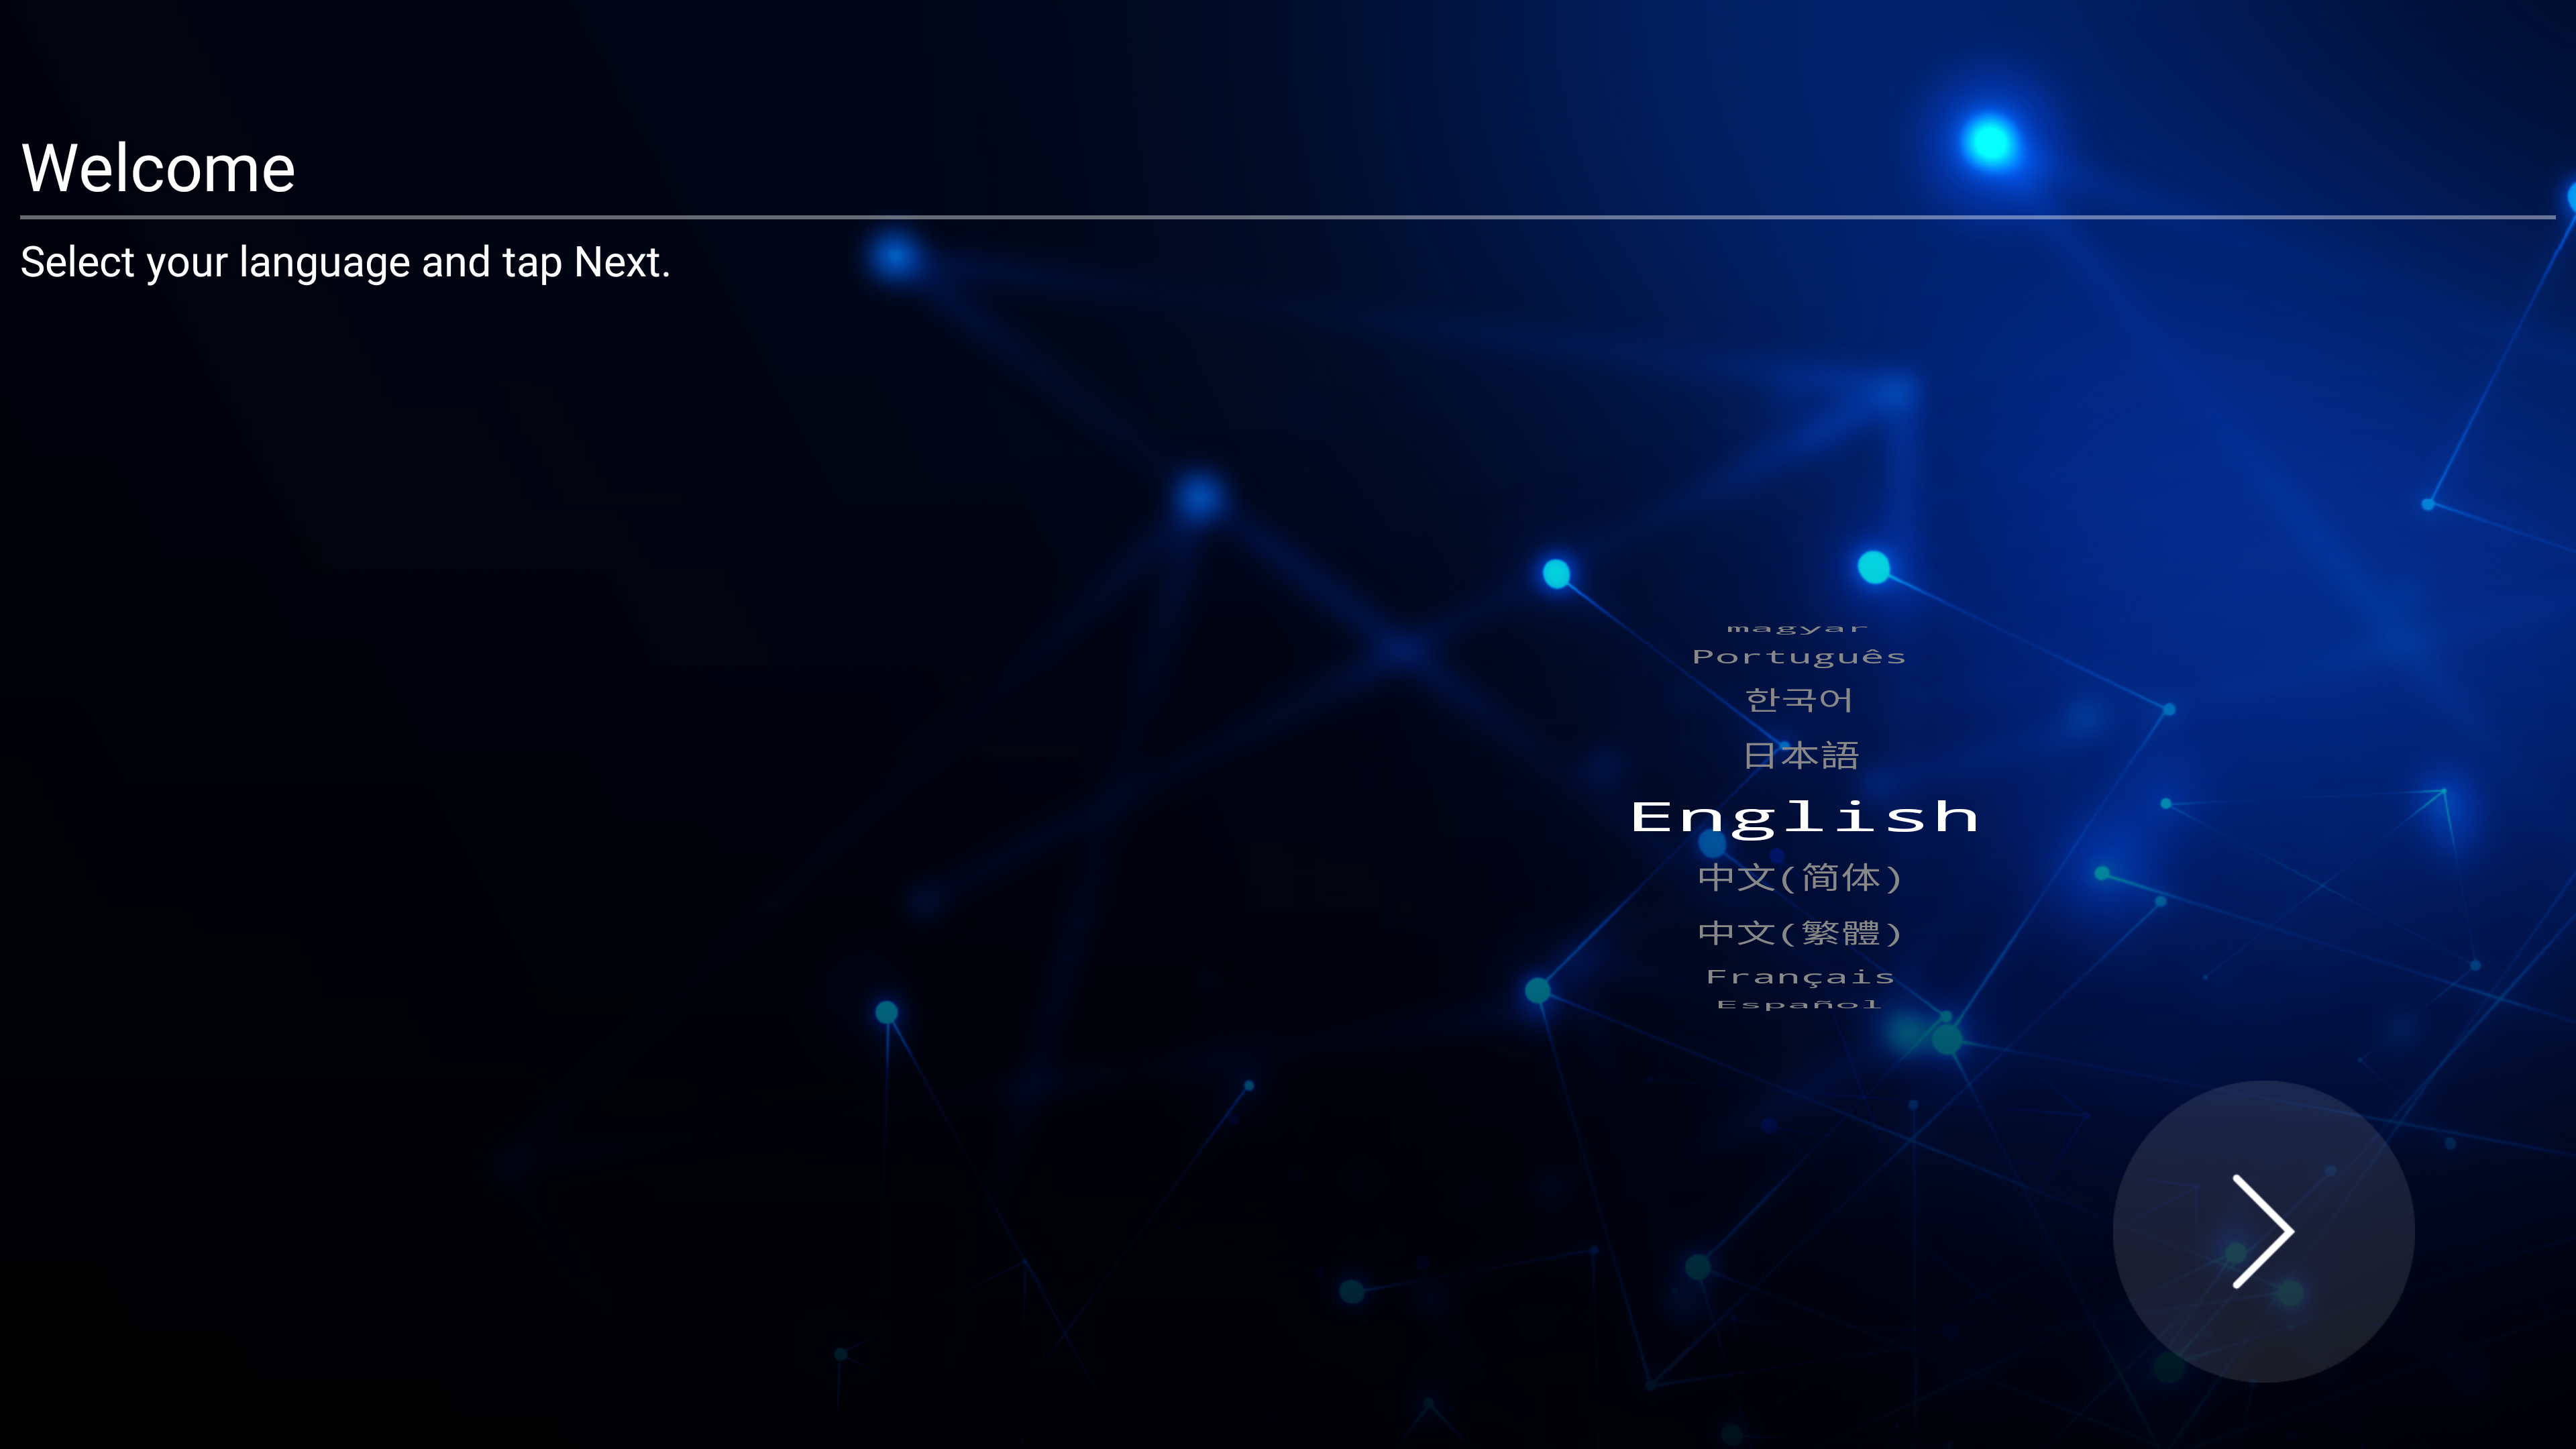 Language selection prompt.
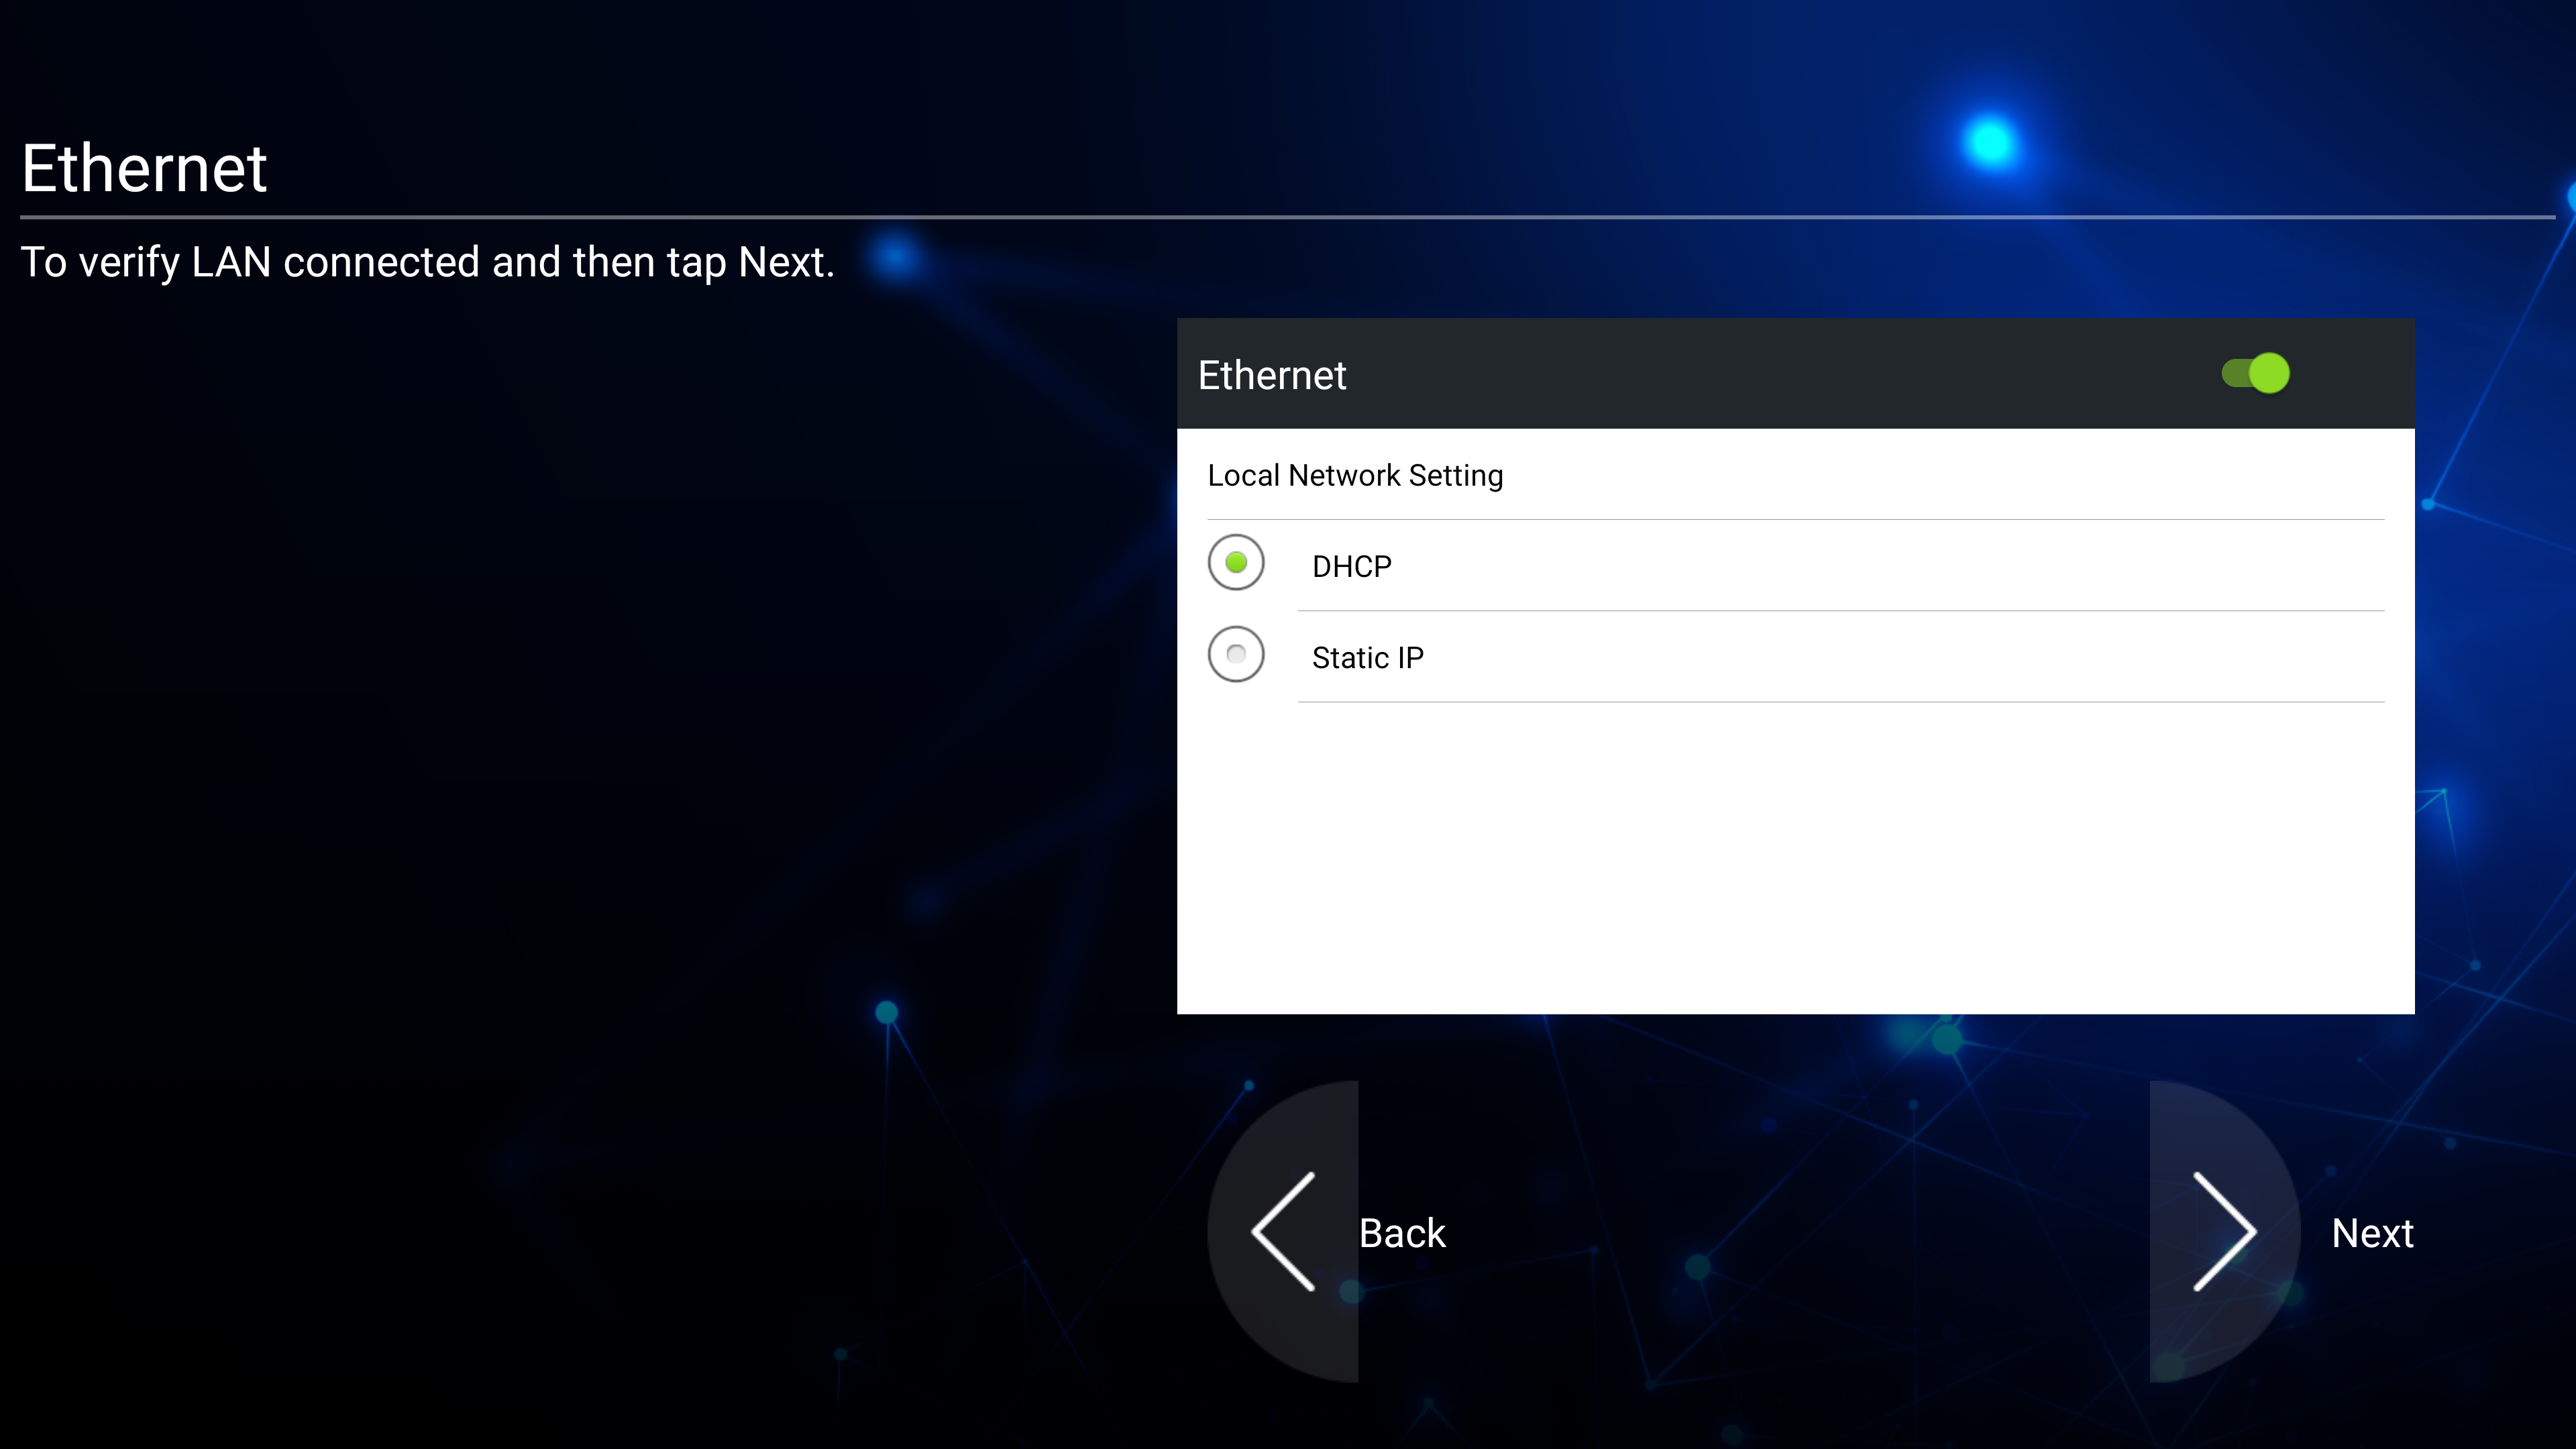 Network connect setup.
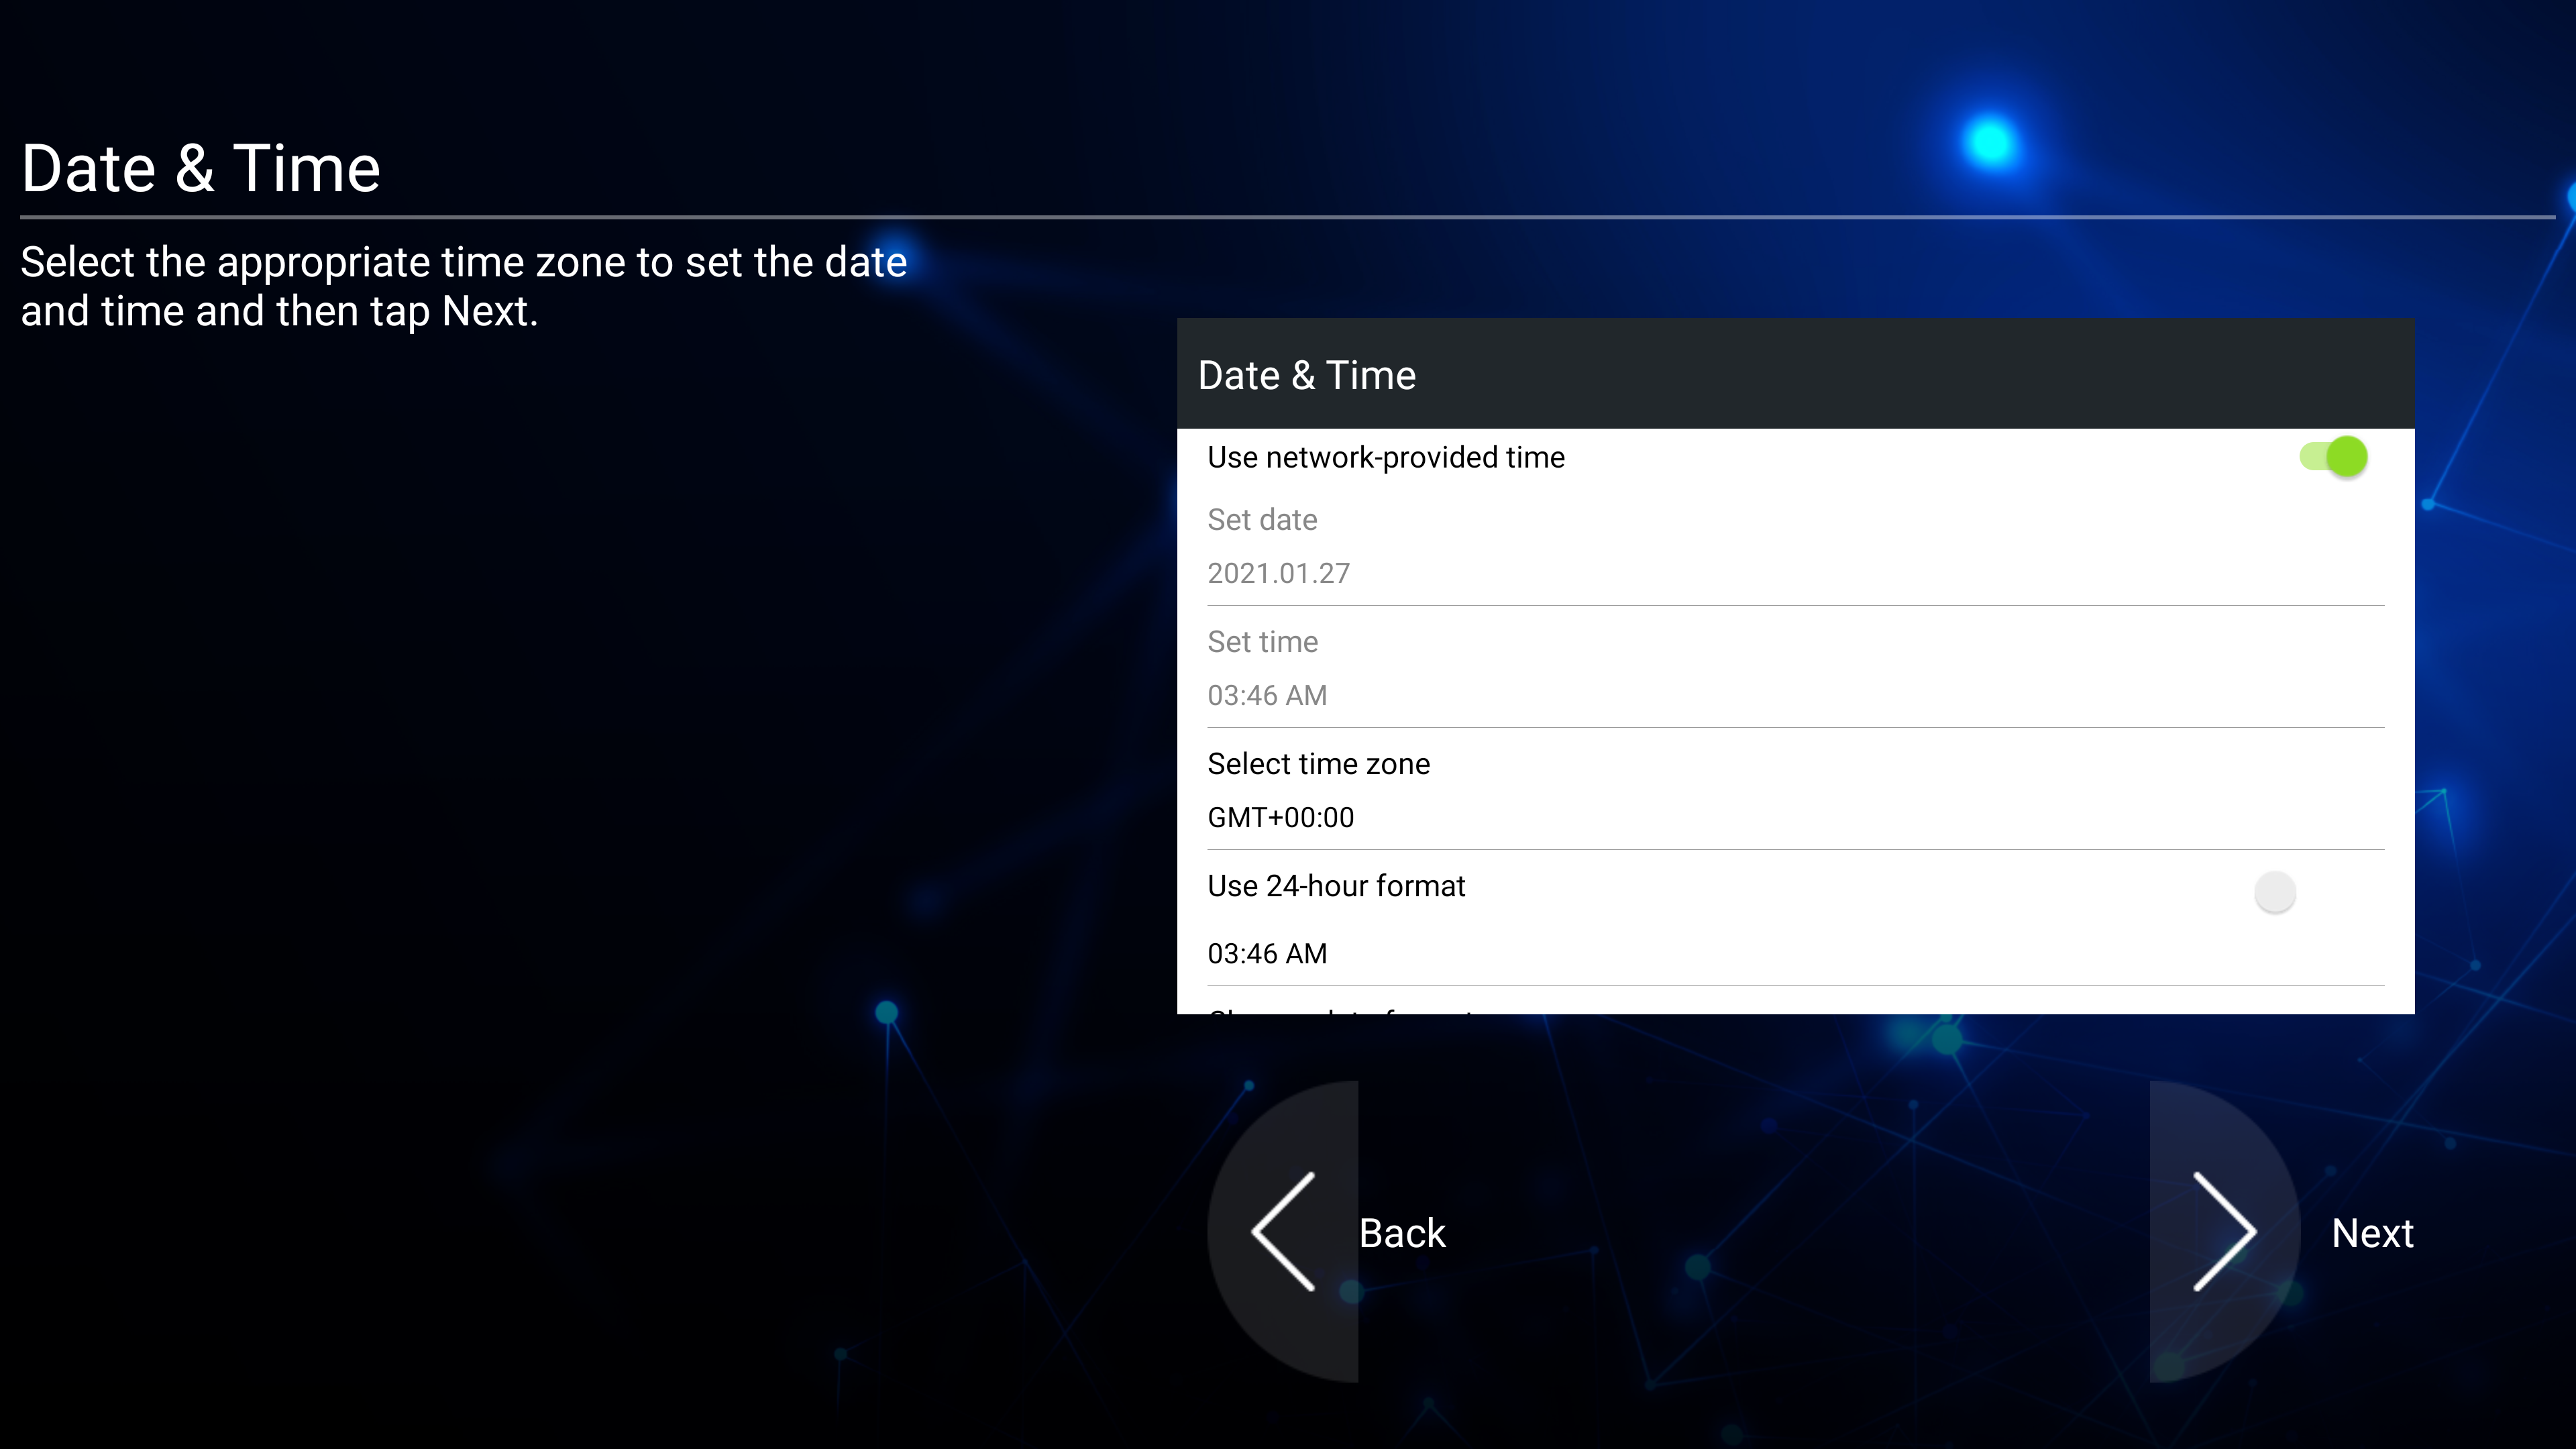 Date and time setup.
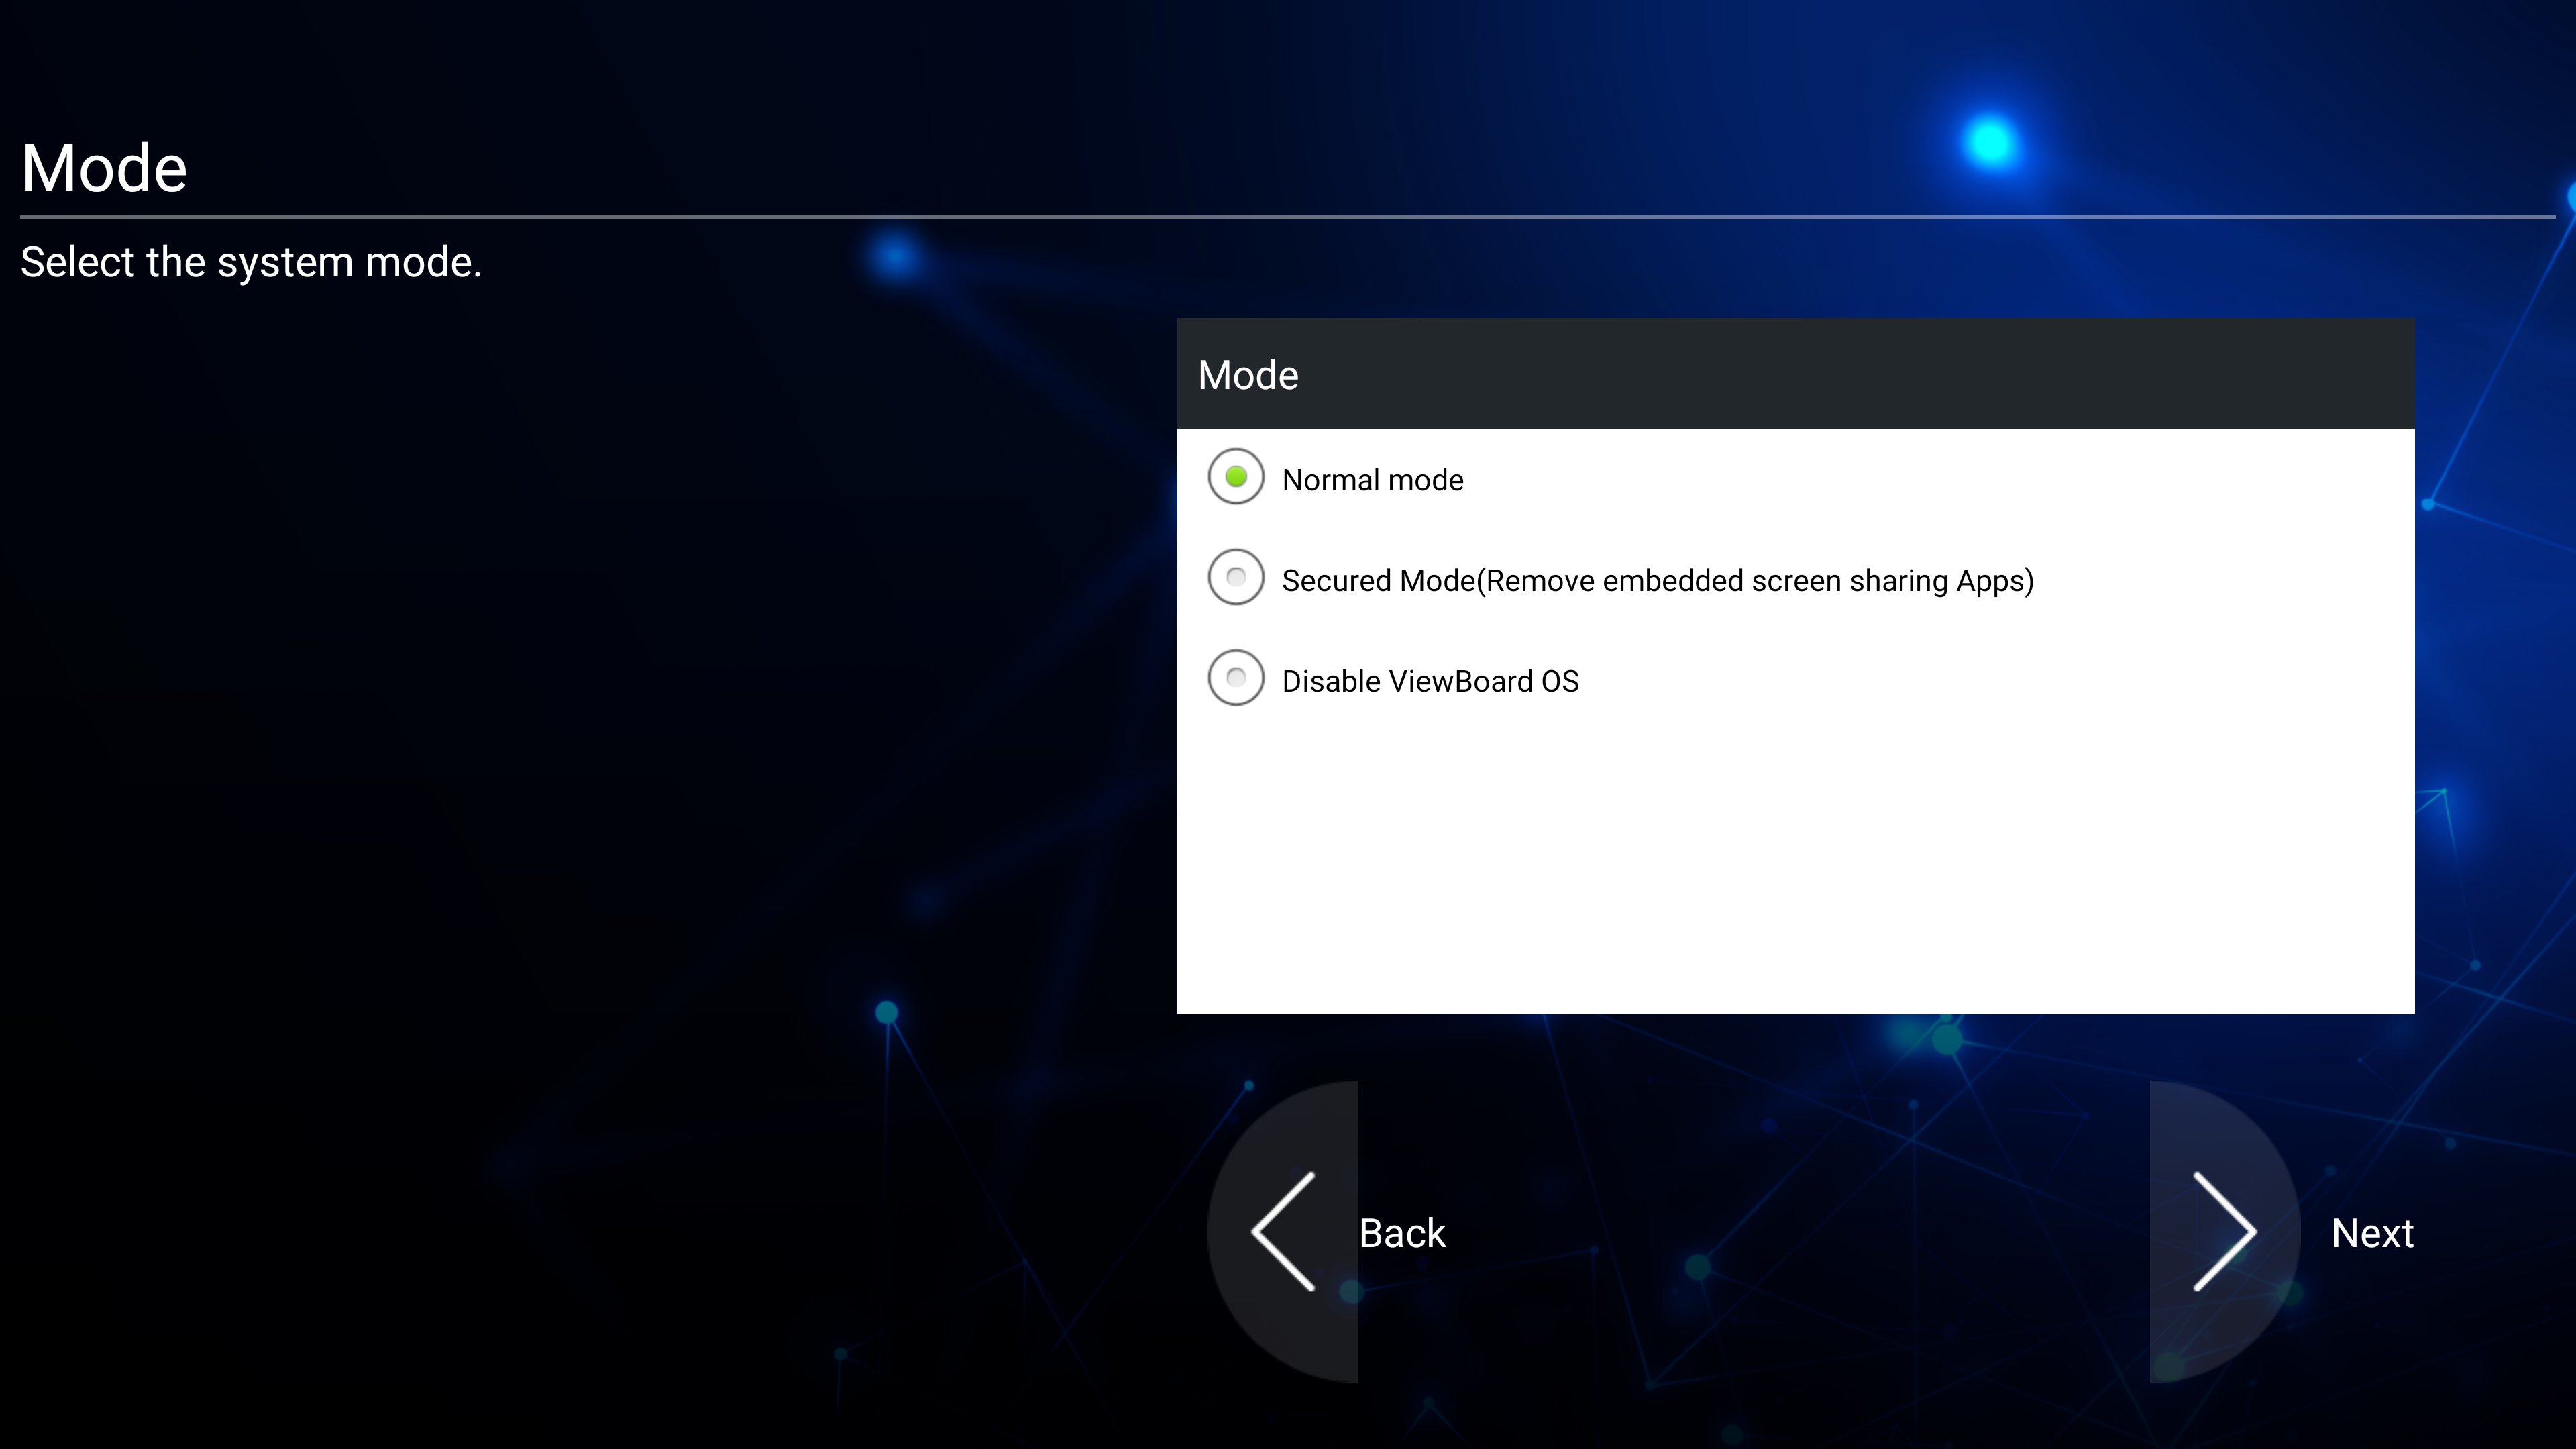 System mode selection.
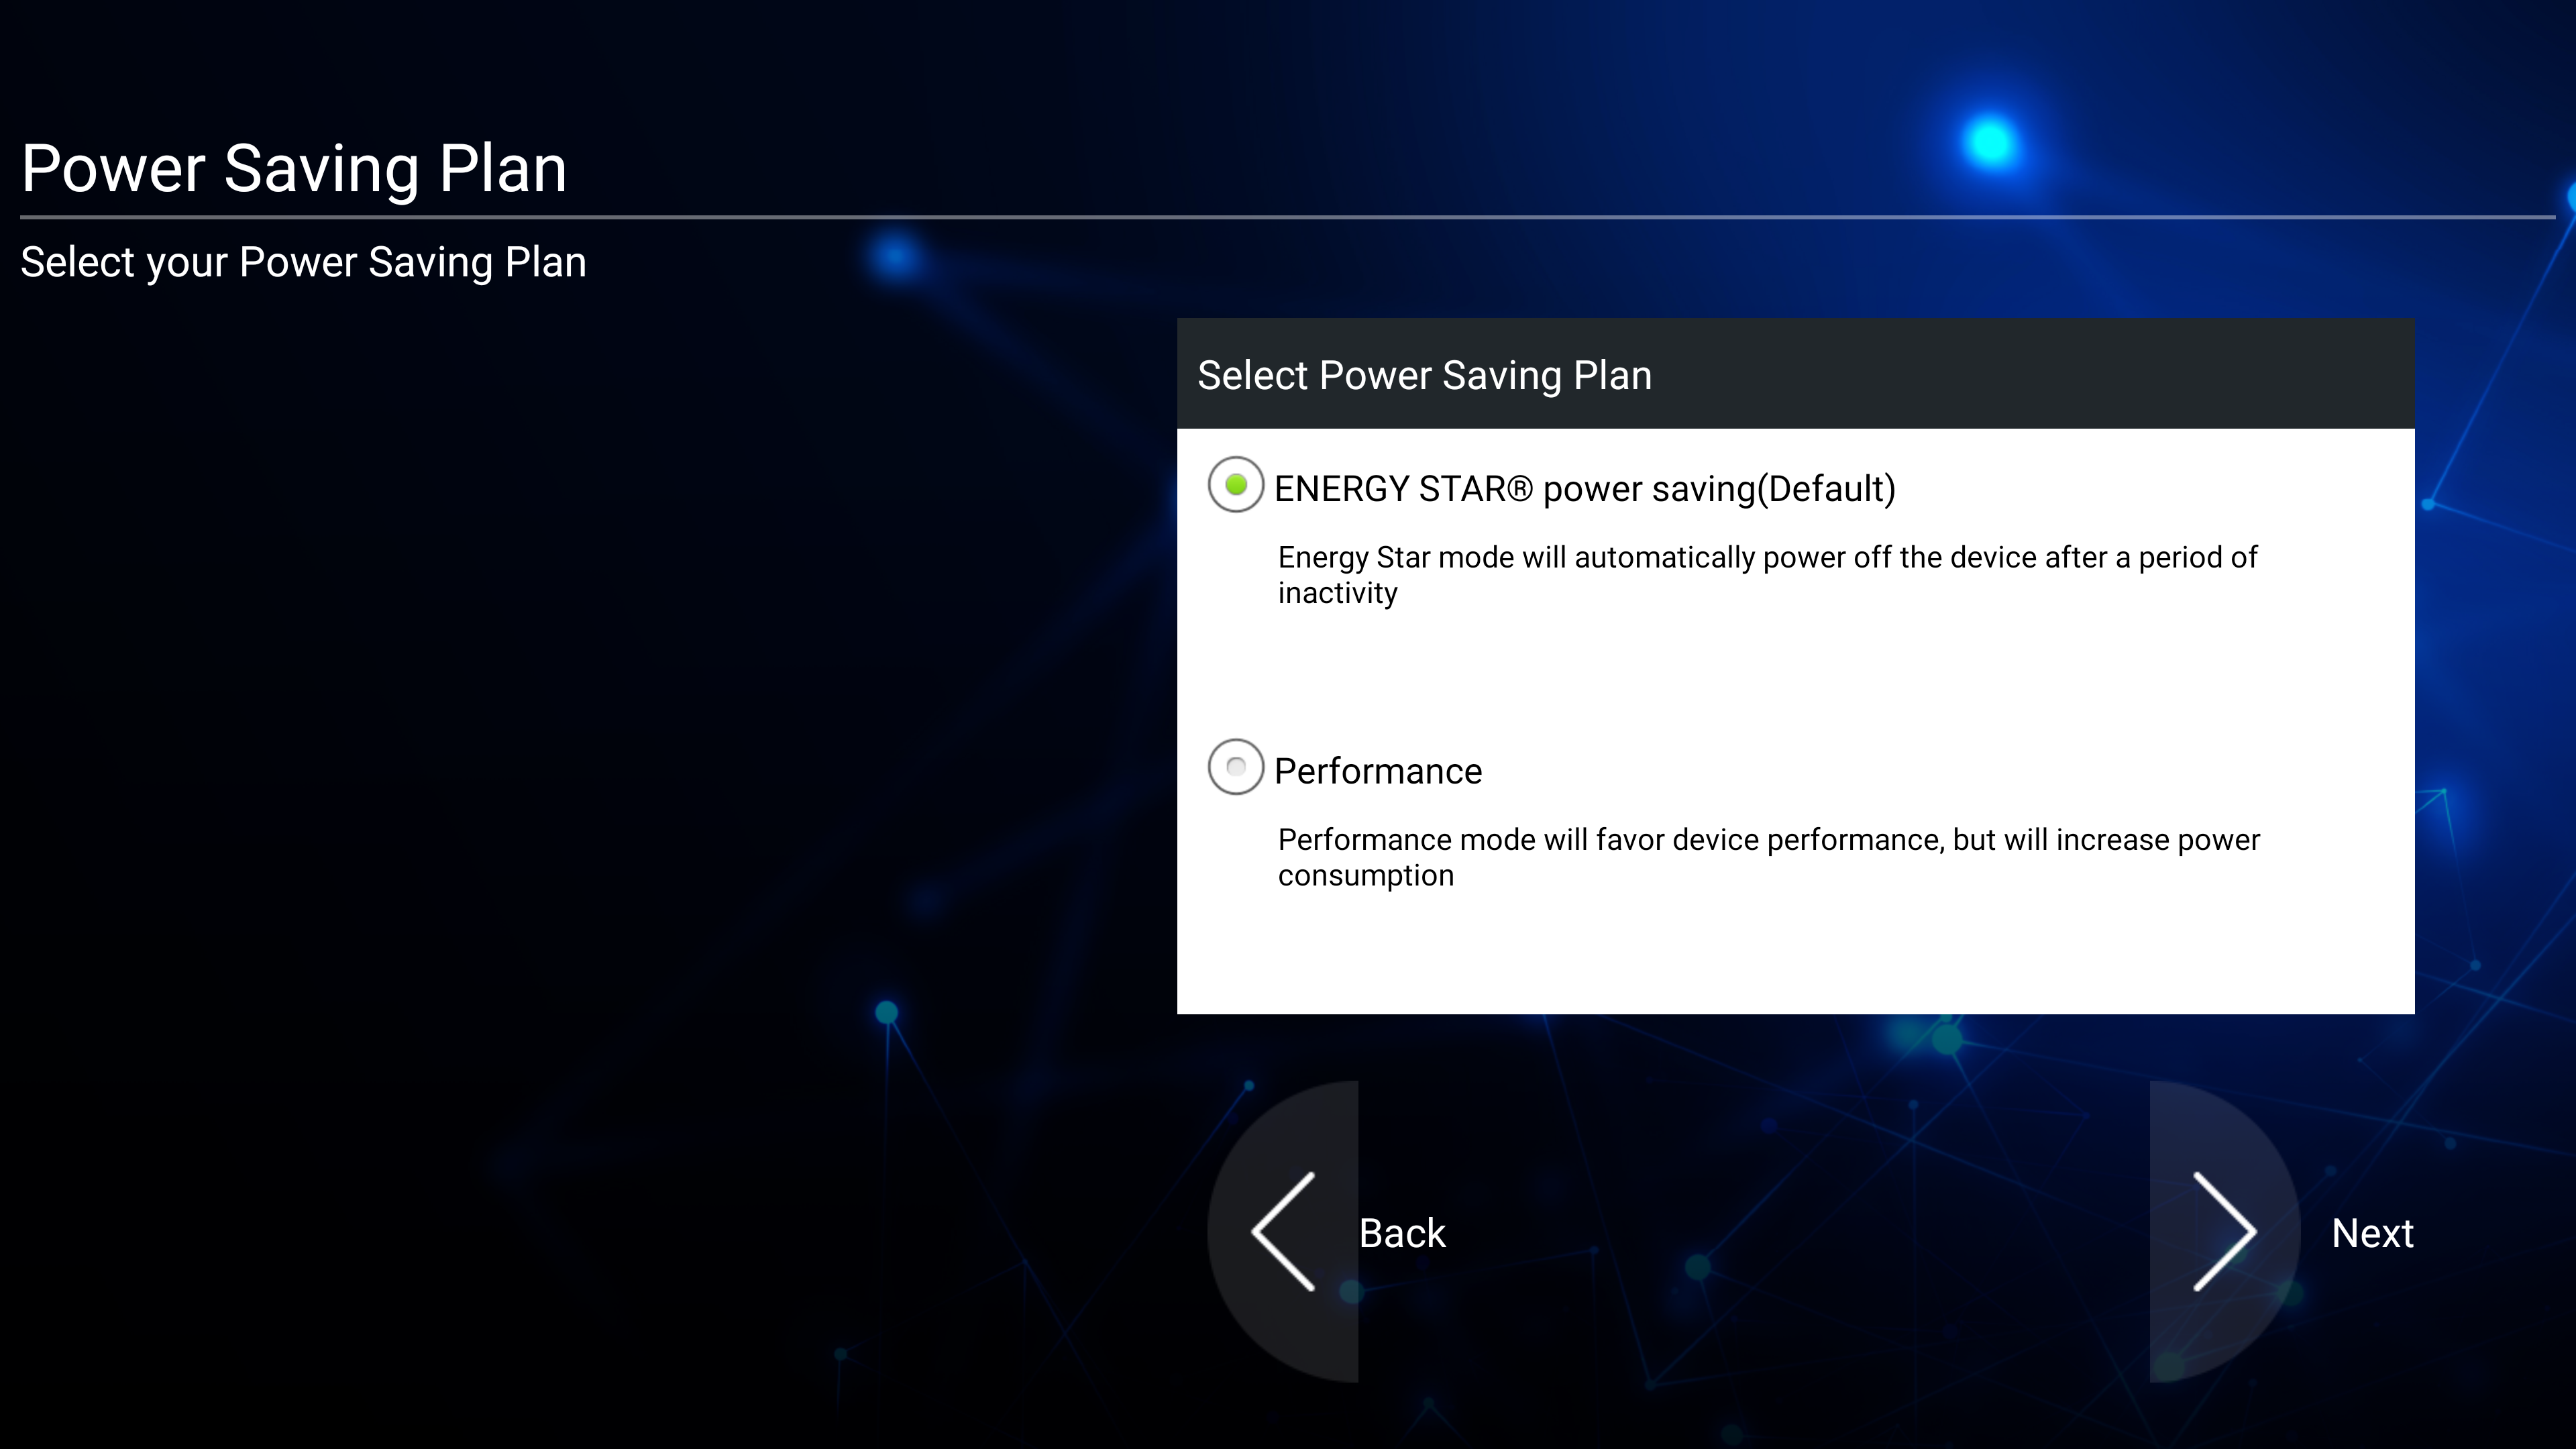 Power saving mode selection.
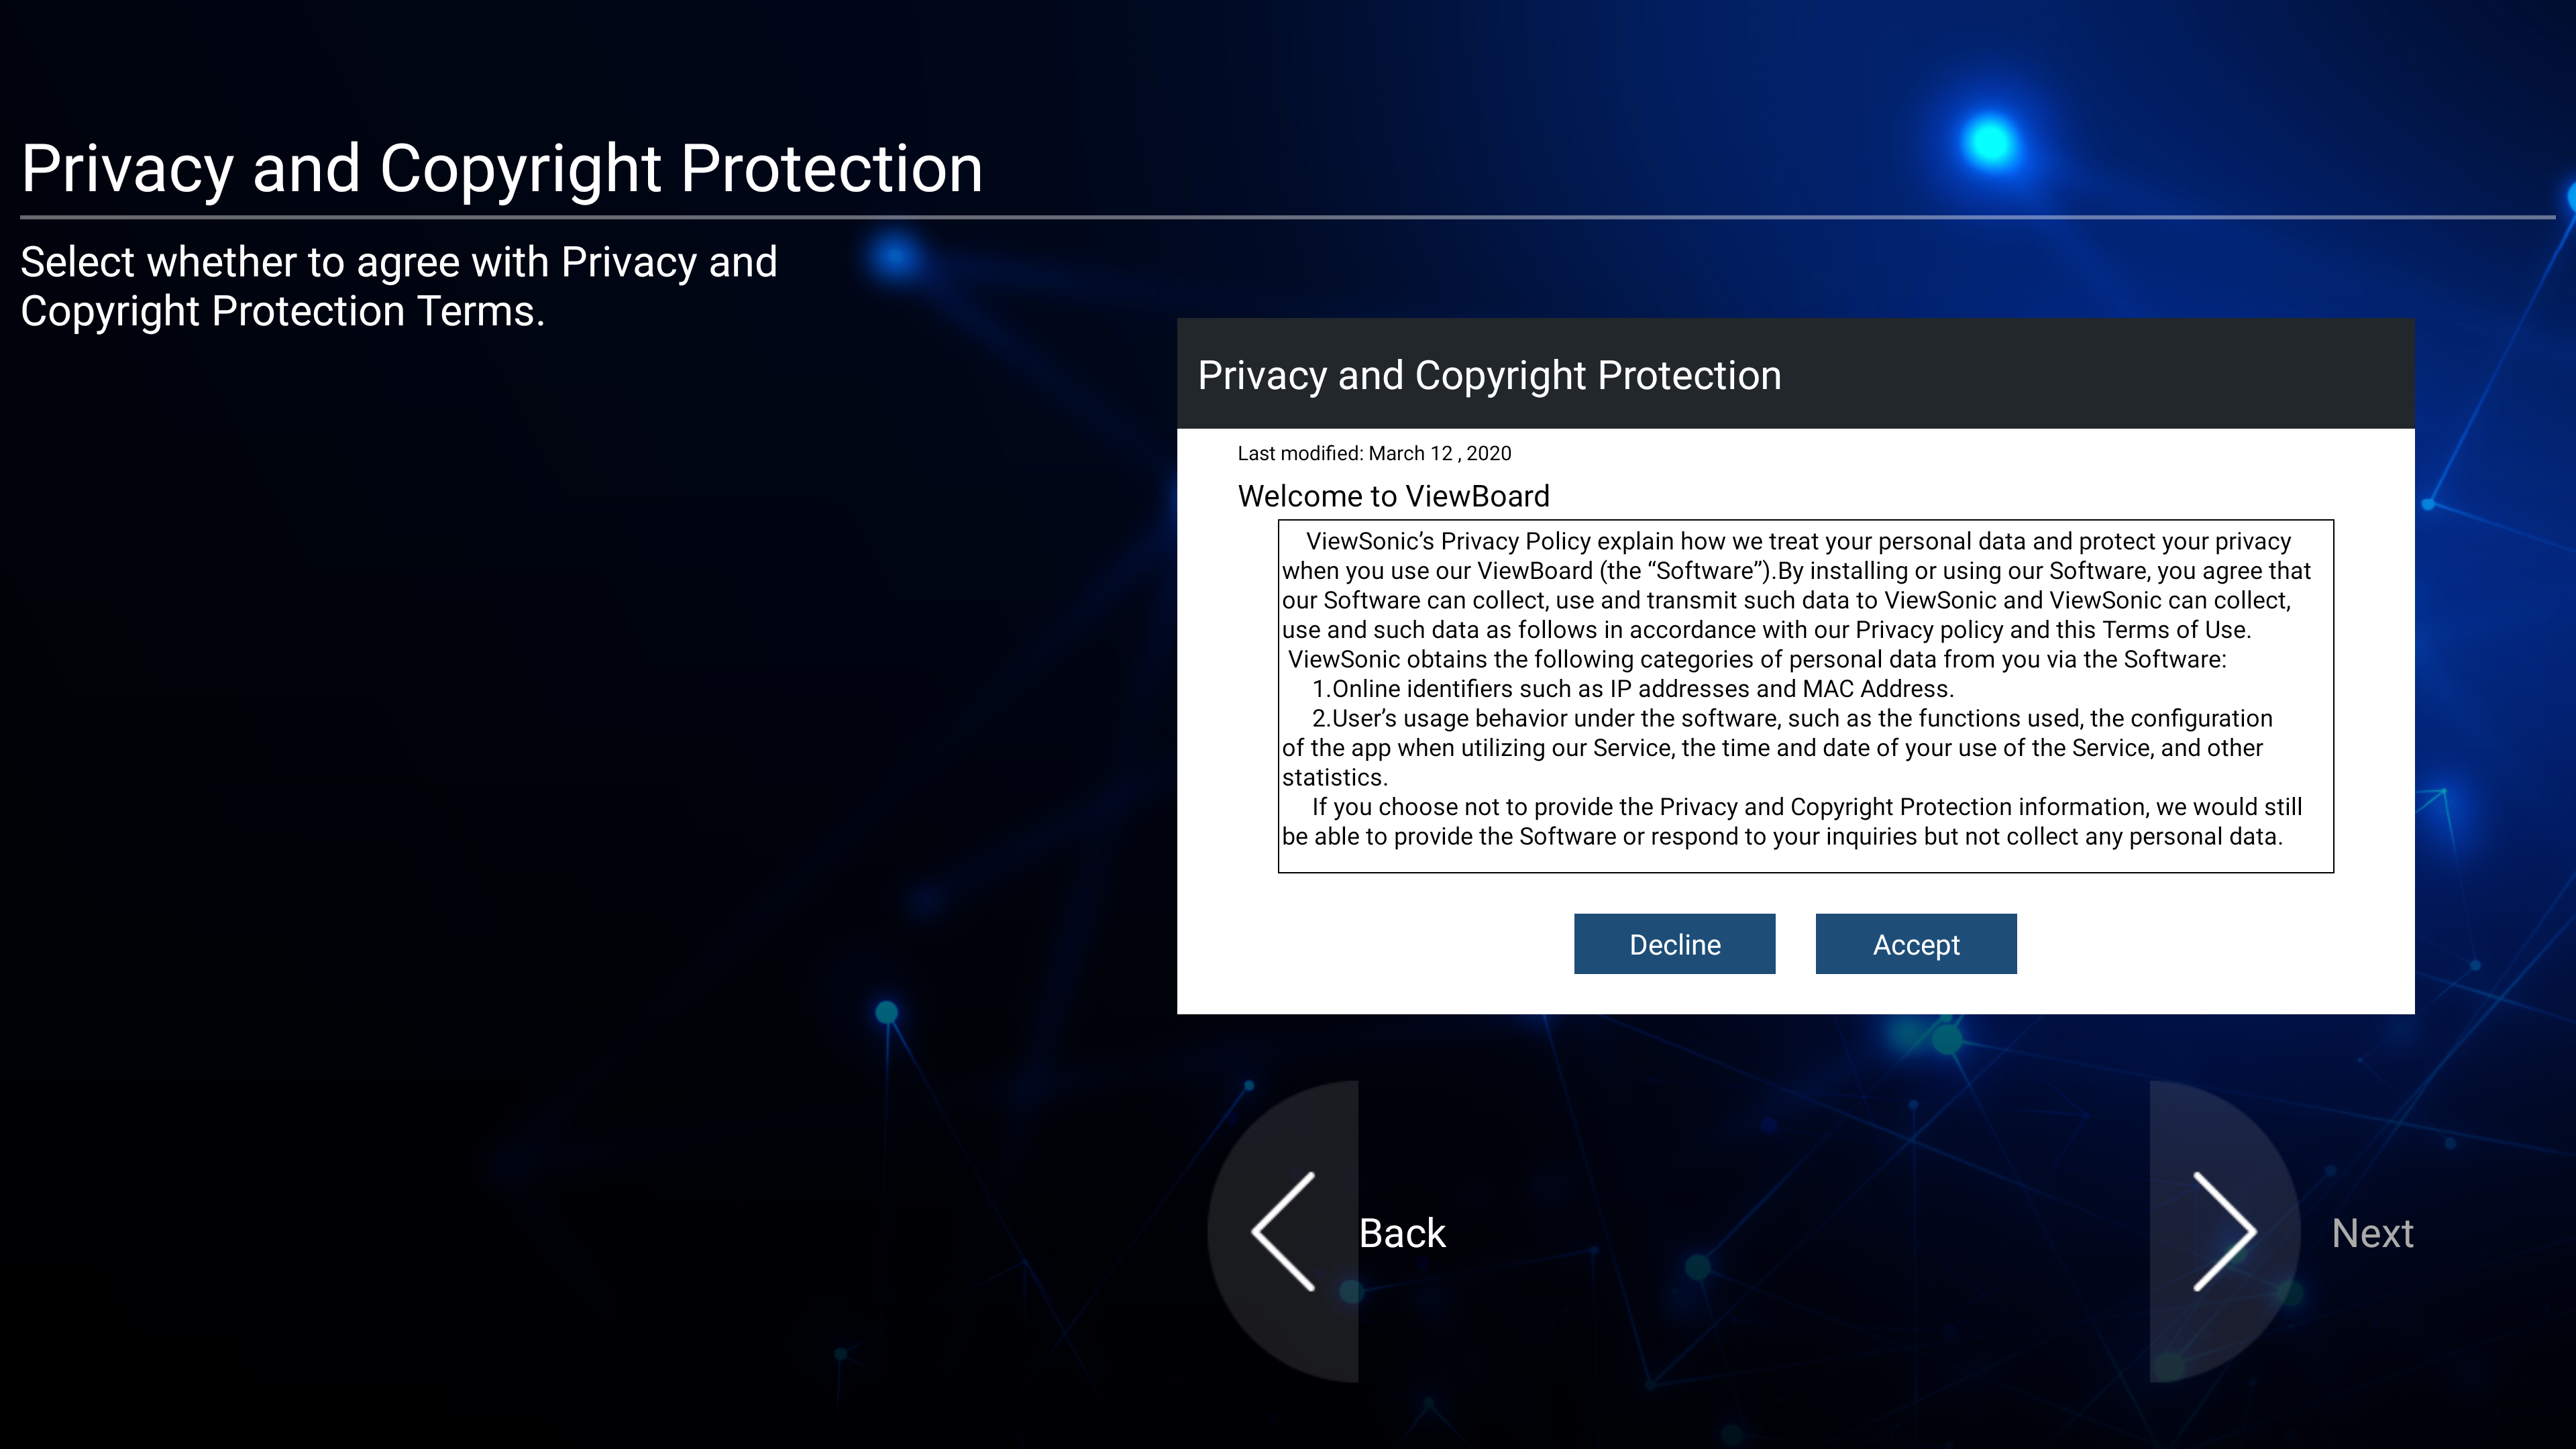 Privacy and copyright agreement.
Home screen
The home screen is where you'll find quick access to your ViewBoard's applications and input source options.
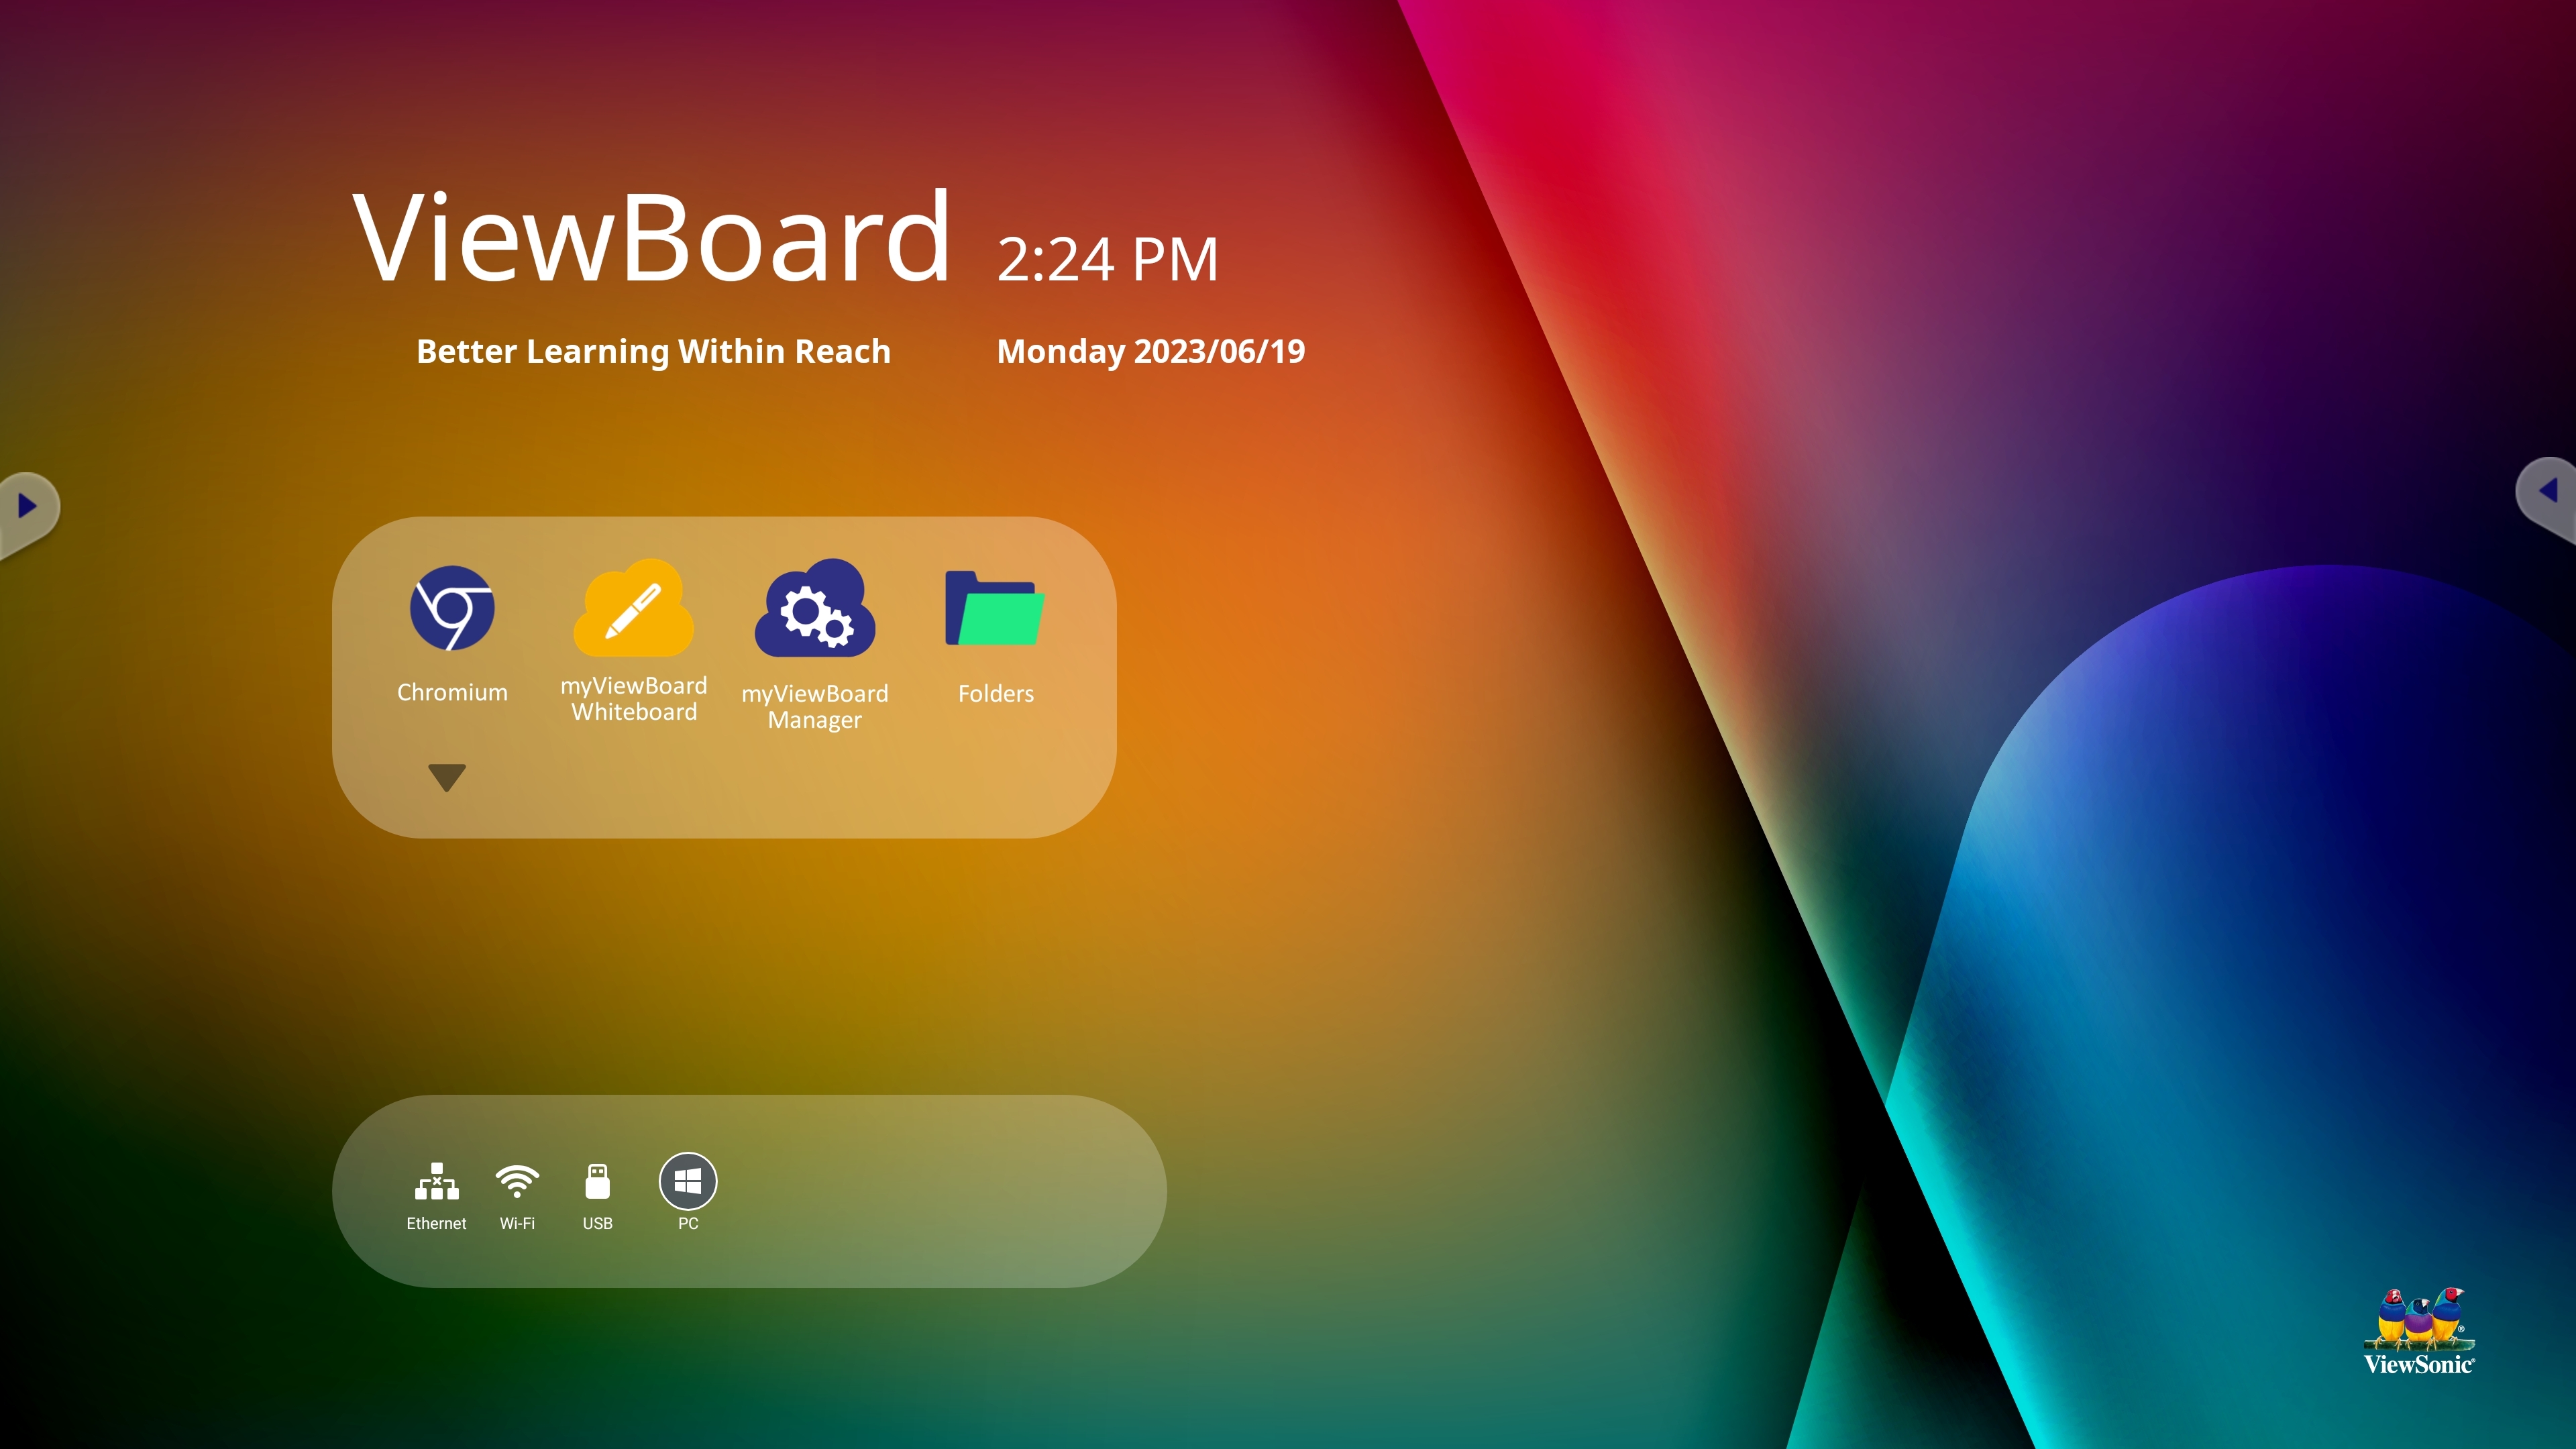 ViewBoard home screen.
Home screen message
The content displaying in the home screen can be changed at any time. Simply press the title section of the home screen to change the title and subtitle.
Additionally, press Set password to require a password for anyone attempting to change title and subtitle content.
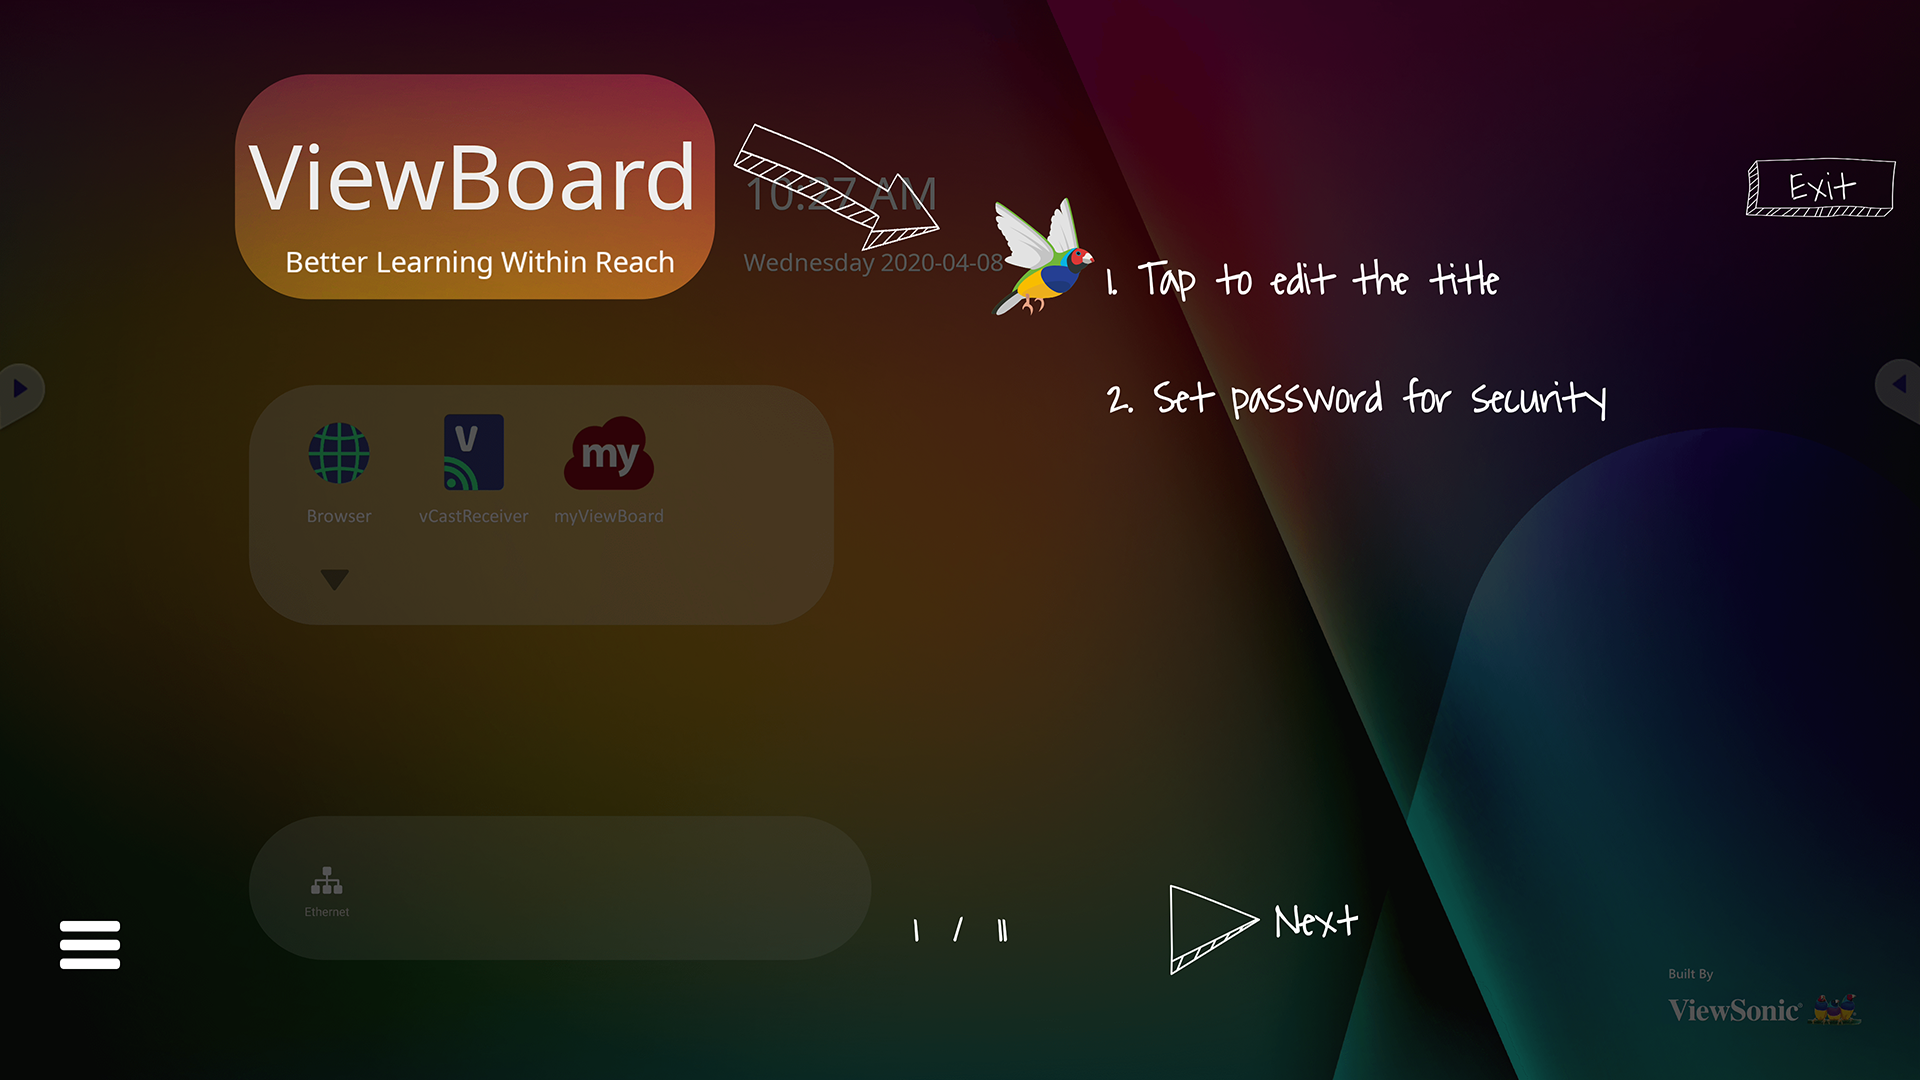 Title area of home screen is highlighted.
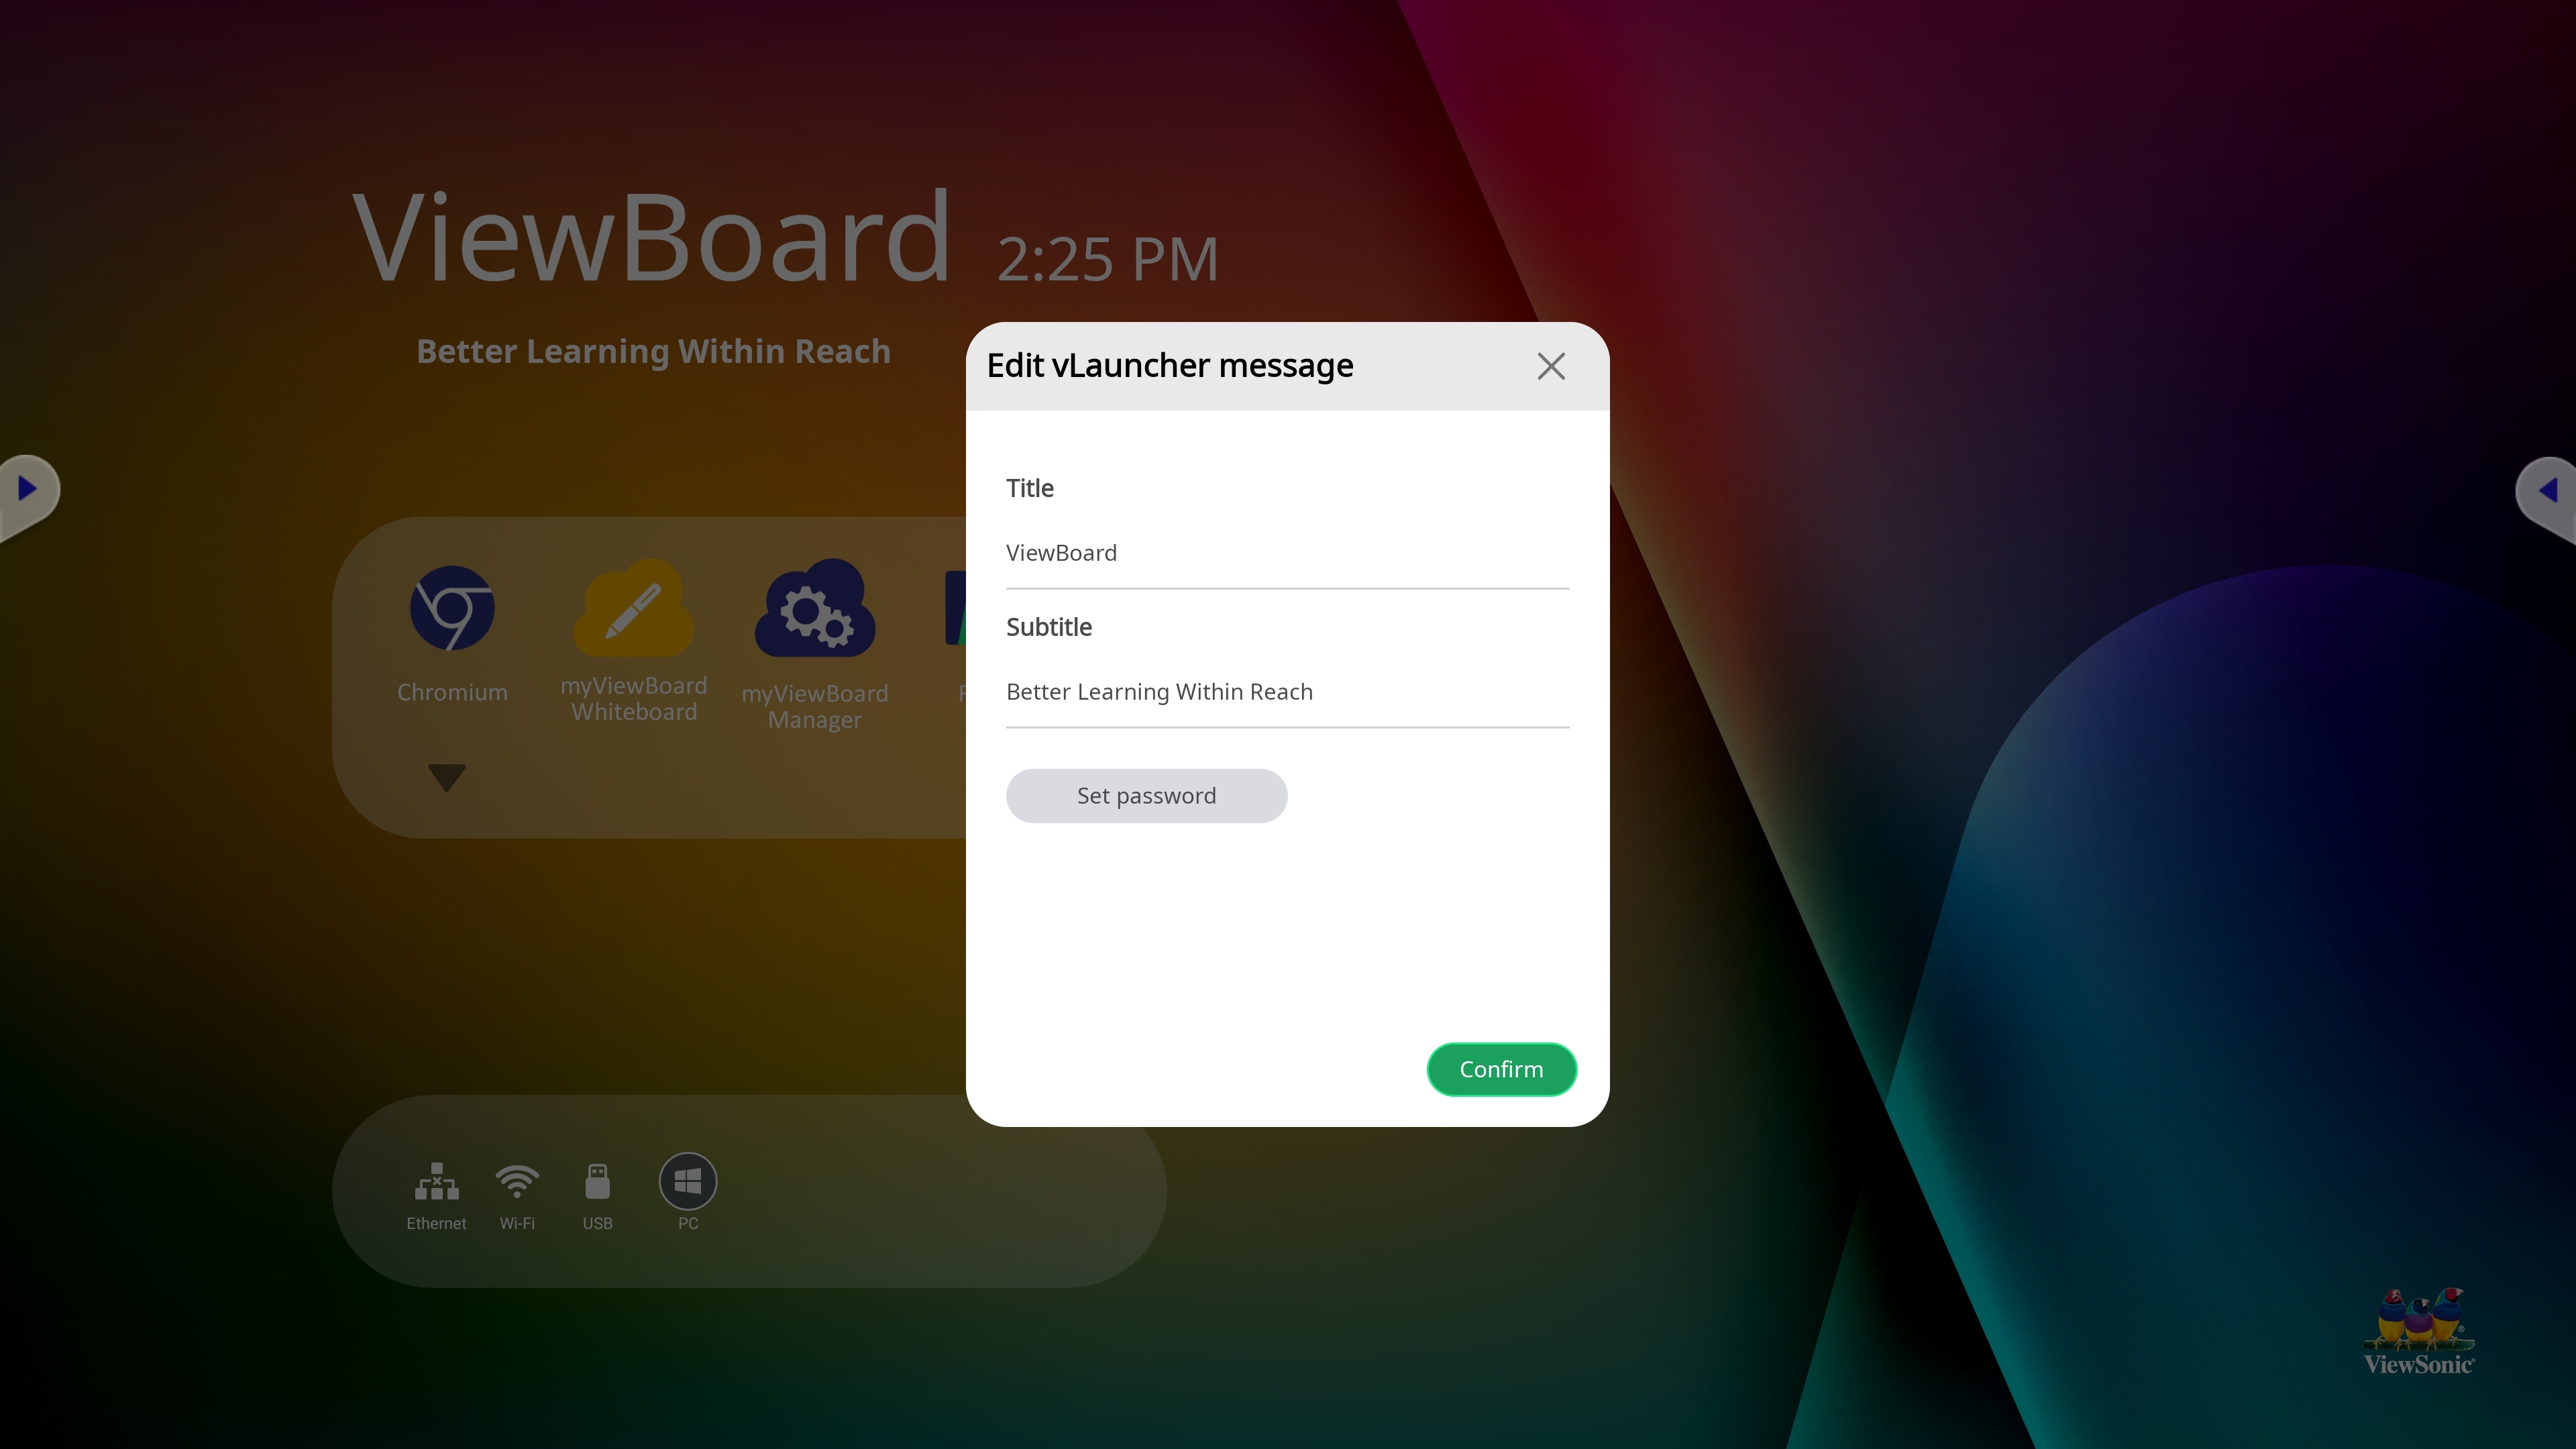 Edit message prompt. The option to set a password to edit this message is available in this prompt.
Applications tray
Find all installed applications in the home screen app tray.
- View all applications by pressing the down arrow
in the shortcut tray.
- Press-hold an application icon and drag it into the shortcut tray to make it more easily available.
- Press-hold an application icon in the shortcut tray and drag it down to remove it from the shortcut tray.
- You can also press-hold and drag applications onto the home screen.
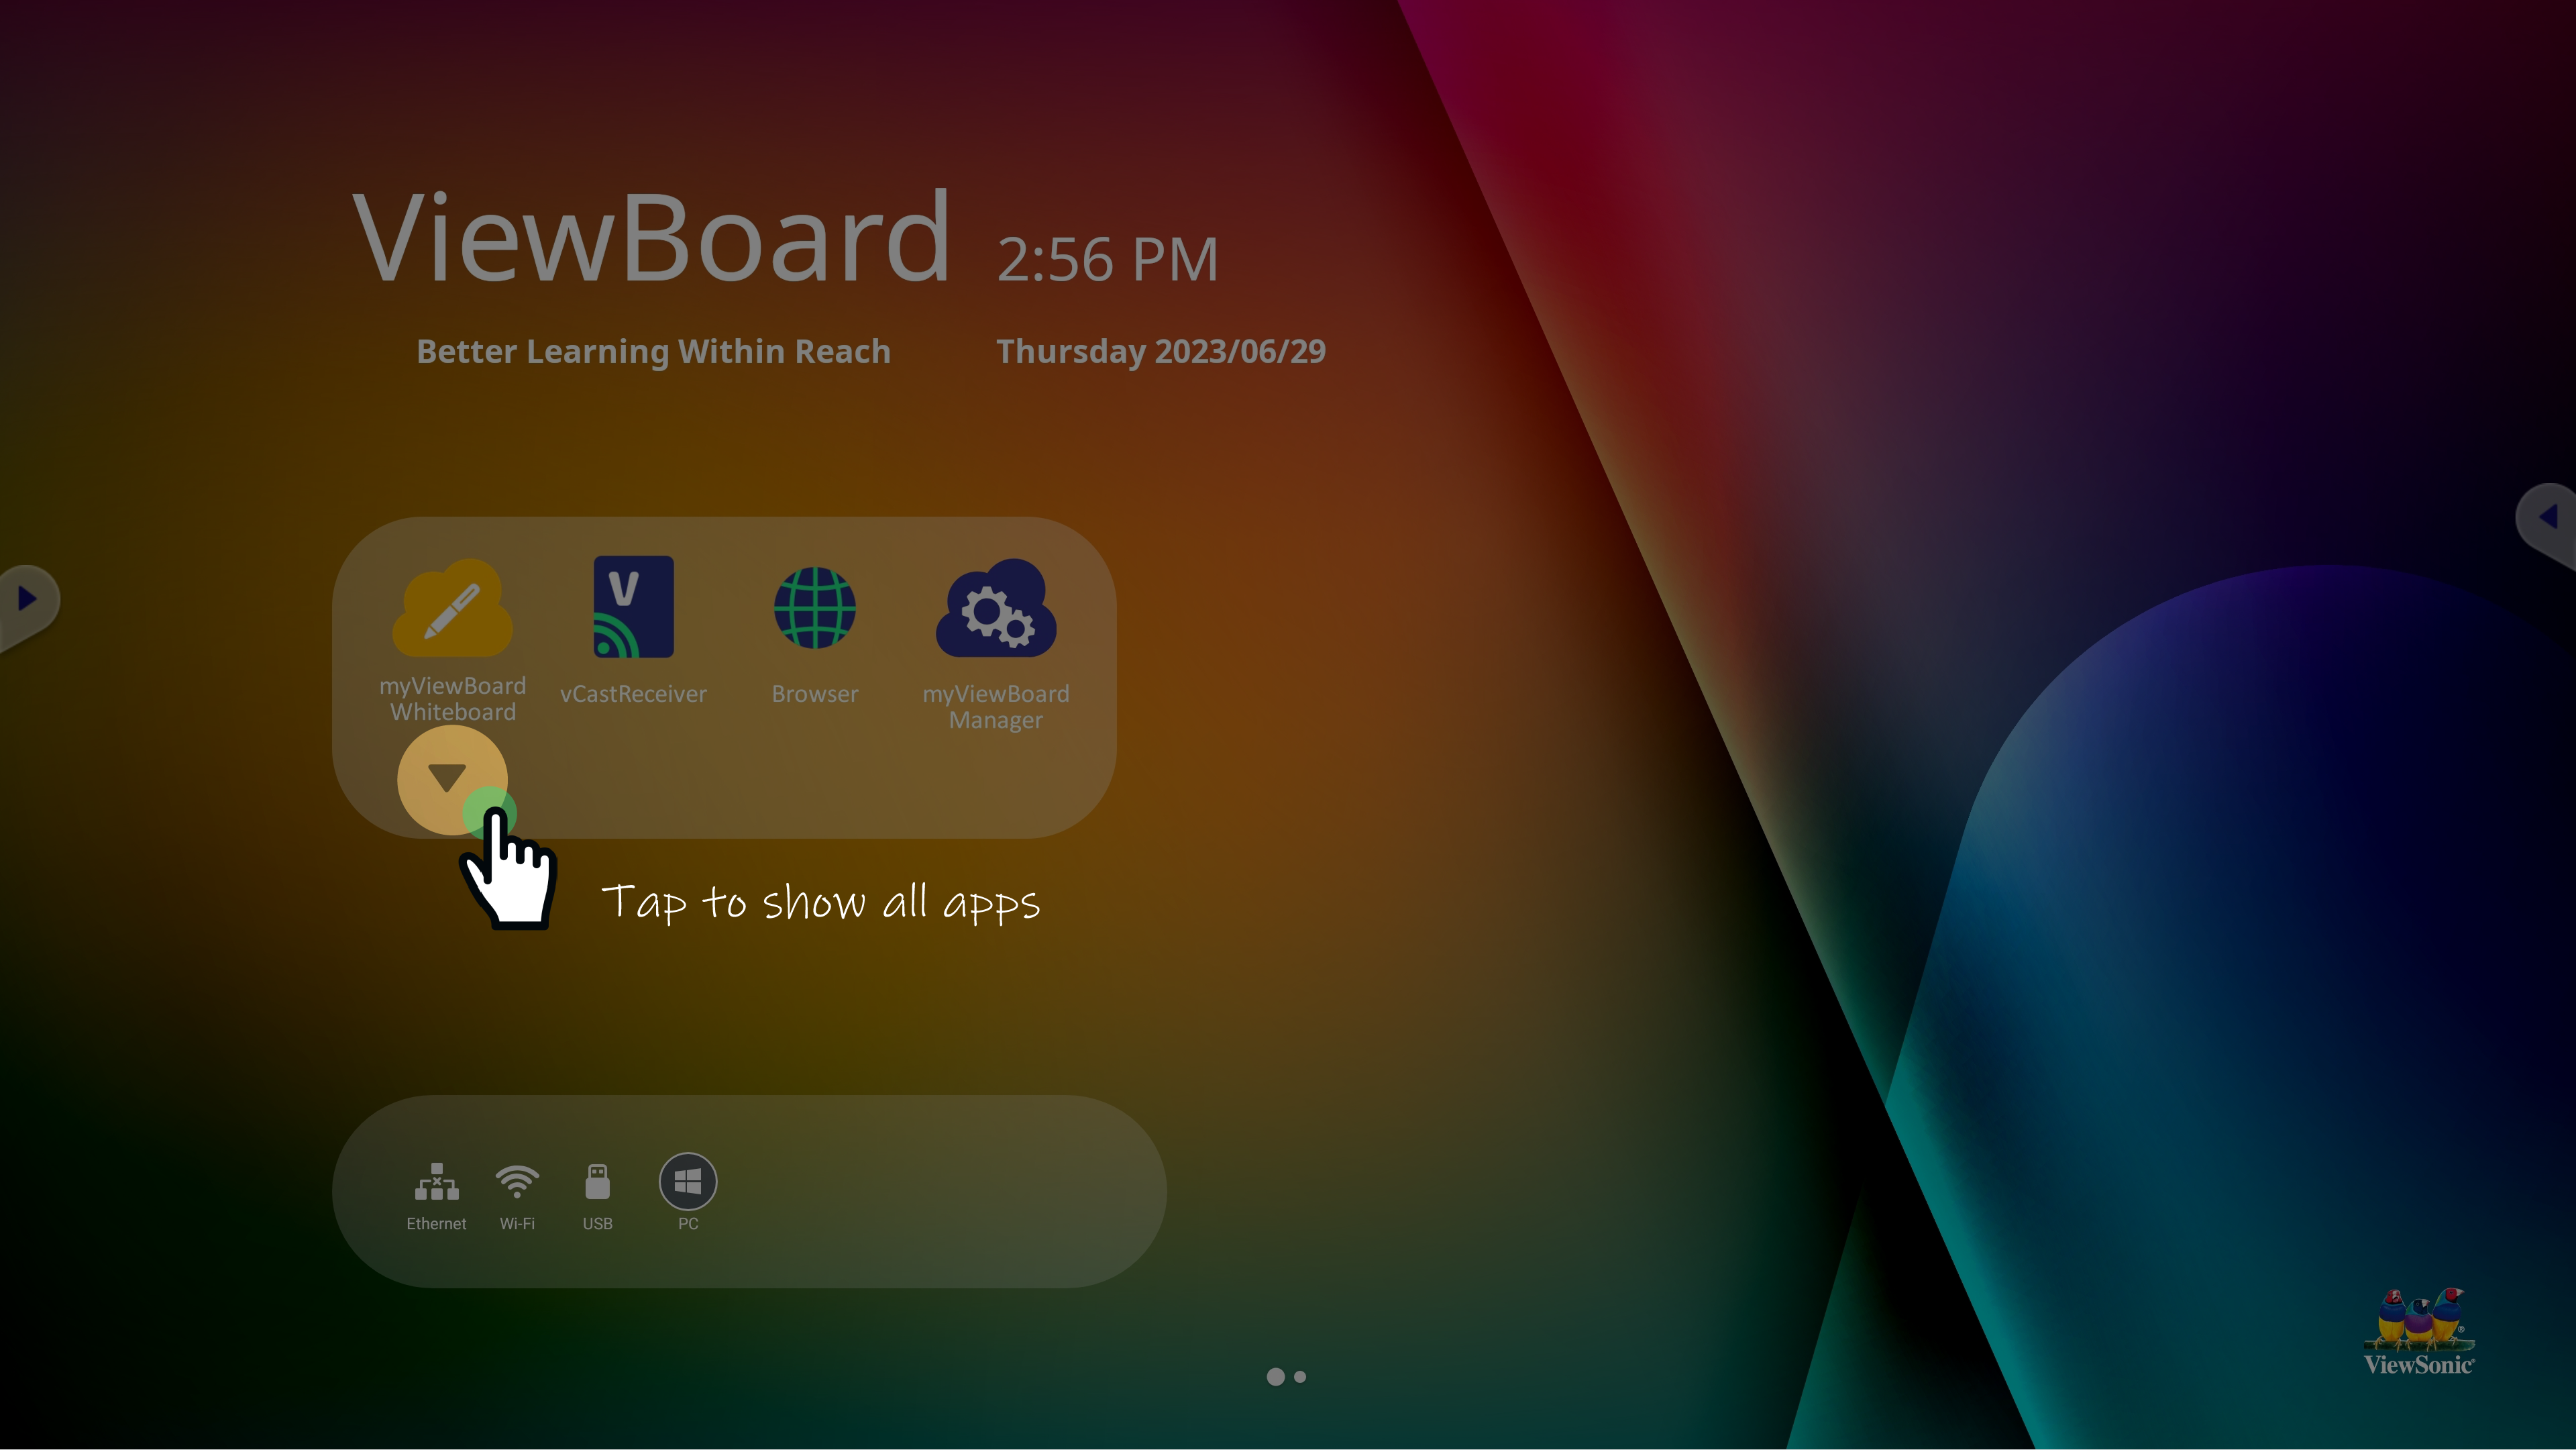 App tray expand button highlighted.
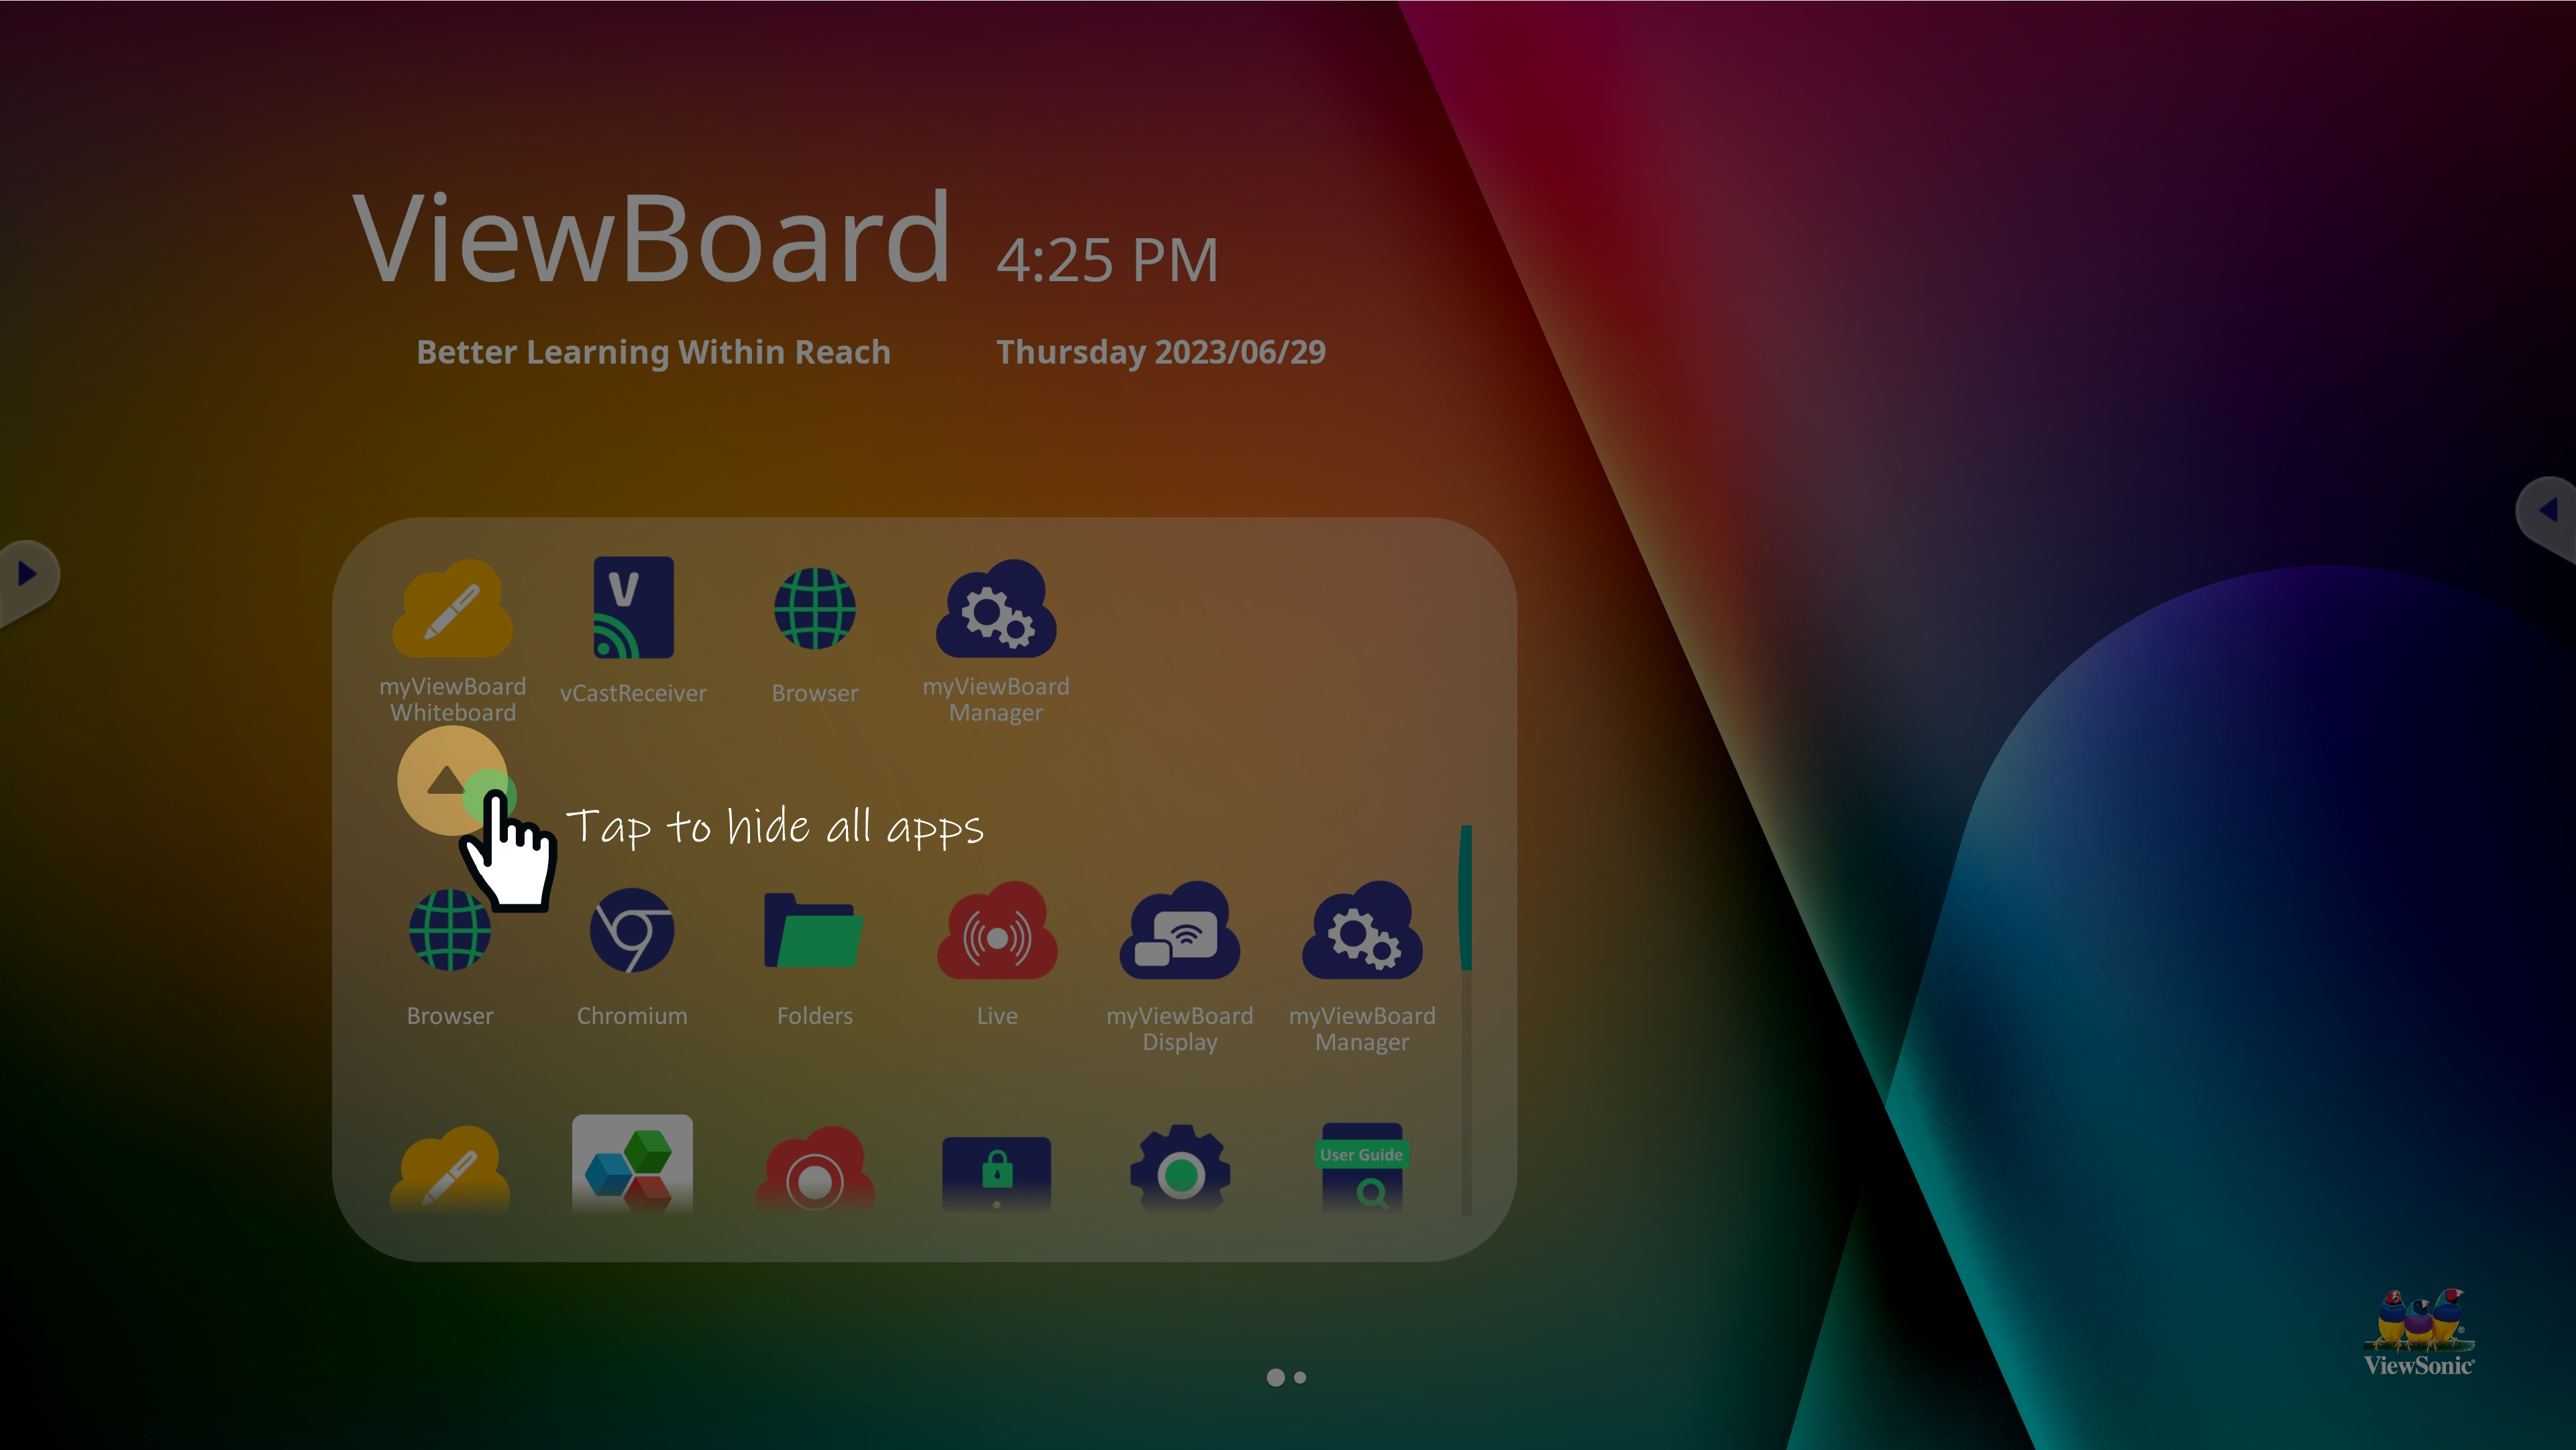 App tray collapse button highlighted.
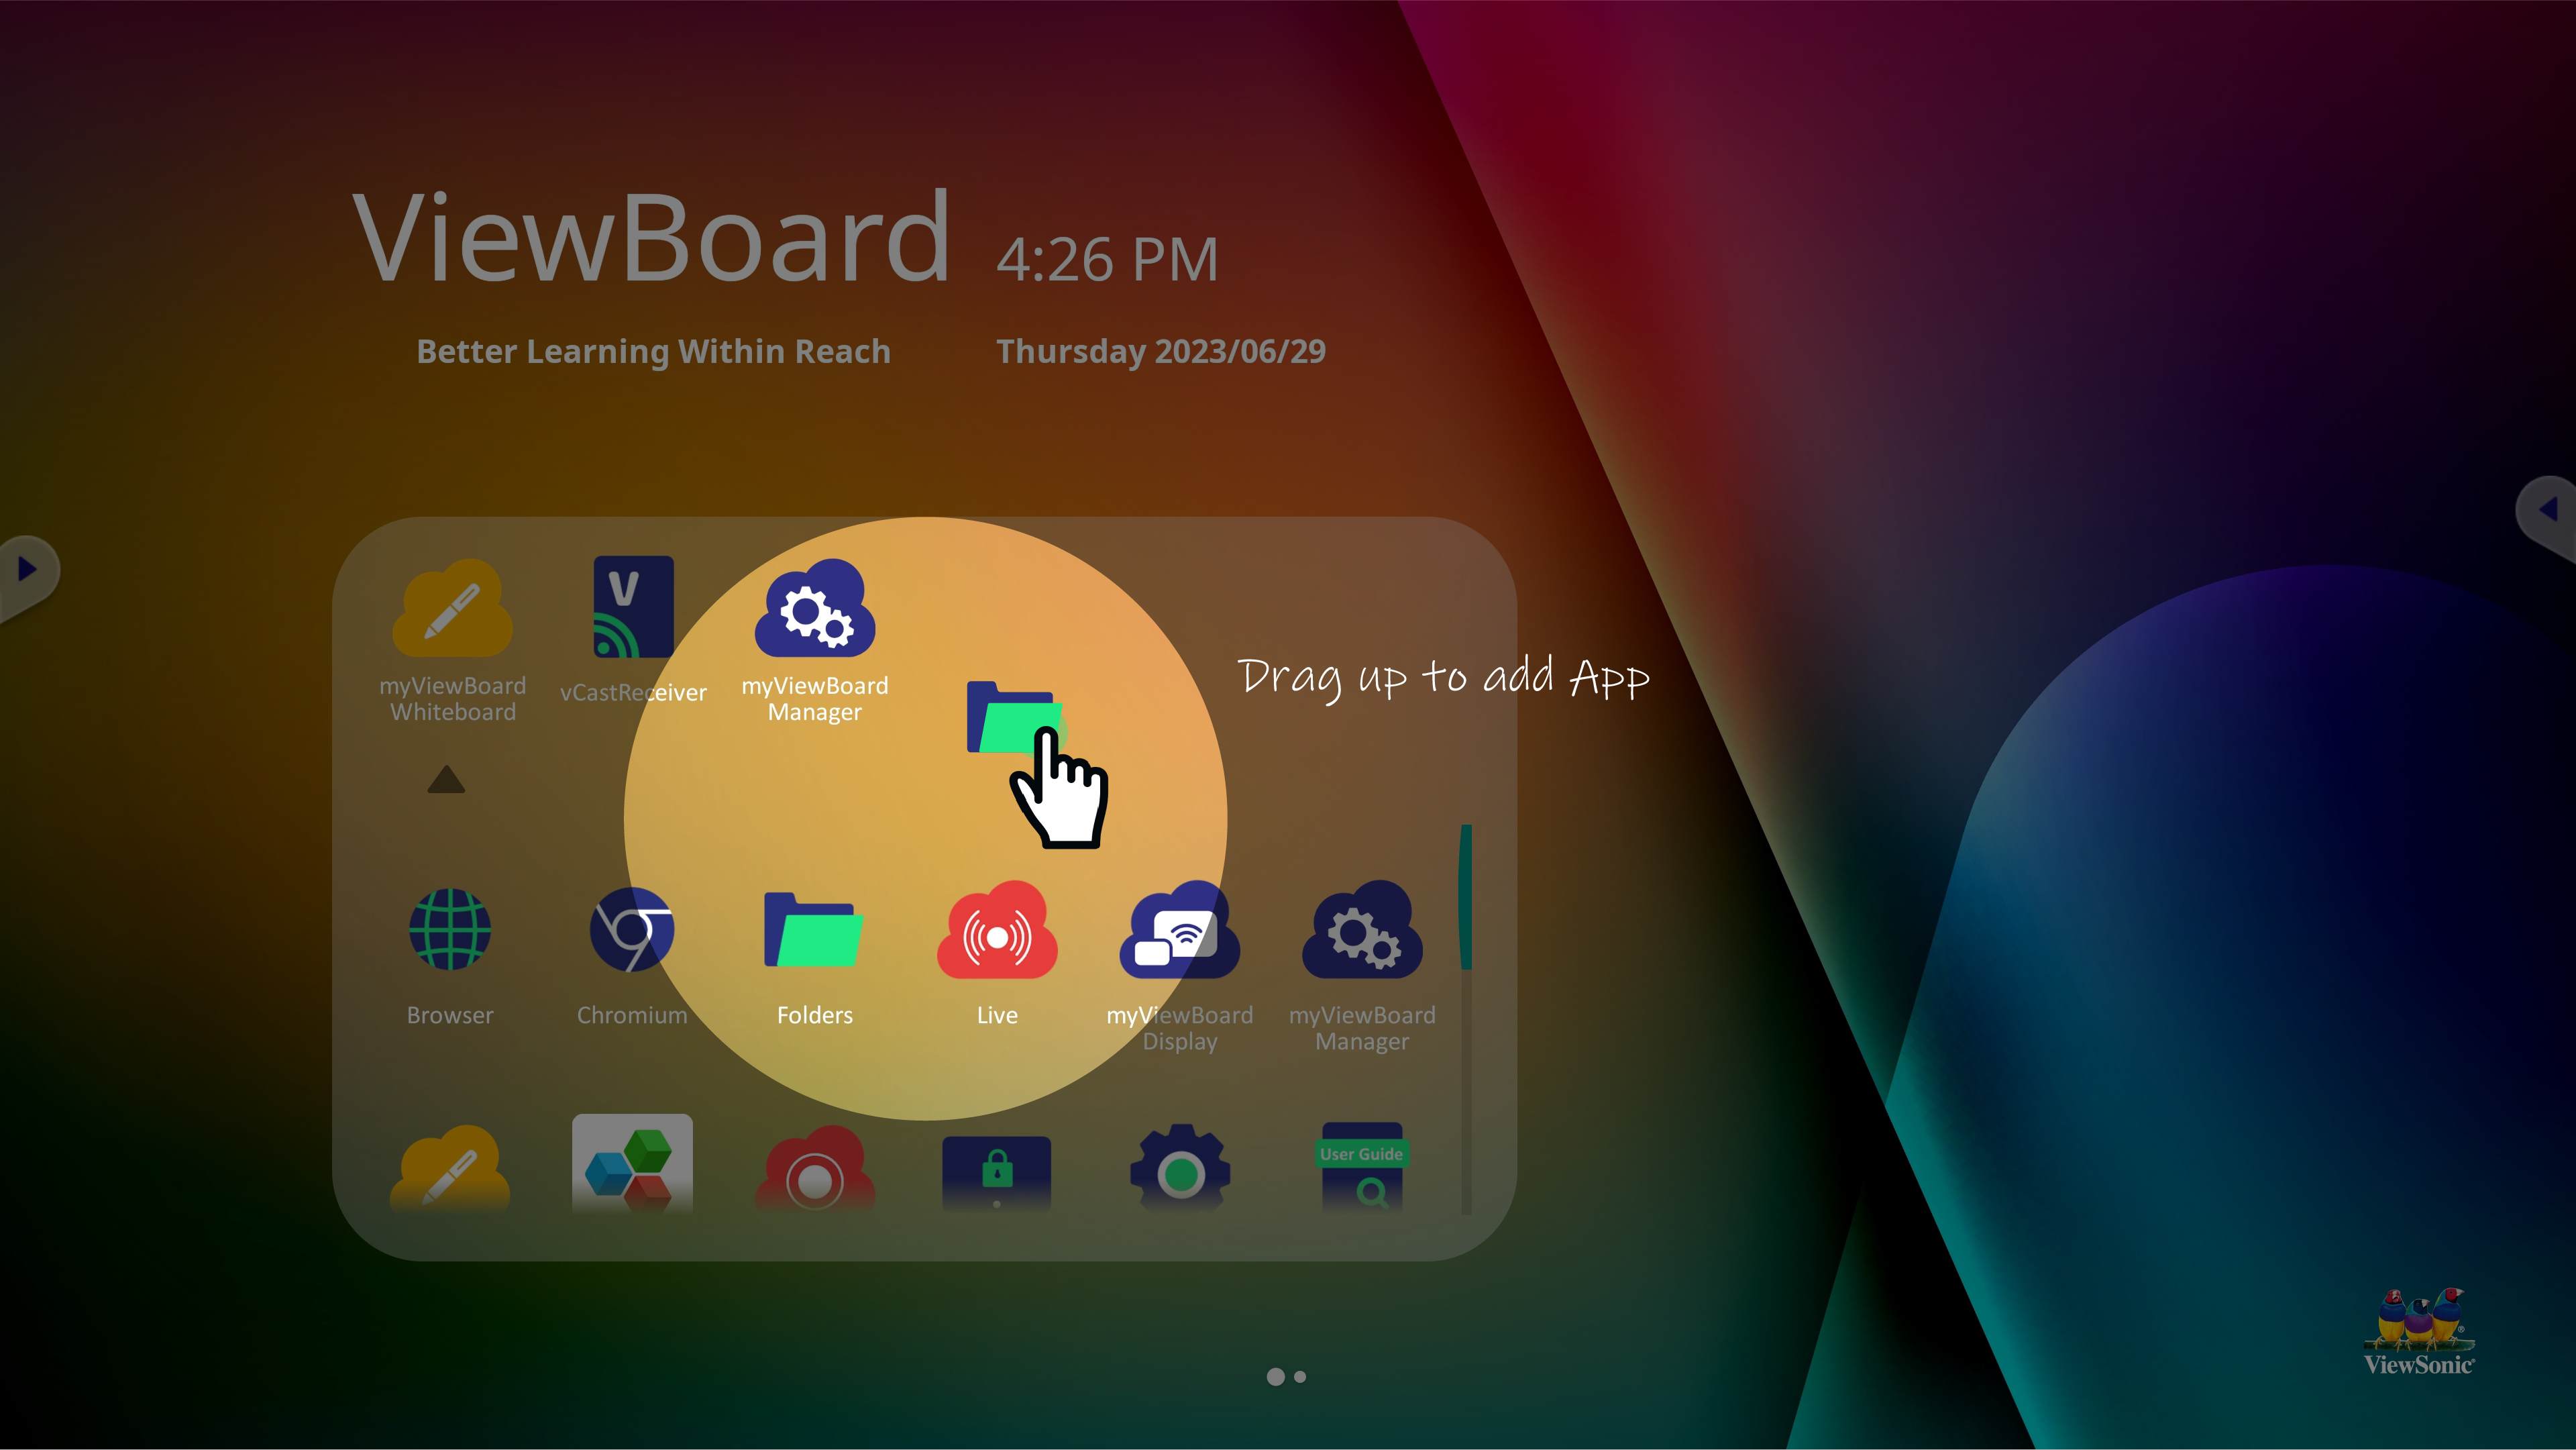 Example of adding an app into the shortcut tray.
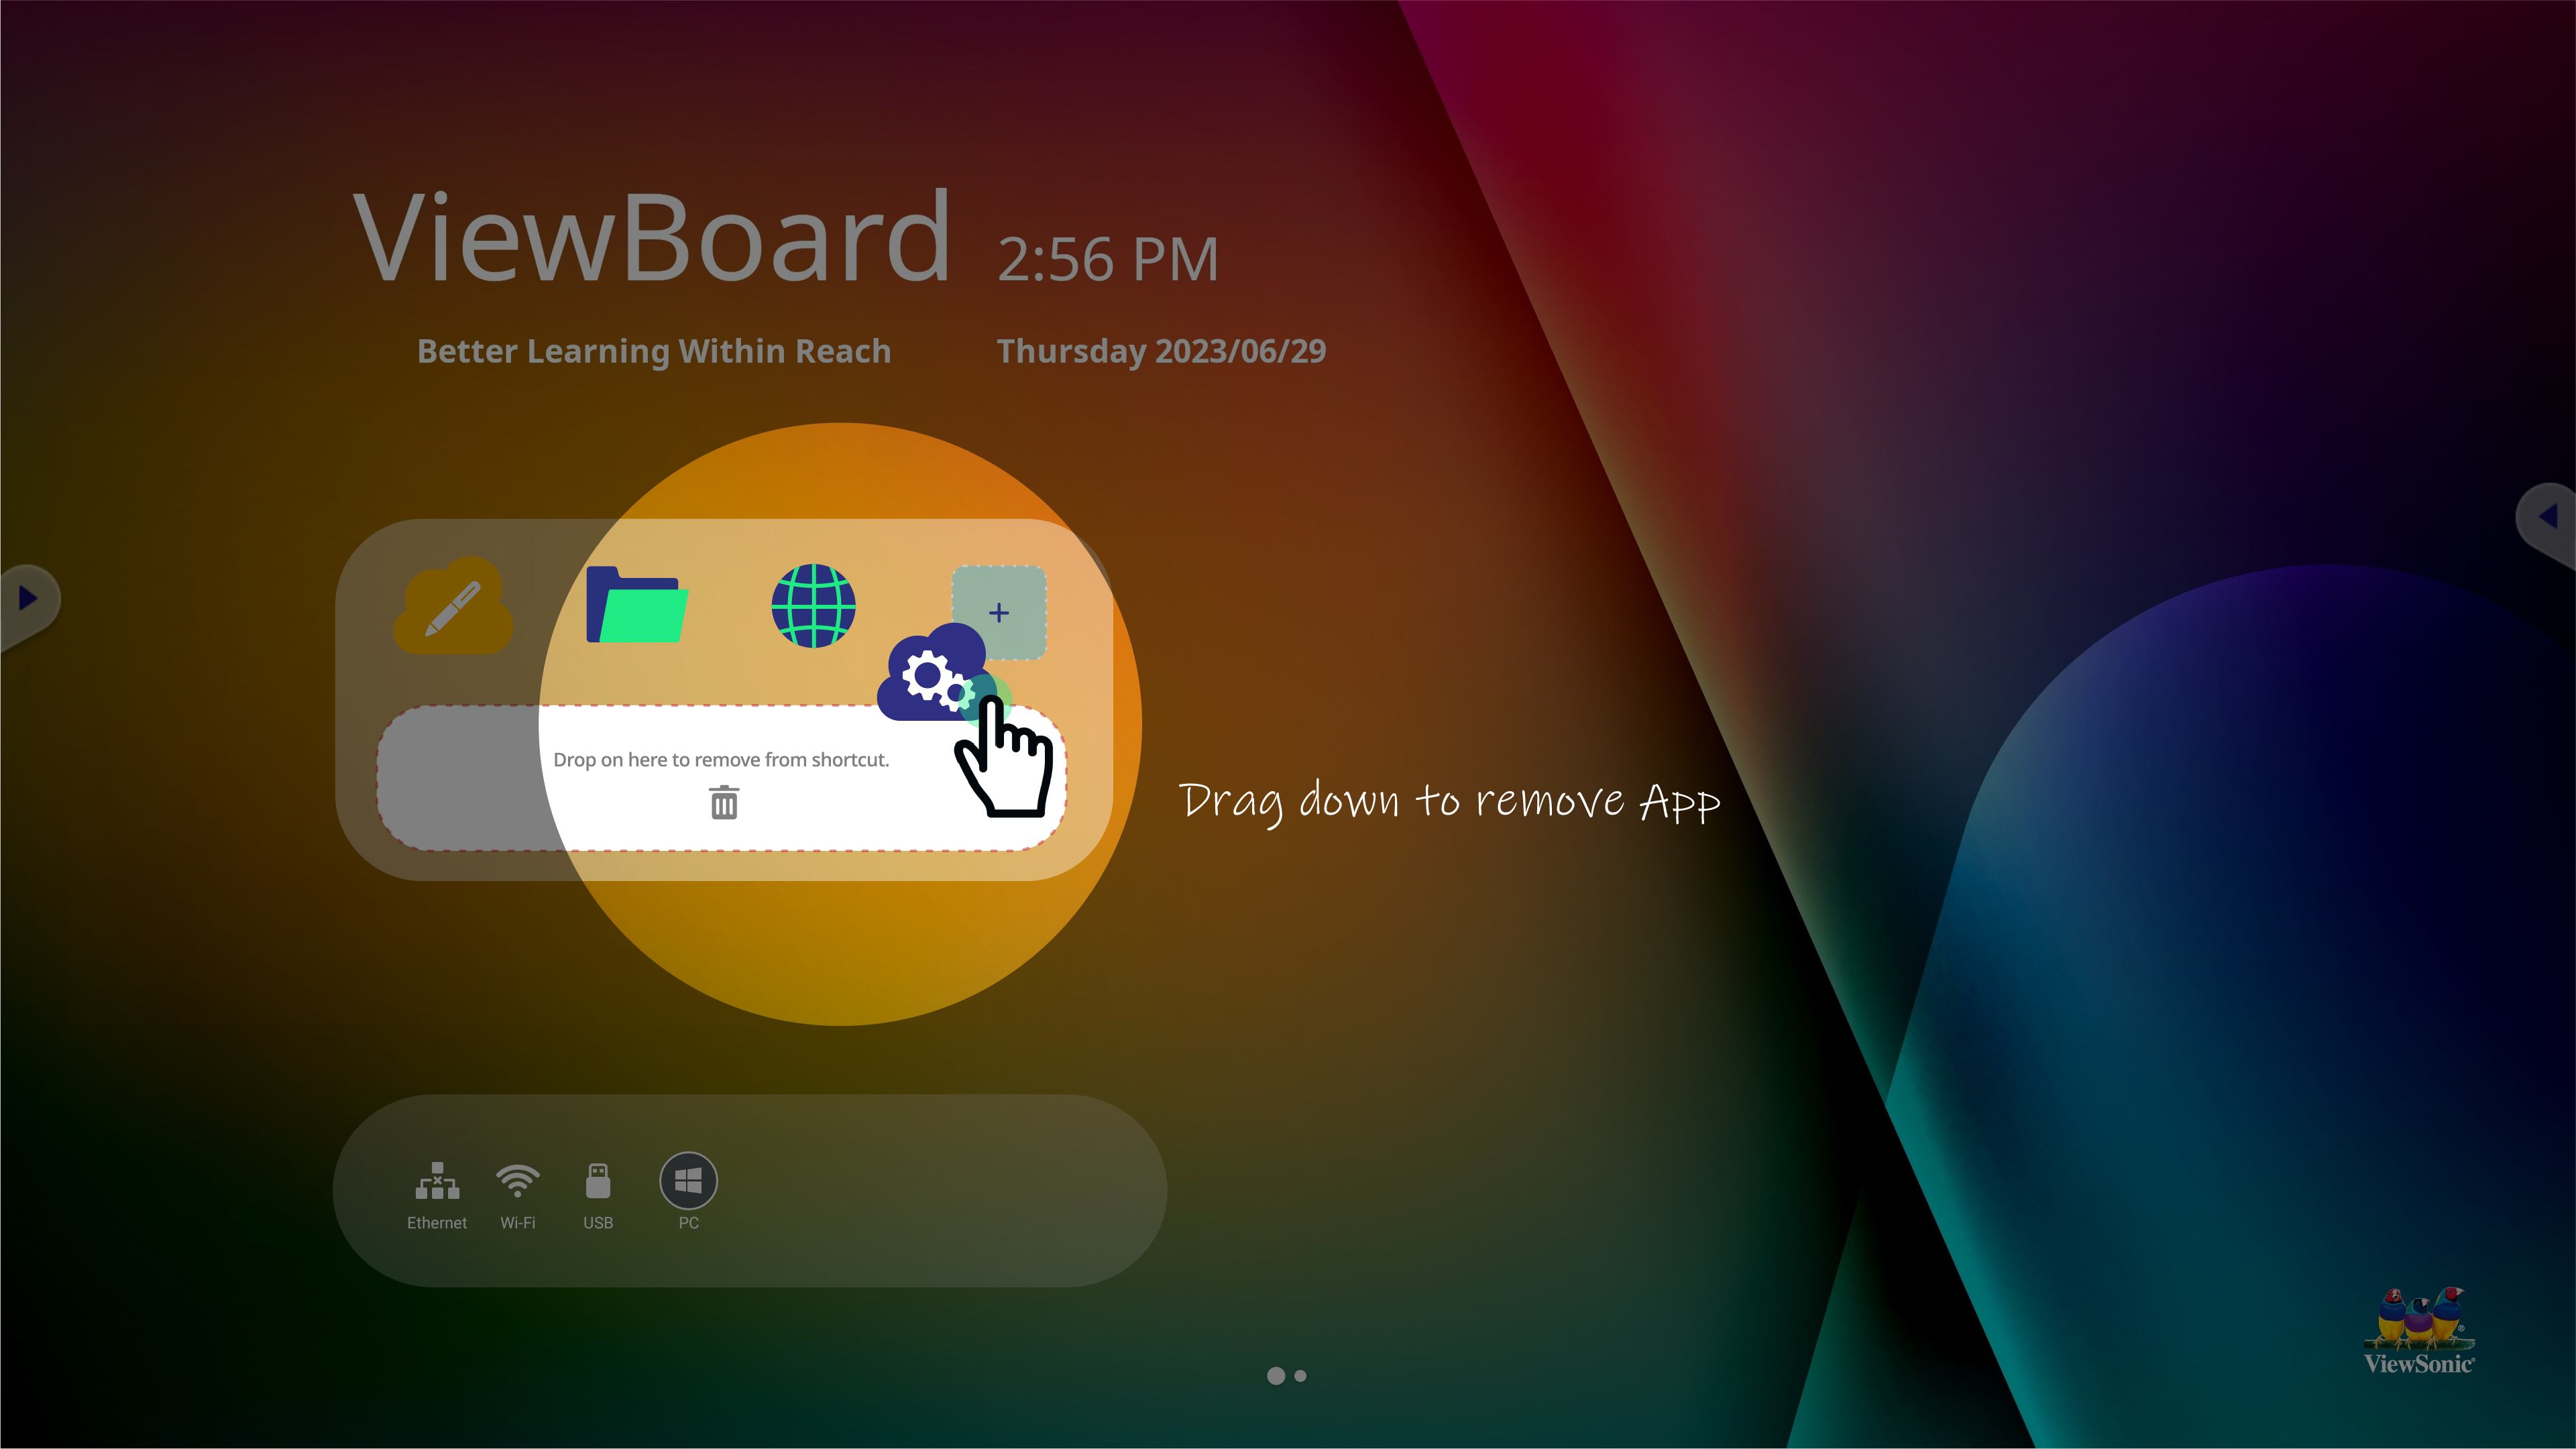 Example of removing an app from shortcut tray.
Learn more about pre-installed apps on your ViewBoard.
Side toolbar
You can access always-available tools in the side toolbar. The icons to open this toolbar is always accessible no matter which app you have open or which input source you're in.
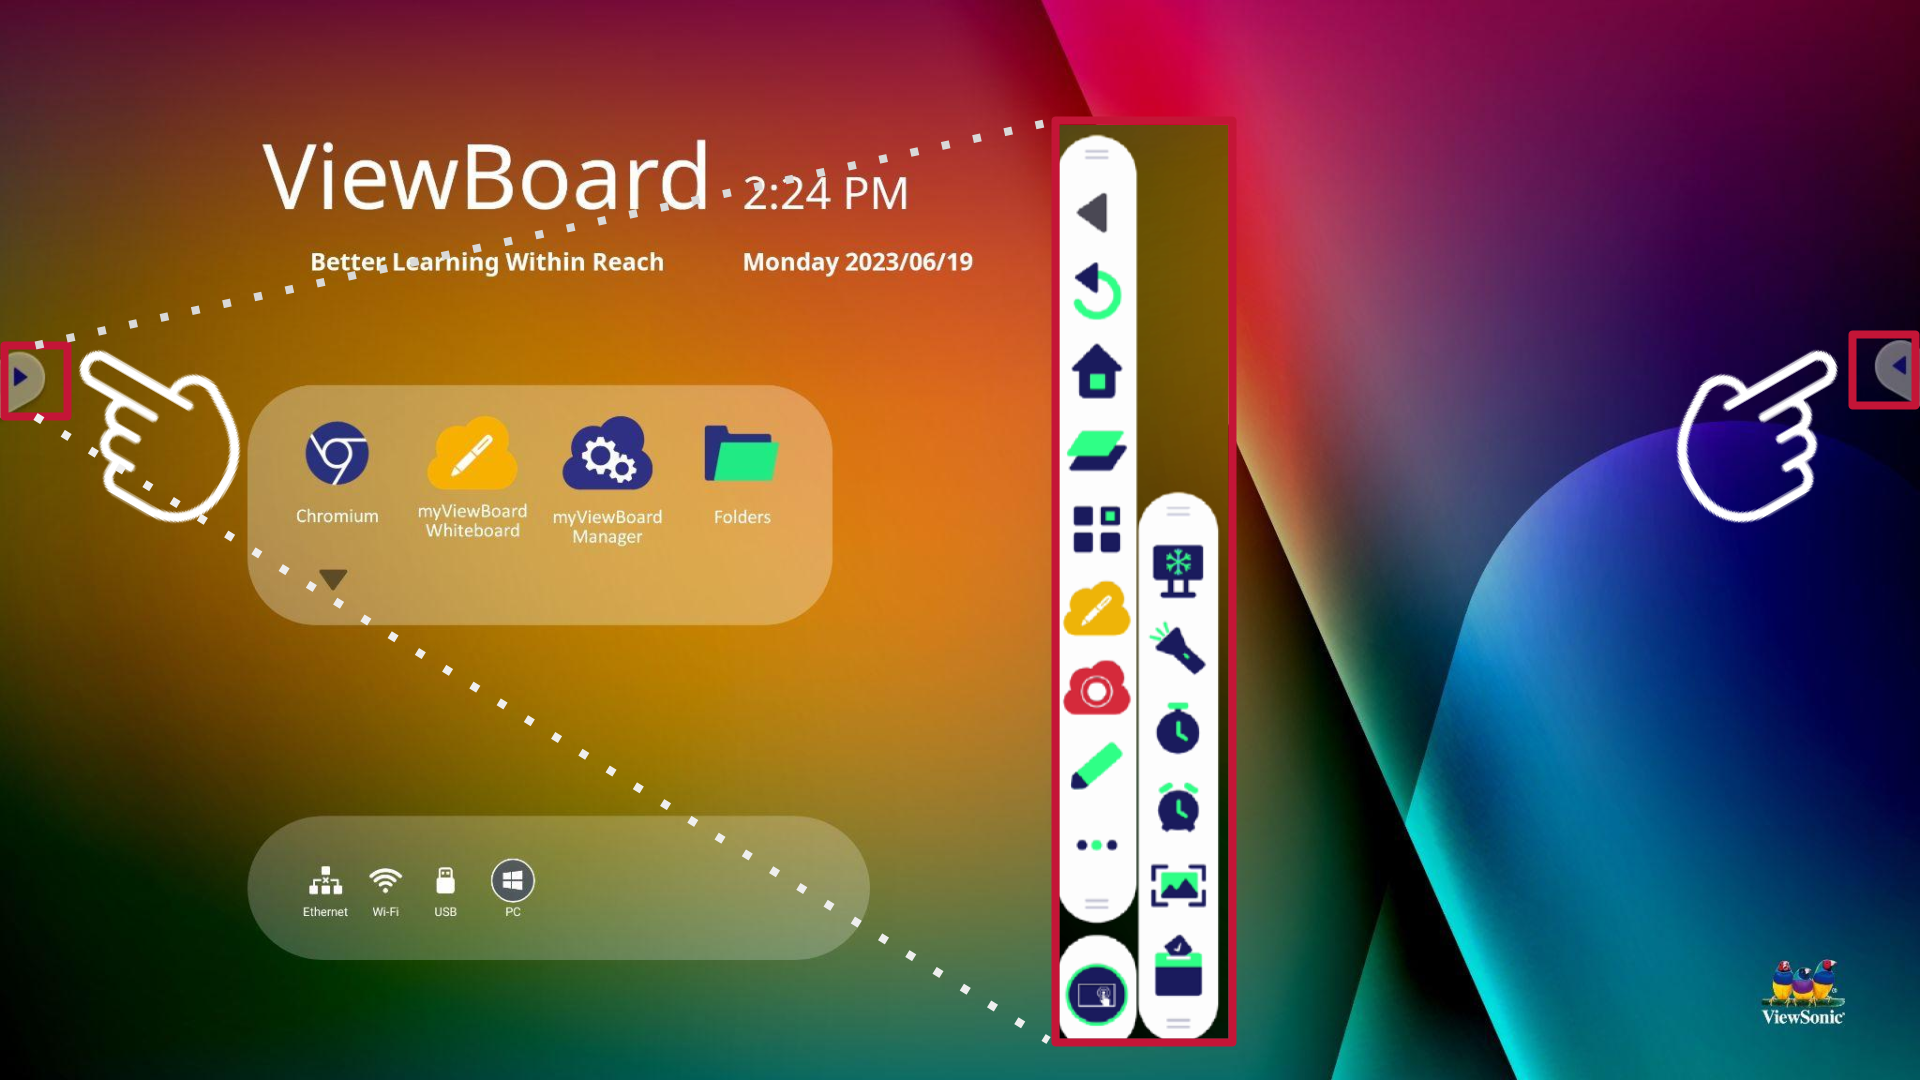 Side toolbar icons highlighted at the left and right edges of the ViewBoard home screen, with open toolbar highlighted at the center of the screen.
To access a given tool:
- Press the toolbar icon
.
- Press your desired tool to open it.
- (Optional) Press the more icon
to view more tools.
Tool |
Description |
|
|---|---|---|
 Back Back |
Return to the previous screen. | |
 Home Home |
Return to the ViewBoard home screen. | |
 Recents Recents |
Display all active or open applications. | |
 Apps Apps |
View all installed applications. | |
|
|
Launch myViewBoard Whiteboard, ViewSonic's whiteboarding software designed to make the most out of your ViewBoard. | |
|
|
Record your screen and save it on your device. Used in combination with myViewBoard Whiteboard when recording a lesson. | |
 Draw Draw |
Annotate over your current screen with black, white, yellow, orange, red, pink, green, or blue ink. | |
| Emphasize content on the screen with yellow, grey, gold, orange, red, pink, green, or blue highlights. | ||
 Eraser Eraser |
Remove pen or highlighter marks. | |
| Undo a previous action. | ||
| Redo a previously undone action. | ||
| Clears all marks on the screen. | ||
| Save the current screen image including any annotation marks. | ||
| Close the drawing tool. | ||
 More More |
Convert the currently displayed screen into a still image into which you can zoom in or out. | |
| Enable a tool to focus on your desired part of the screen. Press the settings icon to adjust the spotlight size and level of transparency around the spotlight. | ||
| Keep track of time duration during activities. Have the option to view the stopwatch in full screen or continue navigating your ViewBoard with a mini stopwatch running at your desired location. | ||
| Run a countdown with an optional alarm setting. Have the option to view the timer in full screen or continue navigating your ViewBoard with a mini timer running at your desired location. | ||
| Hide or unhide the toolbar trigger icons. When hidden, swipe from the edge to the center of the screen to make the icon available. | ||
| Take a screenshot of the current screen. The image will save in Folders > Image. | ||
| Interactive teaching tool for classroom usage. | ||
 Settings Settings |
Access your current input source's settings. (Icon will change depending on current input source.) | |
1Air Class is only supported on IFP52-1C models.
