Download, install, and update myViewBoard
This article outlines key details like system requirements and steps to download myViewBoard.
System requirements
Windows
| Recommended specifications | Minimum requirements | Specifications for devices interacting with myViewBoard1 |
|---|---|---|
|
|
1This applies to participants interacting with the host myViewBoard by watching the Wireless Presentation, or using features from myviewboard.com, such as Throw.
2To ensure the minimum .NET Framework requirement of version 4.8 is met on your device, make sure your Windows 10 64-bit meets the minimum requirement of version 1607.
3For users running 11th Gen Intel, performance issues are expected when using the Embedded Browser or when uploading GIF files. In order to improve performance, please update your Intel Graphics Driver to version 30.0.100.9667 or a newer production version. The latest drivers can be found here. For more information on this issue, please view these resources.
Android
| Recommended specifications | Minimum requirements |
|---|---|
|
|
iOS
| Recommended specifications | Minimum requirements |
|---|---|
|
|
1myViewBoard is currently only available for Mac devices with an ARM-based M1 chip processor.
DeleteDownload and install myViewBoard 2.0
Windows
Download myViewBoard 2.0 for Windows by following these steps:
- Click on one of the links below:
- The file will download to your local drive.
Install by following these steps:
- Open the installation file.
- On the myViewBoard Setup window, press Next.
- Press Install (requires administrative privileges).
- If prompted on a separate window, press Yes to allow the app to make changes to your device.
- When installation is complete, press Finish.
Android
To install myViewBoard for Android from the Google Play store,
- Go to the Google Play store.
- Search myViewBoard.
- Press Install.
Alternatively, you can use the following link to install myViewBoard for Android:
You can also download the APK file from myviewboard.com:
- Go to myviewboard.com.
-
If already signed in,
- Press the Download myViewBoard applications button in the header.
- Press the Android icon
in the popup to download the APK.
-
If not signed in,
- Press Download in the header.
- Press the myViewBoard icon.
- Press the Download Android APK button.
-
If already signed in,
- The file will download to your local drive.
- Open the file to install it.
- You may need to grant permission to installs apps from unknown sources.
iOS
To install myViewBoard for iOS from the Apple App Store,
- On your device, open the App Store.
- Search myViewBoard.
- Press GET.
Alternatively, you can use the following link to install myViewBoard for iOS:
Or you can open the App Store from myviewboard.com:
- Go to myviewboard.com.
-
If already signed in,
- Press the Download myViewBoard applications button in the header.
- Press the App Store icon
in the popup to open the App Store.
-
If not signed in,
- Press Download in the header.
- Press the myViewBoard icon.
- Press the Download from the App Store button.
-
If already signed in,
Enroll instances
For entity users only, enrolling myViewBoard is recommended so IT Admin can configure certain myViewBoard settings more easily. myViewBoard requires a stable internet connection to successfully enroll your instance. Enrollment only needs to be done once on a given instance after installation.
Entity users can complete instance enrollment under their entity by the following methods:
Method 1: Enroll with myViewBoard Enrollment Form (any entity user)
- Install myViewBoard onto the device (visit the download page if the app is not already installed on your device).
- Open the software and sign in with your myViewBoard account.
- Press settings and click
for the software information tab.
- Press Enroll Software Instance under Entity.
- Complete the myViewBoard Enrollment Form by entering a myViewBoard name and a myViewBoard email address.
- After inputting the email address, await detection of the corresponding entity.
- A prompt should appear informing you of successful enrollment.
Method 2: Enroll with myViewBoard Enrollment QR Code (Entity Admin only)
- Install myViewBoard onto the device (visit the download page if the app is not already installed on your device).
- Open the software and sign in with your myViewBoard account.
- Press settings and click
for the software information tab.
- Press Enroll Software Instance under Entity.
- On the myViewBoard Enrollment Form, press Enroll via QR Code.
- Open the Companion app (make sure to be signed in with your Entity Admin account).
- Tap the QR code icon to open the scanner.
- Scan the QR code displayed on myViewBoard with your mobile device.
- On your mobile device, ensure you select your desired entity.
- Tap Submit.
- A prompt should appear on myViewBoard informing you of successful enrollment.
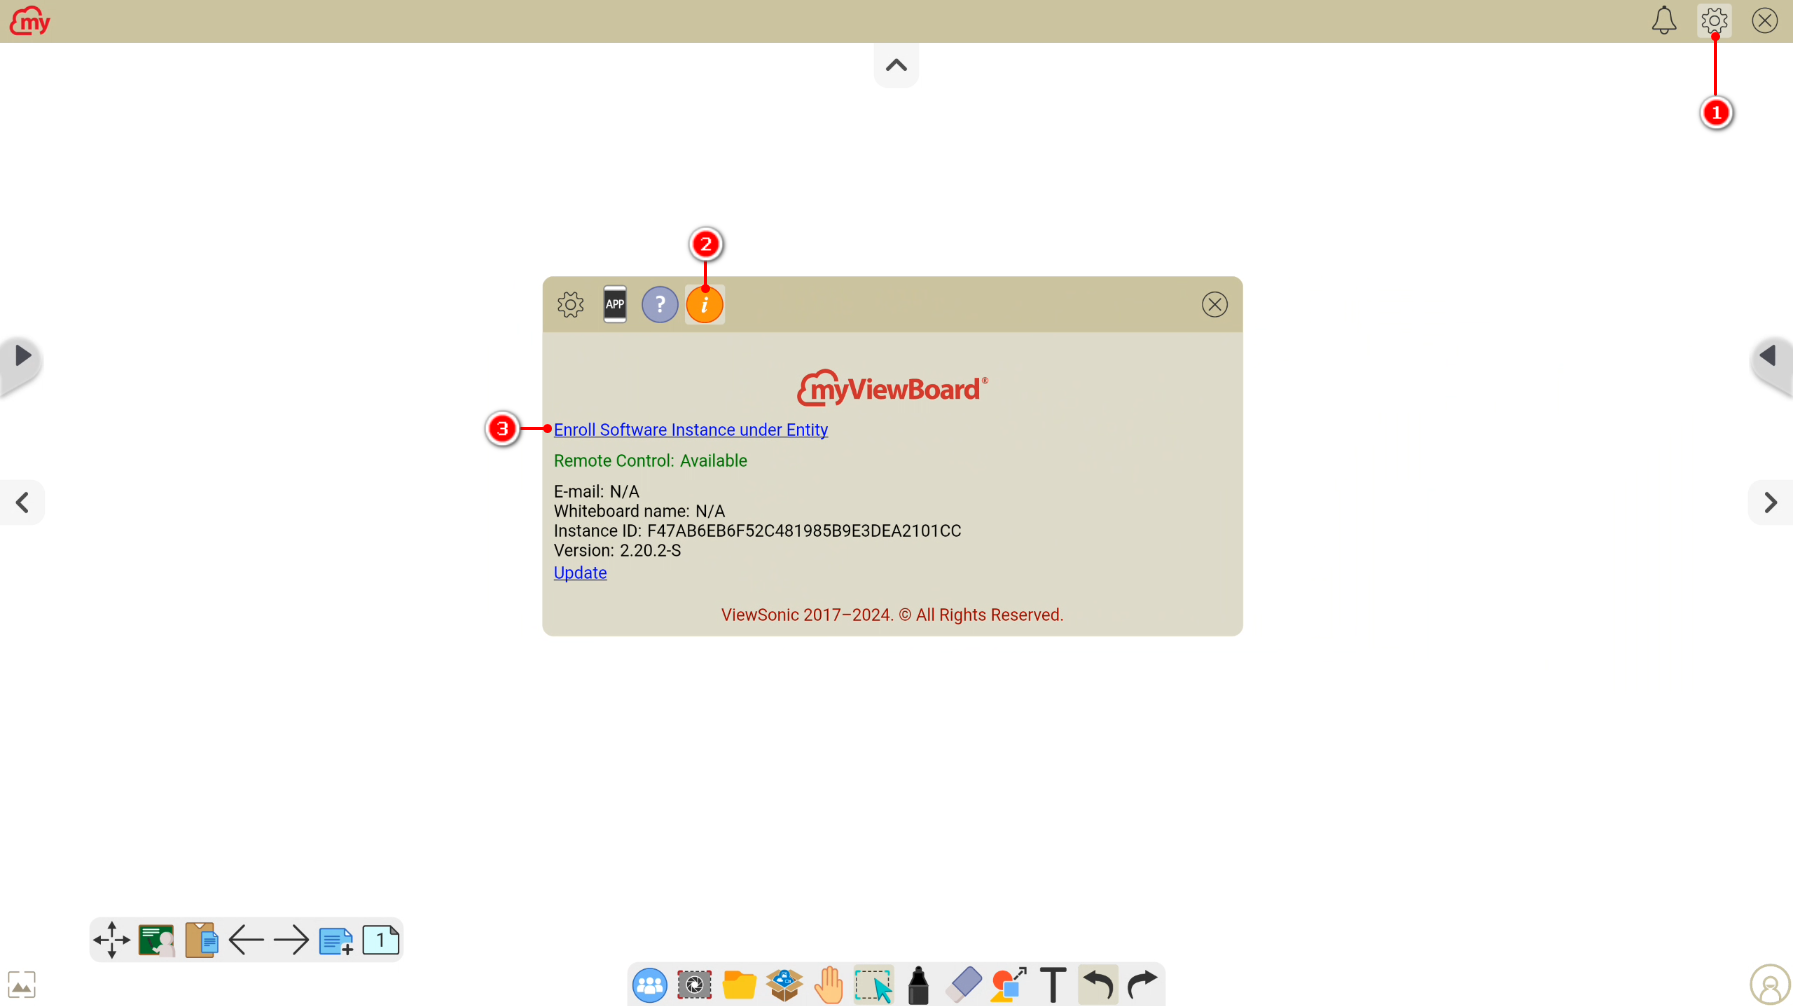
After sign-in, access the enrollment QR code or form in myViewBoard settings.
Update myViewBoard
In general, when a new version of myViewBoard becomes available, you'll receive a notification and a prompt in the app asking if you would like to update to the latest version.
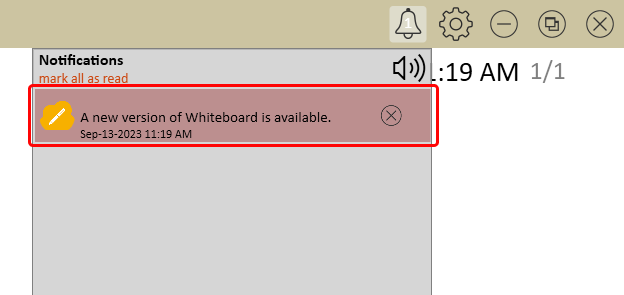 Notification of a new available version of myViewBoard, found at the right of the top toolbar menu. Notification of a new available version of myViewBoard, found at the right of the top toolbar menu. |
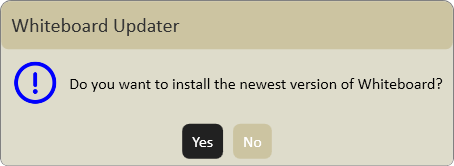 Prompt asking user if they want to update to the latest version of myViewBoard. Prompt asking user if they want to update to the latest version of myViewBoard. |
If you don't see the notification prompt, you can also initiate the myViewBoard Updater through the settings menu. Go to the information tab to find the Update myViewBoard button.
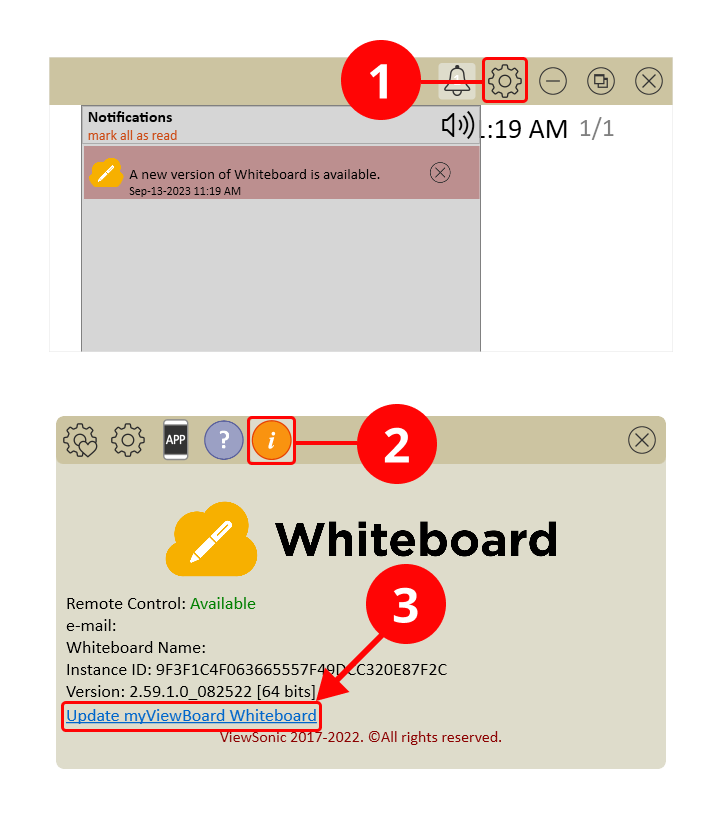
If no update is available, you'll receive a "Version is up to date" dialog. Otherwise, you'll be prompted to update myViewBoard. (See myViewBoard Updater screen above.) Follow the instructions to initiate and complete the update.


 from the app tray.