
Home
-
Getting started with ManagerManaging devicesBroadcastingManager Advanced
- Manager Advanced overview
- How to get Advanced licenses
- Assign licenses
- Manage apps on Advanced devices
- Upload files and transfer to devices
- Create playlists
- Advanced broadcasting
- Schedule startup and shutdown
- Back Up and Restore with Advanced
- Settings Lock
- Create, assign and schedule Jobs
- Create and assign Profiles
- Remote Desktop
- Update firmware from external source
- Install and manage certificates
- Reports
- Action Log
- > More
Other Manager info
Control devices by groups
Organize devices into groups so you can control multiple devices at once. All actions sent to a parent group will also apply to its subgroup. Note that the action will only take effect if the target device supports it.
Create a group
Create a group that will be used to organize your devices. It is highly recommended to create groupings based on a logical feature, like location (office group, balcony group, etc.), department (Accounting, Marketing, etc.), or model (CDE, IFP50, etc.) so it will be easier to identify the devices you want to target later.
- Click the Menu to open the side panel.
- Click the Devices option.
- Click the Groups tab.
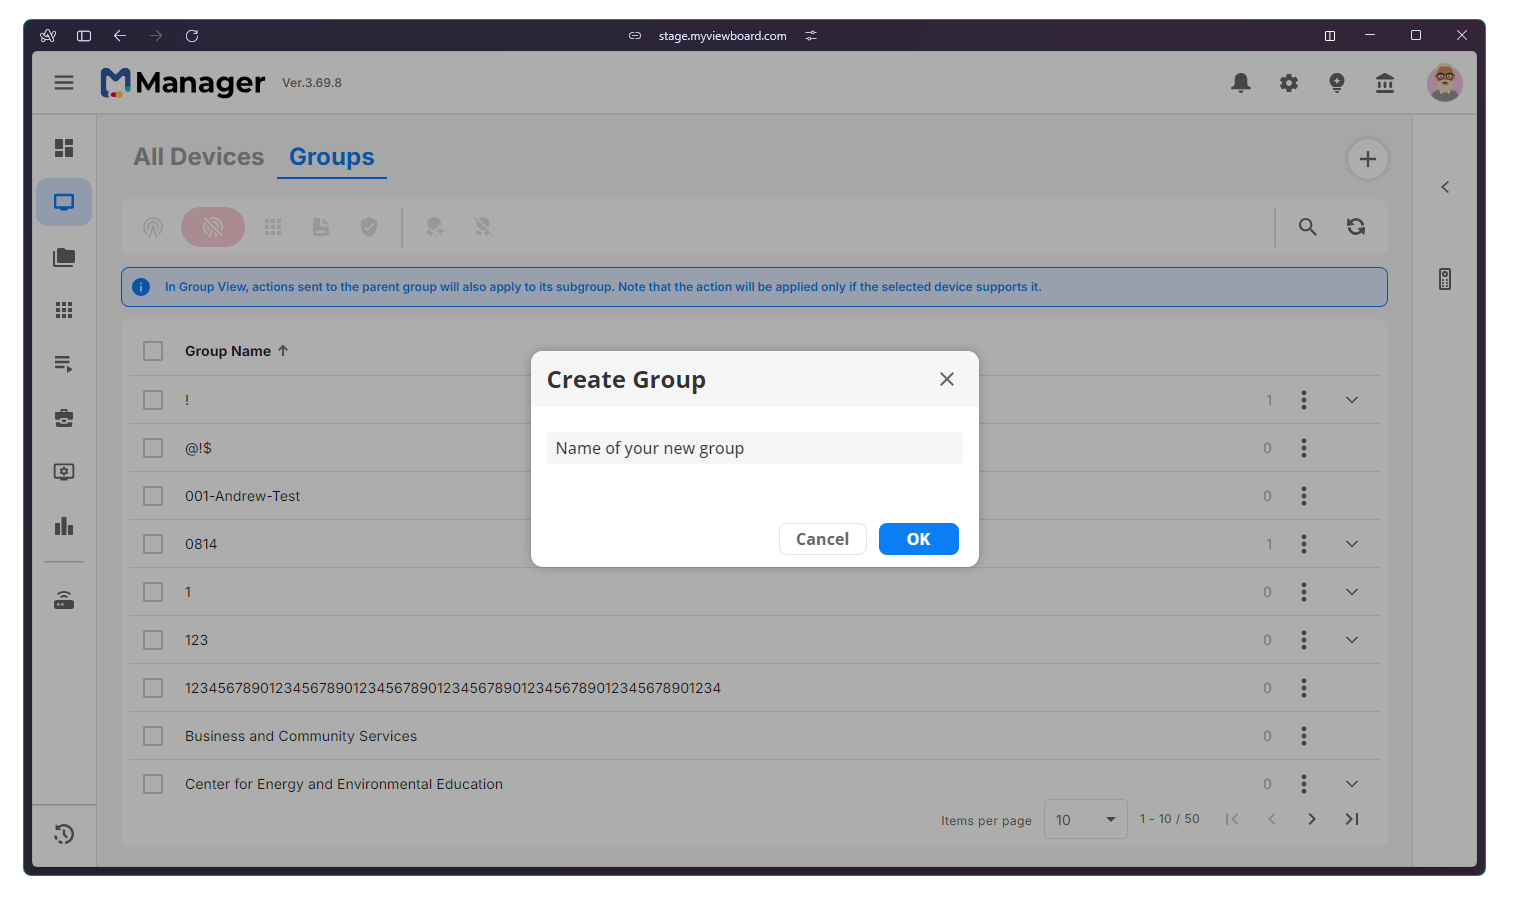
- Click the plus icon to open the Create Group dialog.
- Type a unique name for your group.
- Click OK.
- The new group is added the list. Note that groups with no devices added will show a 0 on the far-right side.
Add devices
You can start adding devices once you have your groups ready. To add devices, perform the following:
- Click the Menu to open the side panel.
- Click the Devices option.
- Click the Groups tab.
- On the list below, click the row of the group you want to populate.
A new side panel appears on the right.
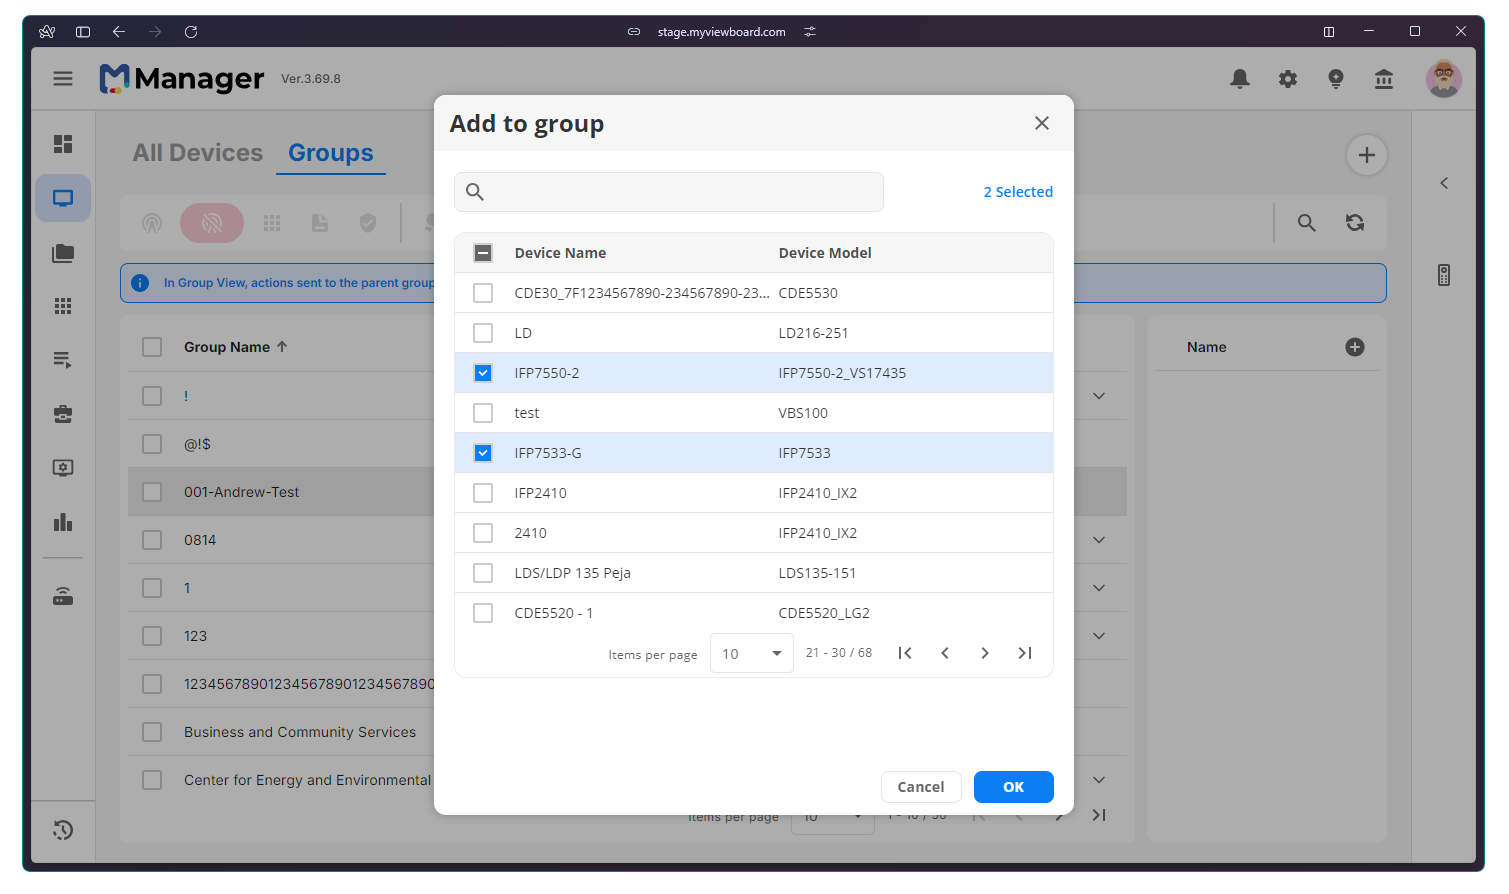
- Click the plus icon to open the Add to Group dialog.
- Select the devices you want to add.
- Use the pagination controls or the search bar to locate devices.
- Click OK once all desired devices have been selected.
- The devices are added to the group. The number on the far-right of the row should update to reflect the total number of devices included in the group.
Managing Groups
Over time, the number of groups in your list may increase. Manager provides the following tools to manage large groups:
|
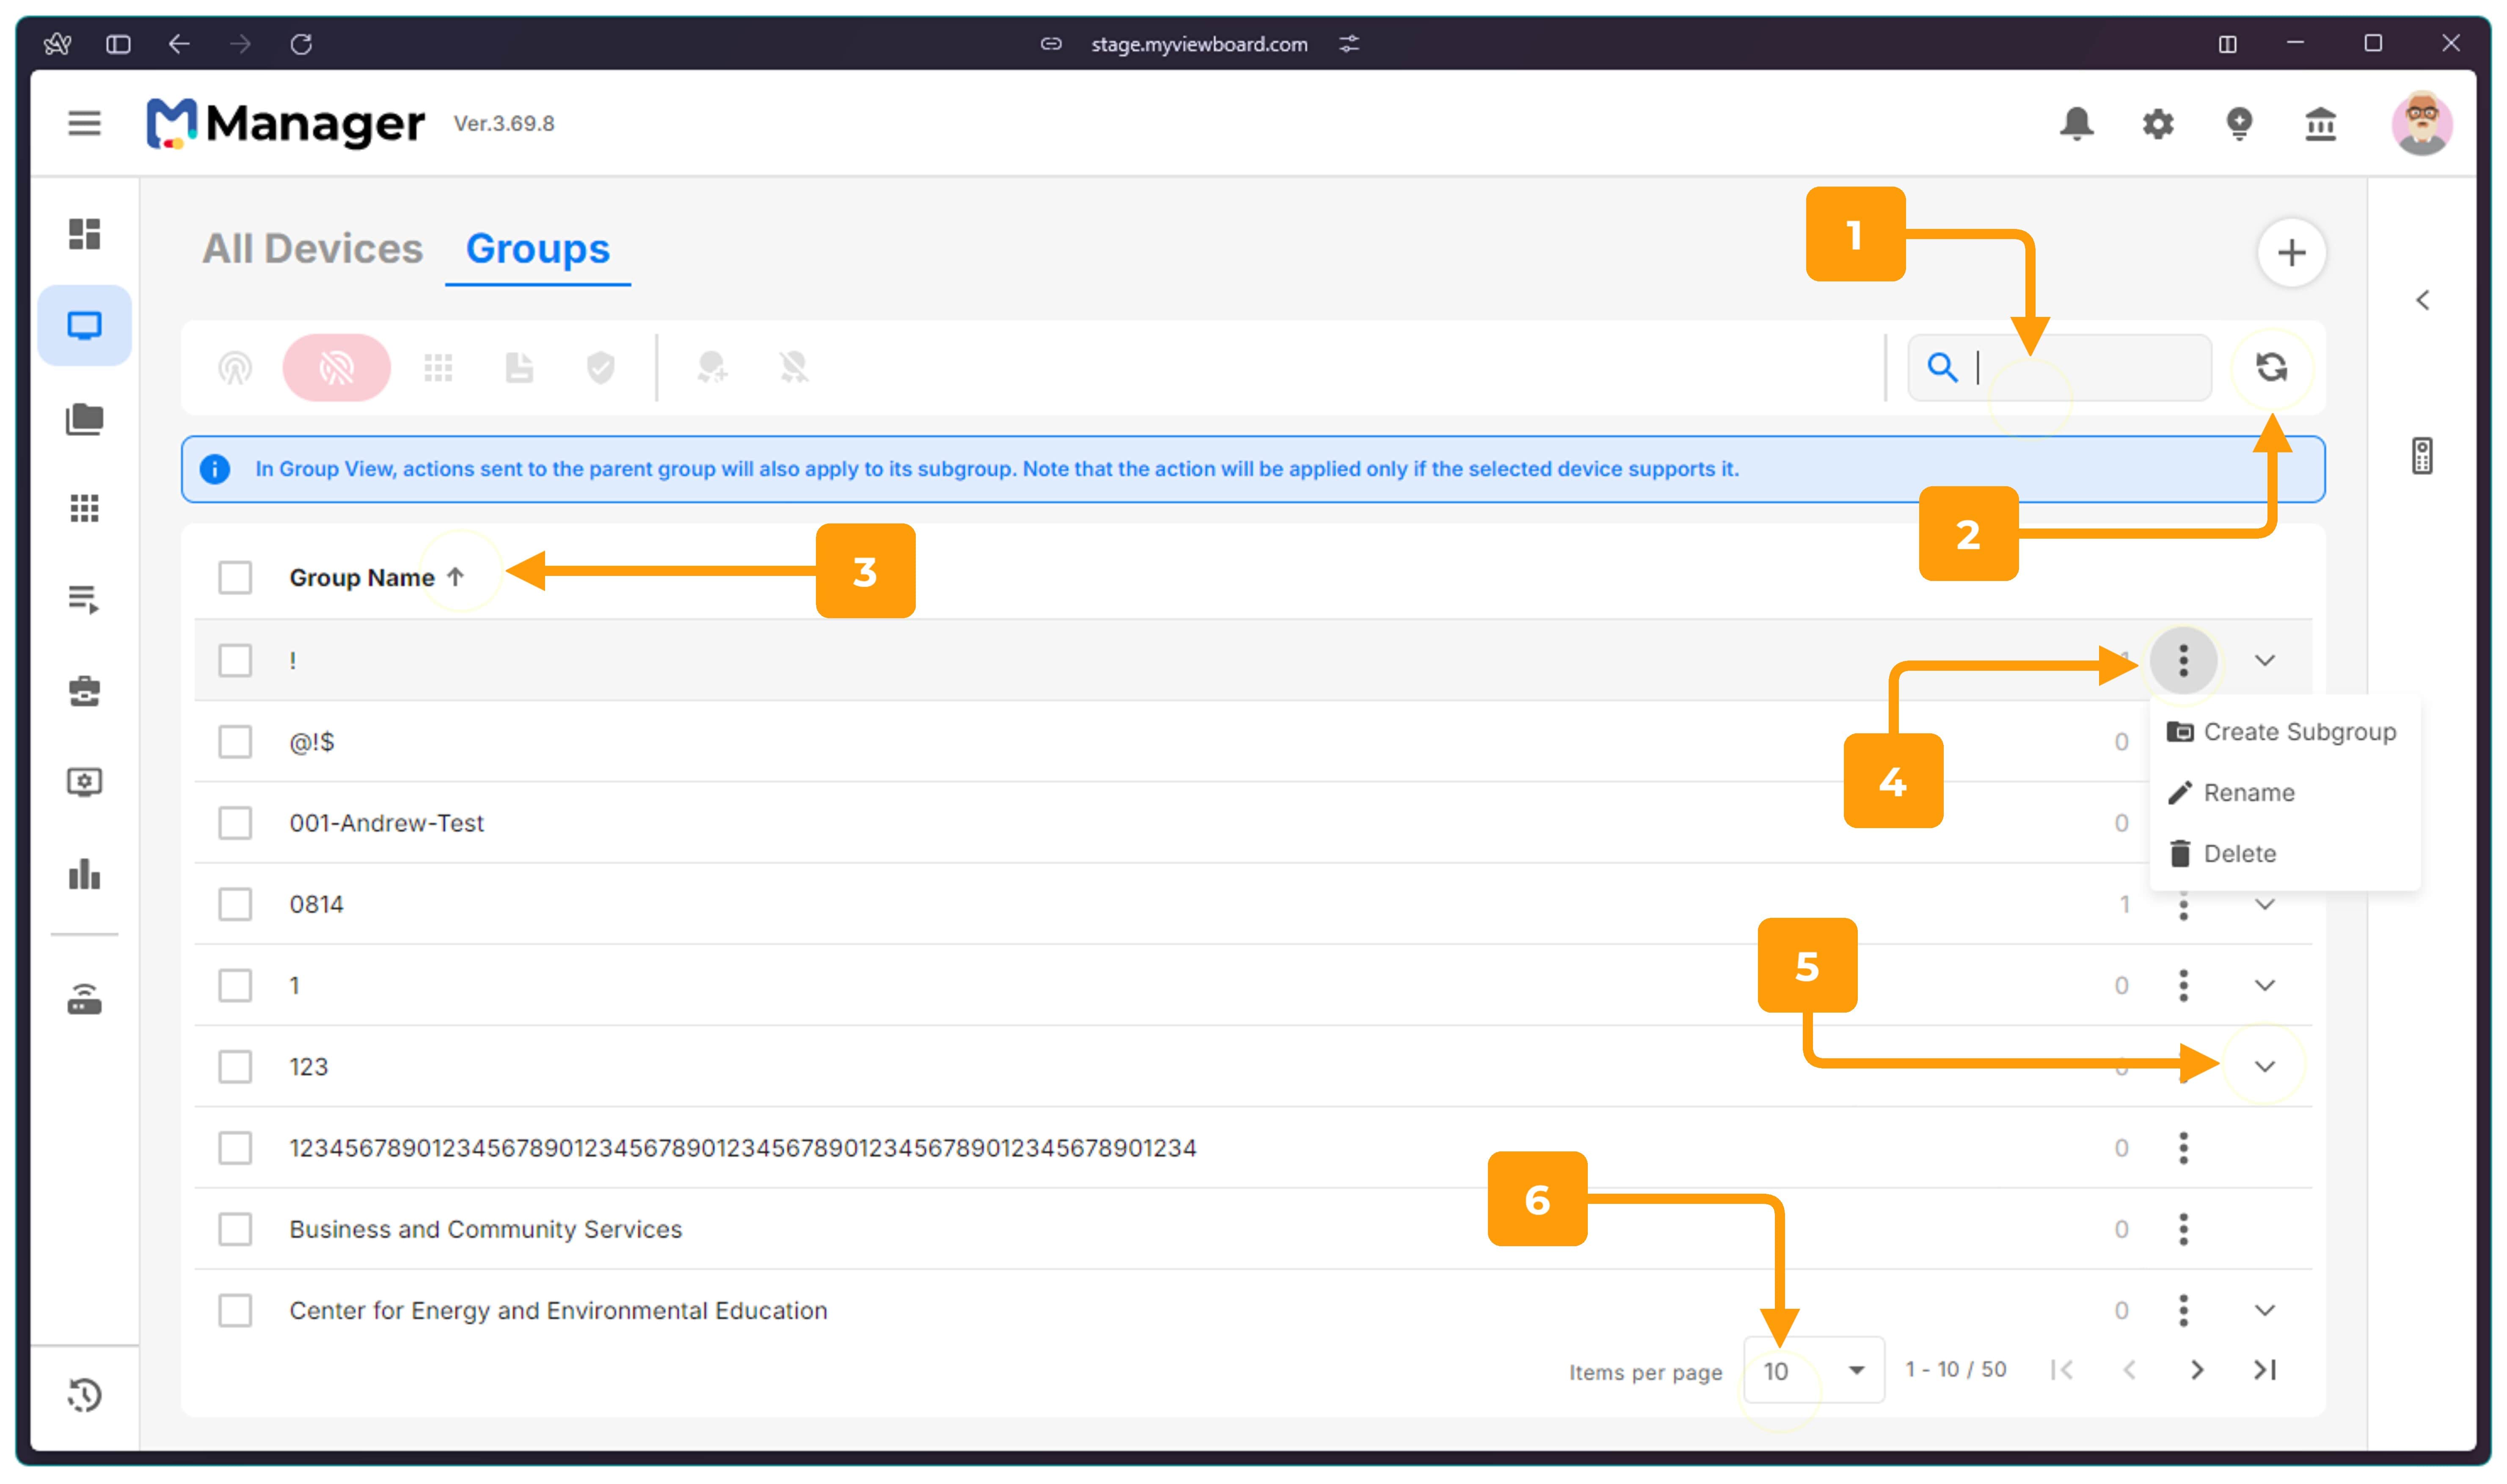
Search Click and type a few characters. Manager will return Group names that contain the characters provided. To reset the search, click . |
|
|
Refresh Click to reload the list again. Use when you've added or removed devices and the list hasn't updated yet. |
|
|
Sort Click the Group name column to sort top-level group names alphabetically. Note that sub-group names are ignored during sorting. |
|
|
Context menu Click to display actions that allow users to update the selected group. |
|
| ┗ |
Create subgroup Create a new group under this group. Note that all actions applied to the parent group will also apply to the subgroups. |
| ┗ |
Rename Change the name of the group. |
| ┗ |
Delete Remove the group. Note that this action does not remove the devices inside the group. |
|
View subgroup Click to show the subgroups nested under the group. By default, groups with subgroups are collapsed. |
|
|
Pagination Use to navigate through the Group list. By default, group names are presented in alphabetical order. |