
Home
-
Main toolbar (2.0)Floating toolbar (2.0)Pen tools (2.0)Shapes and Lines (2.0)Text formatting (2.0)Adorning menu - All objects (2.0)Adorning menu - Special objects (2.0)
Tables
Create tables through the Shapes and Lines menu in all versions of myViewBoard Whiteboard. Create tables with rows and columns, into which users can organize content.
Add a table to the canvas
- Press
 in the main toolbar.
 - The default 2D shape selected is a rectangle
 .
. - Press
 in the main toolbar to display the 2D shapes menu.
 - Press the
 to open the table menu.
 - The Table menu provides options before creating the table:
- Select the number of rows and columns in the table.
- Select the border color of the shape.
- Adjust the border thickness and transparency of the shape.
- Select the number of columns and rows by pressing the corresponding cell.
- The table will be added to the canvas.
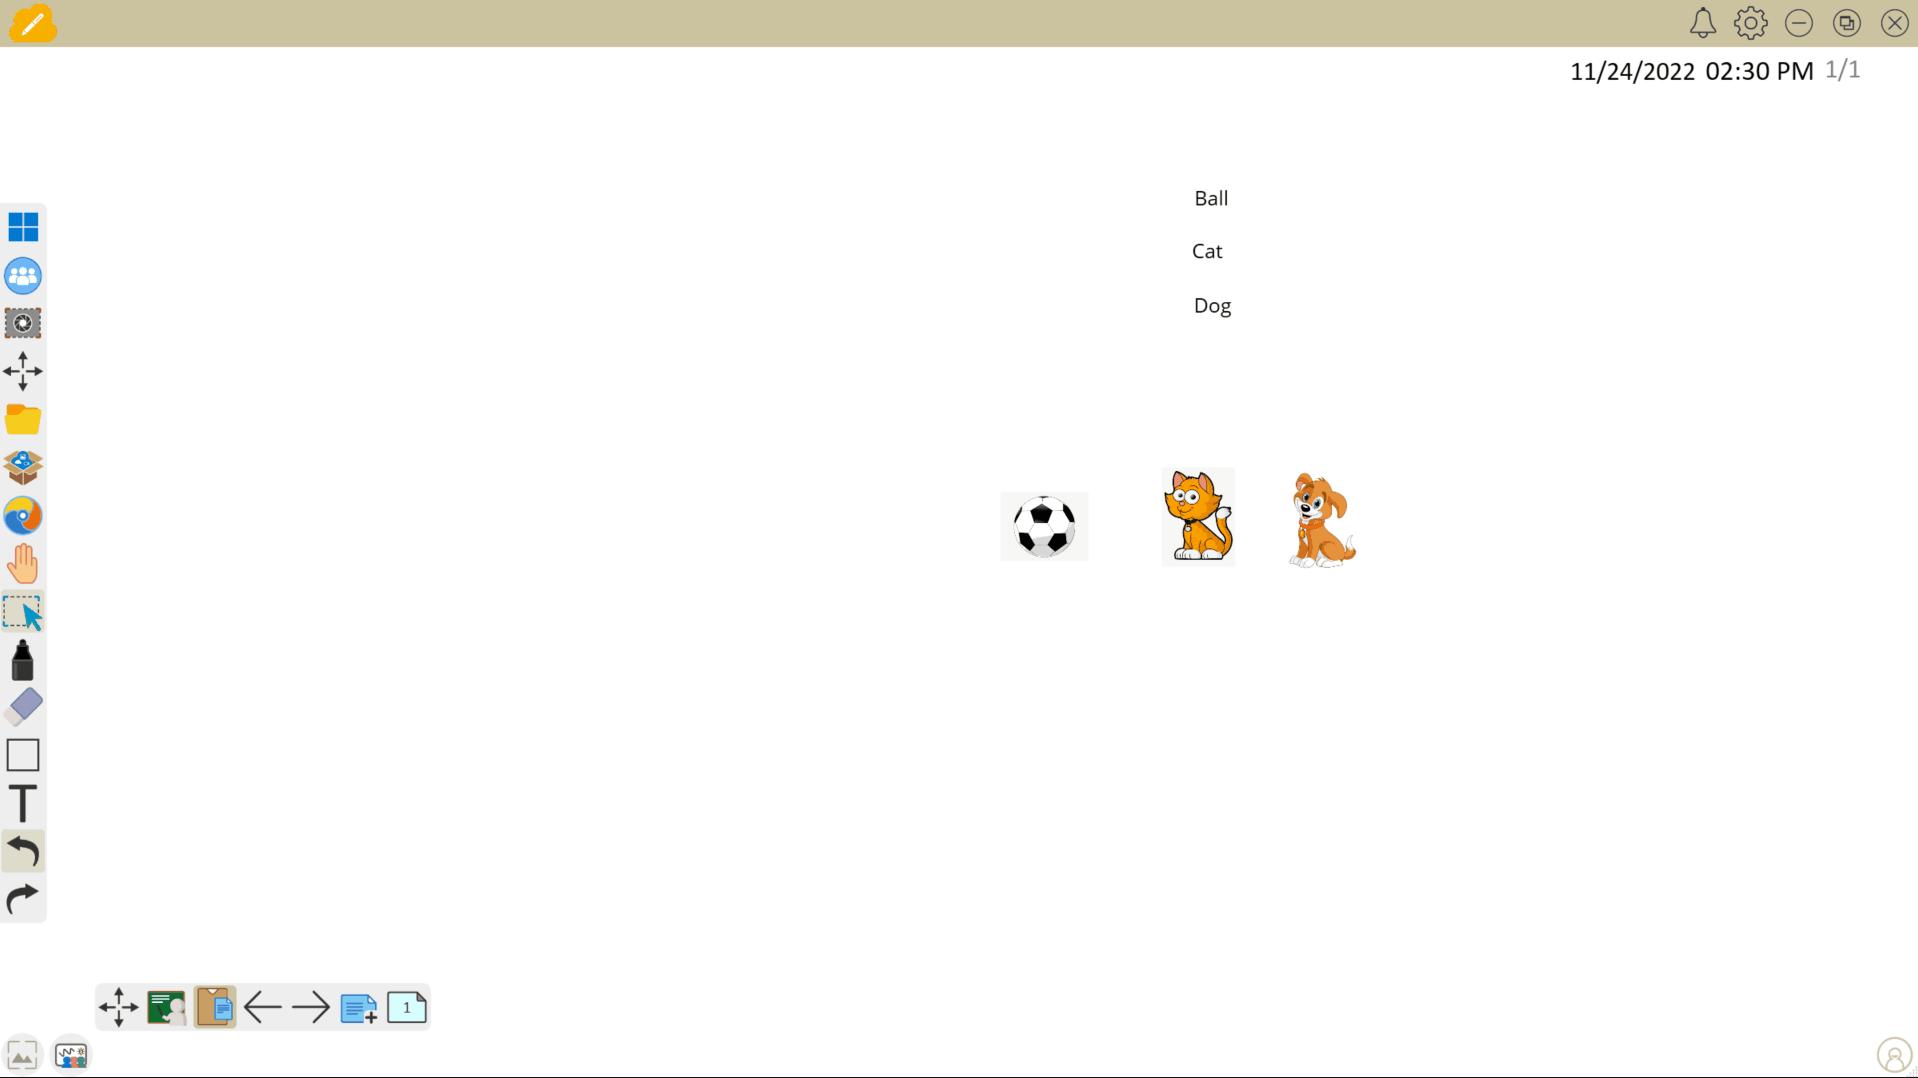 Create a table, and insert content inside the cells. (Windows version depicted: Cell resizing isn't supported in the Android or iOS versions.)
Customize a table
- Resize the table:
- Press
 and select the table.
 - Drag the corners of the table to resize it.
- Press
-
Adjust the height and column width:
- In the Whiteboard for Windows version, hover over the border until the cursor changes to a double-sided arrow, then click and drag to resize.
- In the Whiteboard for Android & iOS versions, press and drag the border to resize.
- Adjust line thickness:
- Press and select the table.
- In the adorning menu,
- Press
 to adjust table line thickness.
 - Press
 to adjust the table line color.
 - Press
 to fill the cells with a color.
- Press
- Press
- Insert objects into cells:
- Press
 and select the desired object.
 - Press and drag the object over a cell.
- The cell will highlight in red to indicate the cell will hold the object.
- If the object is larger than the size of the cell, the row and column size for this cell will expand to fit the cell.
- Release to place the object in the cell.
- Press
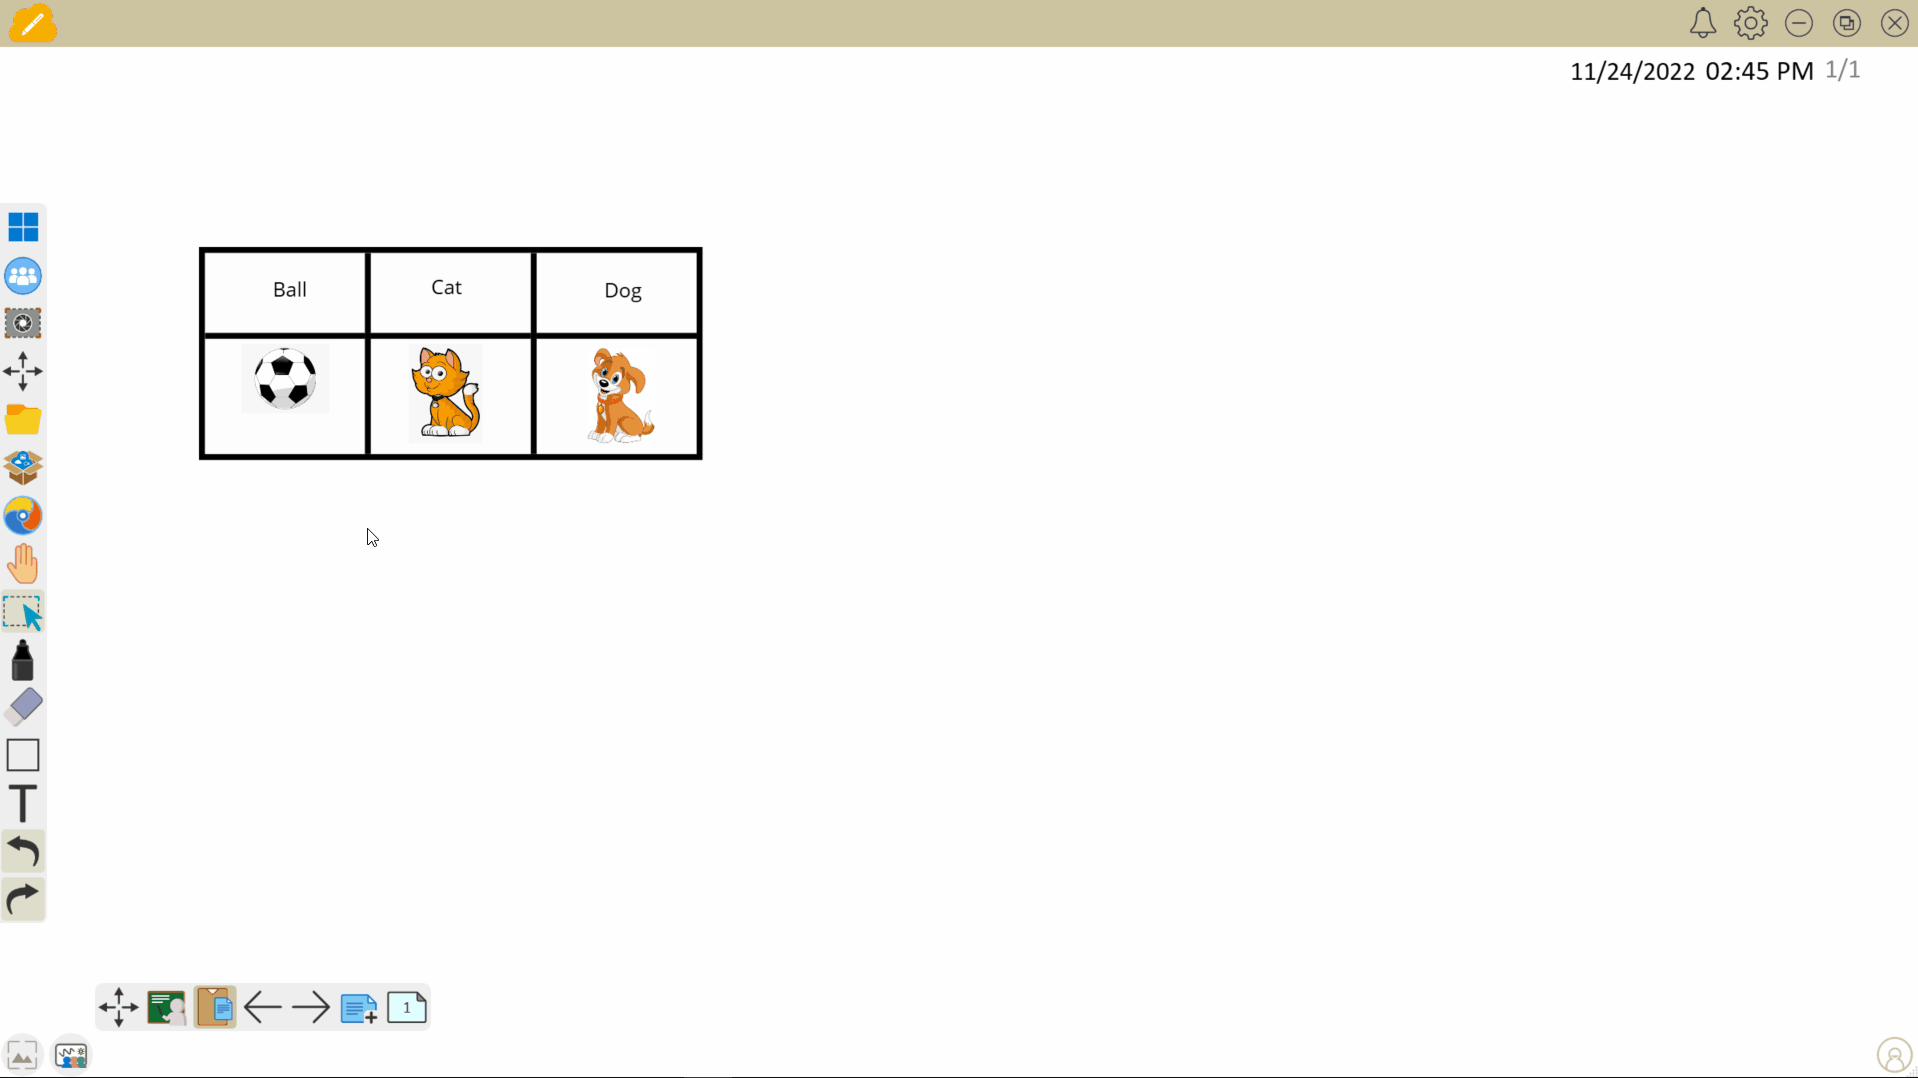 User customizes a table containing objects by draging a columns border to resize, changing the color of table lines and color fill in cells.(Windows version depicted)
Customize table cells
In addition to editing the overall table, individual or groups of cells can also be customized.
Here's how to highlight an individual or multiple cells:
- With mouse and keyboard controls:
- Make sure the table is not selected.
- Enable the selection tool .
- Right-click and hold, and then drag in any direction.
- (Optional) If you wish to highlight more cells, continue dragging into those cells.
- Release the right-click and an options menu should appear.
 User select the cells of a table to display the table options. (Whiteboard for Windows illustrated)
- When using a touch display:
- Make sure the table is not selected.
- Enable the selection tool .
- With either a finger or the thick side of a pen stylus, press-hold a location in a cell.
- Note: When press-holding, be careful not to move the pressed position or you will not reach the desired outcome.
- Whiteboard for Windows on touch display only: Once either a transparent square or full circle appears after holding, drag in any direction.
- (Optional) If you wish to highlight more cells, continue dragging into those cells.
- Release the press and an options menu should appear.
 User select the cells of a table to display the table options. (Whiteboard for Windows illustrated)
Options available
The following options are available when a cell is highlighted:
-
 Fill the cell with a solid color.
 -
 Merge multiple selected cells into one. (Multiple cells must be selected.)
 -
 Add a column of cells to the right of highlighted cell.
 -
 Remove currently highlighted column.
 -
 Add a row of cells below the highlighted cell.
 -
 Remove currently highlighted row.
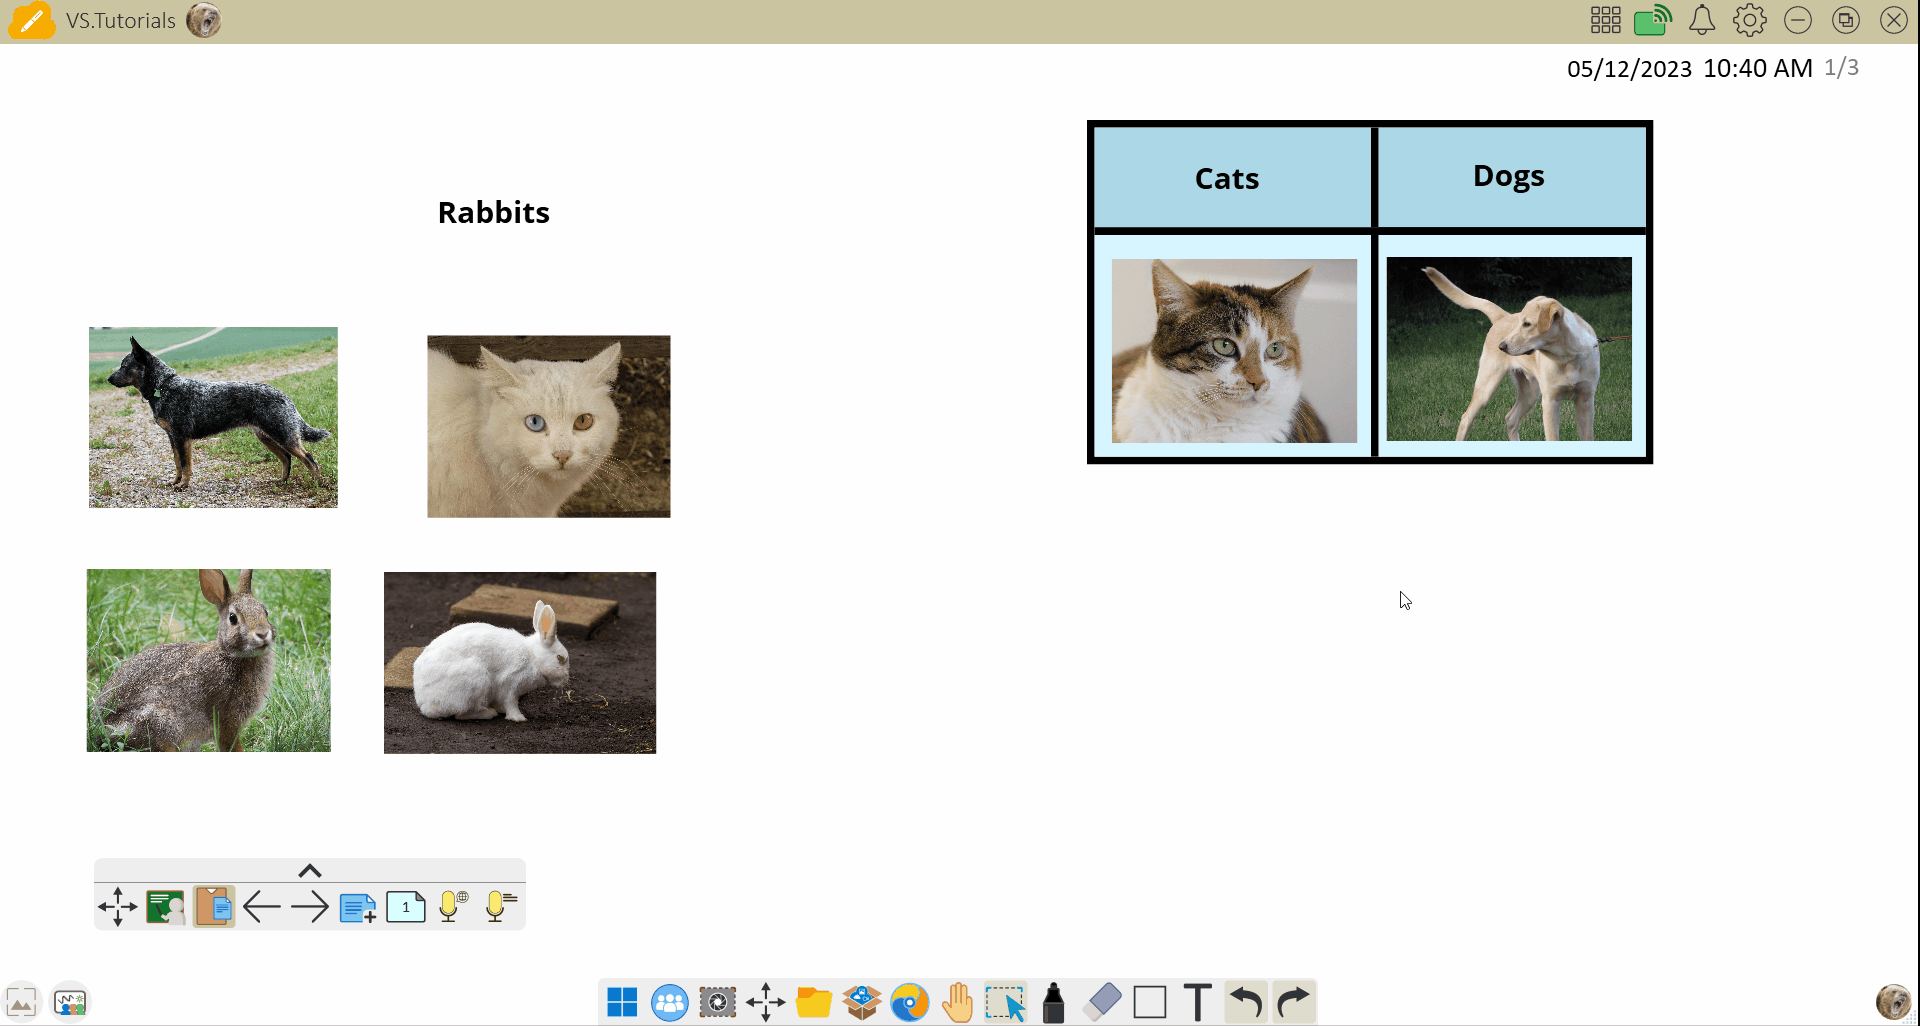 Desktop version depicted: User inserts a column into a table, fills cells with color, and merges cells for a categorization activity. (Whiteboard for Windows illustrated)
IFP version depicted: User merges cells and removes a column for a categorization activity.