Home
-
Getting started with ManagerManaging devicesBroadcastingManager Advanced
- Manager Advanced overview
- How to get Advanced licenses
- Assign licenses
- Manage apps on Advanced devices
- Upload files and transfer to devices
- Create playlists
- Advanced broadcasting
- Startup and shutdown scheduling
- Back Up and Restore with Advanced
- Settings Lock
- Create, assign and schedule Jobs
- Create and assign Profiles
- Remote Desktop
- Update firmware from external source
- Install and manage certificates
- Reports
- Action Log
- > More
Other Manager info
Remote Desktop
Remote Desktop is a feature that allows admin to remotely control a Manager Advanced licensed device. This saves IT admin unnecessary trips to a physical device by troubleshooting devices from the Manager console in a new tab.
Remote Desktop whitelisting requirements
The following services must be whitelisted in order to enable use of the remote desktop feature (Manager Advanced users only):
- TCP 443 for mrtc.myviewboard.cloud
- TCP 443 for getice.myviewboard.cloud
Allow access to the following from the internet (WAN):
- TCP 443 for ice.myviewboard.cloud
- TCP 3478 for ice.myviewboard.cloud
- UDP 3478 for ice.myviewboard.cloud
Peer-to-peer connection should be allowed (optional, but enables better performance):
- 1024-65535 UDP
Enabling Remote Desktop
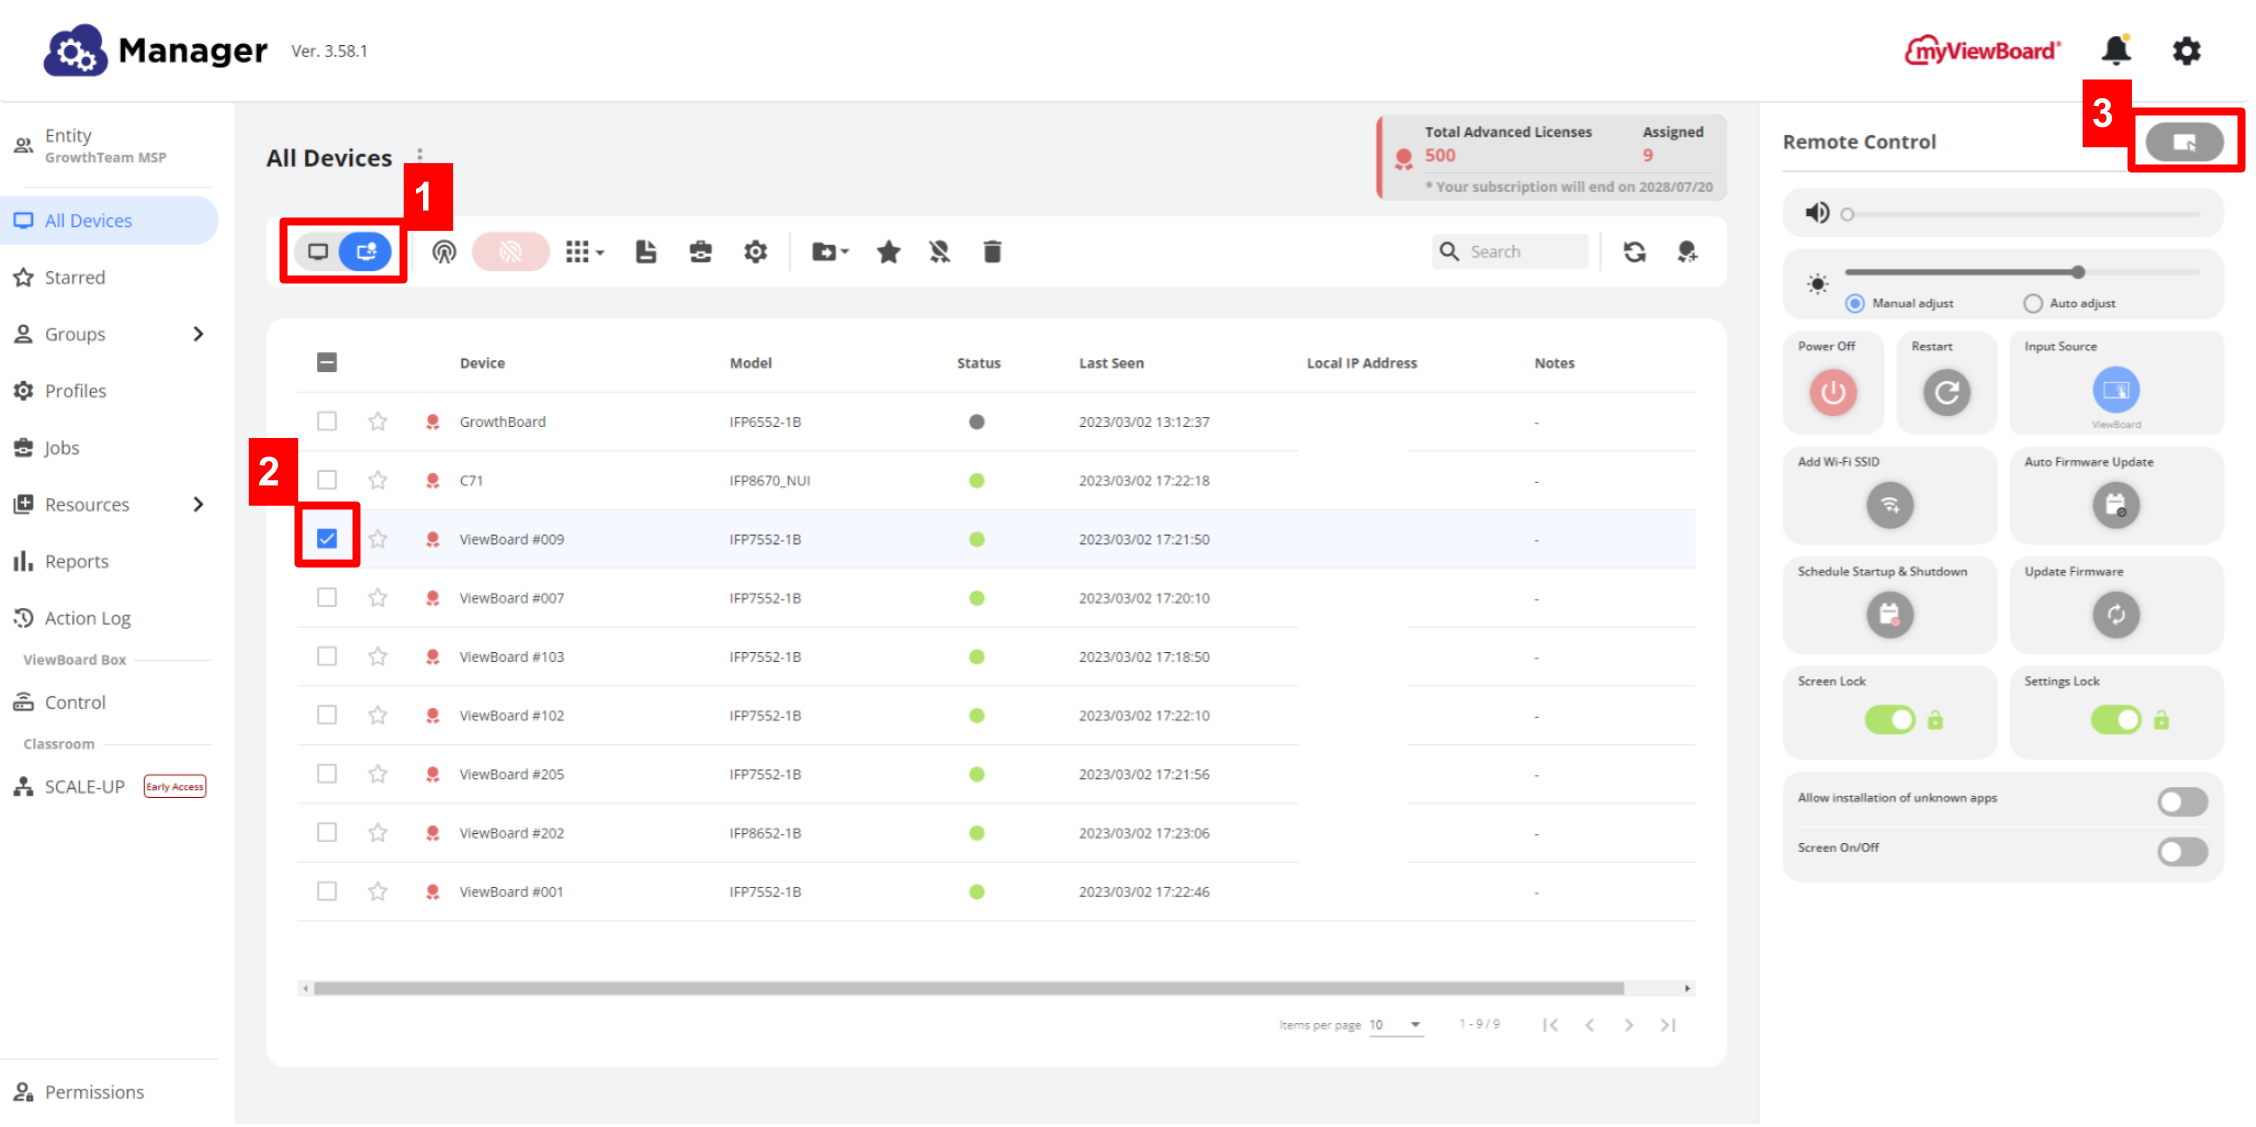
- Go to the
All Devices page.
- Locate your desired Advanced device.
Option: Filter to an Advanced device-only view by pressing.
- On the Remote Control on the right, press the Remote Desktop button
.
- A new tab will open where you can navigate your ViewBoard from your desktop with your mouse cursor.
 Remote Desktop is enabled through the remote control of a Manager Advanced device.
REMOTE DESKTOP DEVICE SUPPORT
This feature is only available for select devices. Check device support information in our device capability chart.
TIME OUT NOTICE
Please note, Remote Desktop will time out after 30 minutes of inactivity. To continue using Remote Desktop, simply initiate it following the instructions above.
Learn more

